With work at a seasonal low, I've had some time to putter in the garage.... I have two projects in the works, and here is the first: a magnetically-stirred kalk reactor.
I have no dry space available inside my stand, so the reactor has to fit in or above the sumps. I have 3 interconnected sumps. Since the reactor may sit in water, the mag-drive prime mover has to be on top of the reactor, unlike the traditional mag stir reactors where the motor is beneath the unit.
The reactor chamber is 6"x11.5". RO/DI water is pushed into the reactor by an Aqualifter, drawn from my ATO reservoir. Supersaturated kalkwasser is displaced by the pure water feed and will flow into the opposite end of the sump from where the AquaController probes are. Dosing will be controller by the AC3 with time of day, dosing amount/time, and pH factored into the AC3 programming. Periodic stirring will be controlled by a standard lamp timer, perhaps 5 minutes 2x daily.
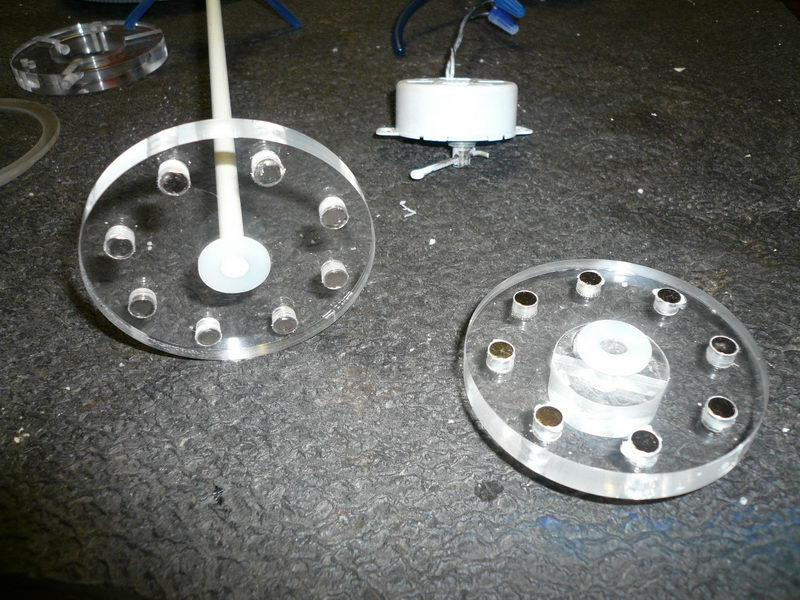
The stirring action is provided by a 5-RPM motor magnetically coupled to the stirrer shaft & impeller; a total of (16) N43 neodymium magnets were used (8 each for the driver and driven parts.)
With the exception of a few stainless steel screws and the John Guest fittings, all components were obtained from Murphy's Surplus, Industrial Liquidators, California Electronics, the scrap bins at Ridout, or parts I already had on hand. Total $$$ investment was quite low! The acrylic cylinder was only $5. Time investment, on the other hand, was significant... I really took my time. I mainly have woodworking tools... table saw, compound miter saw, band saw, drill press, router, etc, all of which were used. I used the drill press on its highest speed as a light-duty vertical mill to make things like the o-ring groove in the bottom flange, cutting smaller circles, etc. (professional machinists, try not to cringe too much!)
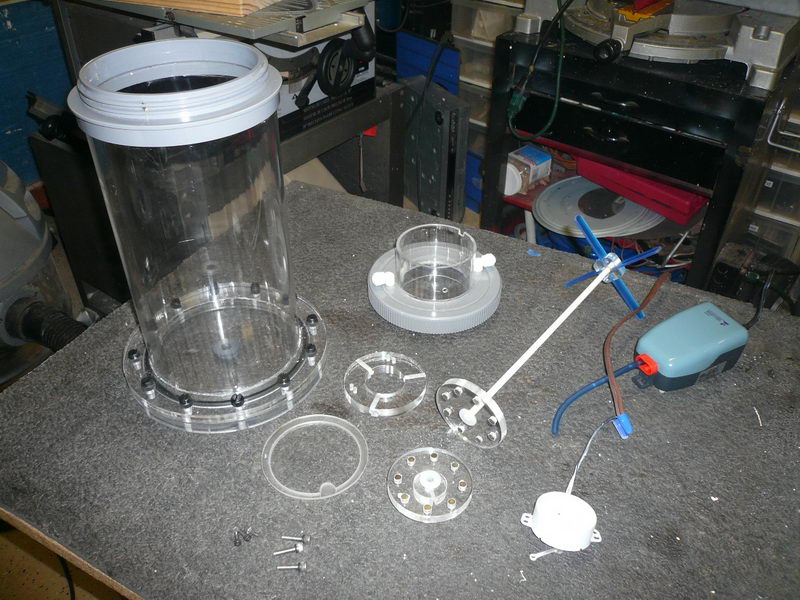
The parts ready for assembly after cleaning and final polishing...
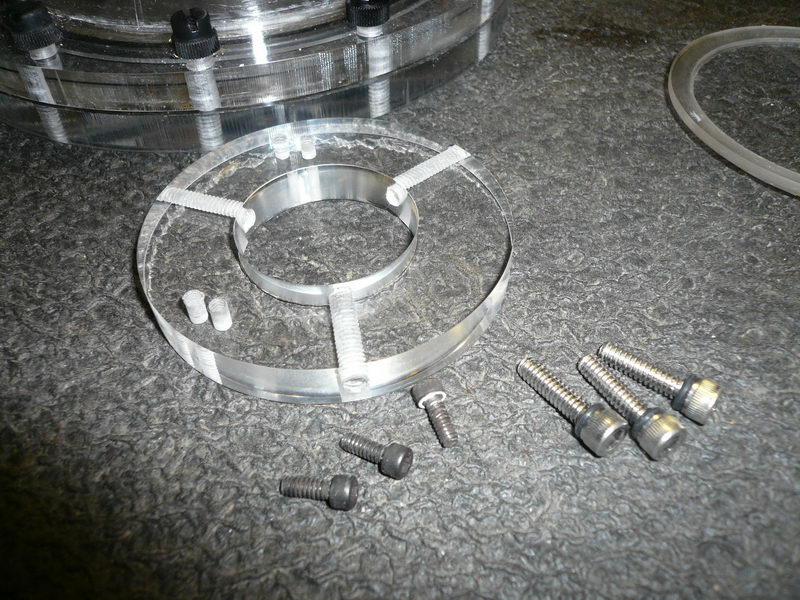
The bottom really didn't need to be removable, but I wanted to make the flanges just for the experience.
The mag-drive...
The motor mount...
The assembled mag-drive unit...
After thorough leak and functional testing, final assembly, a vinegar bath, and initial loading with Mrs. Wages & RO/DI...
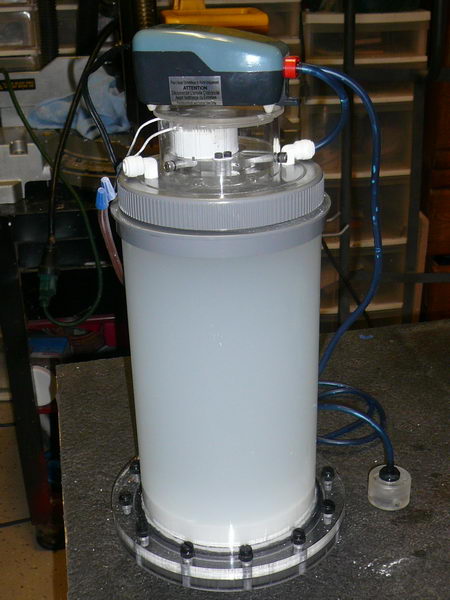
The gizmo in the lower right of the pic above is a weighted intake; it's weighted to ensure that the RO/DI water intake line stays at the bottom of the ATO reservoir.
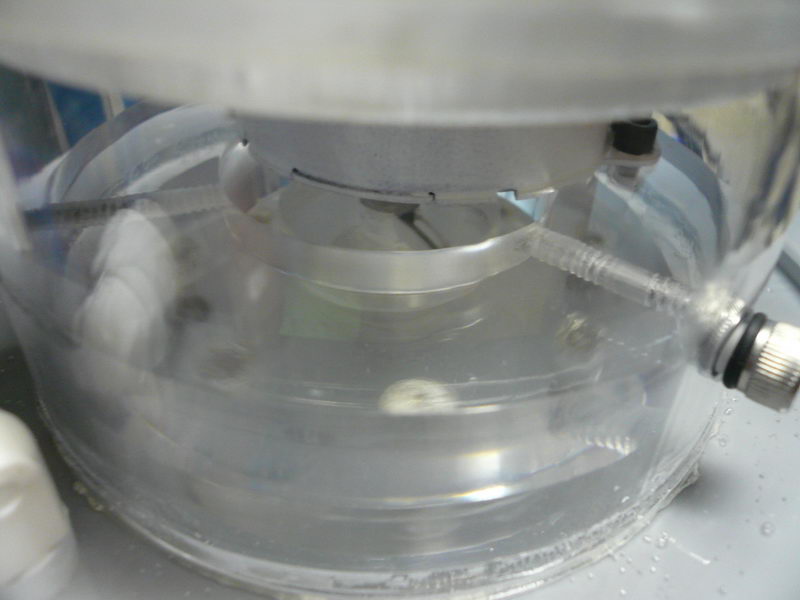
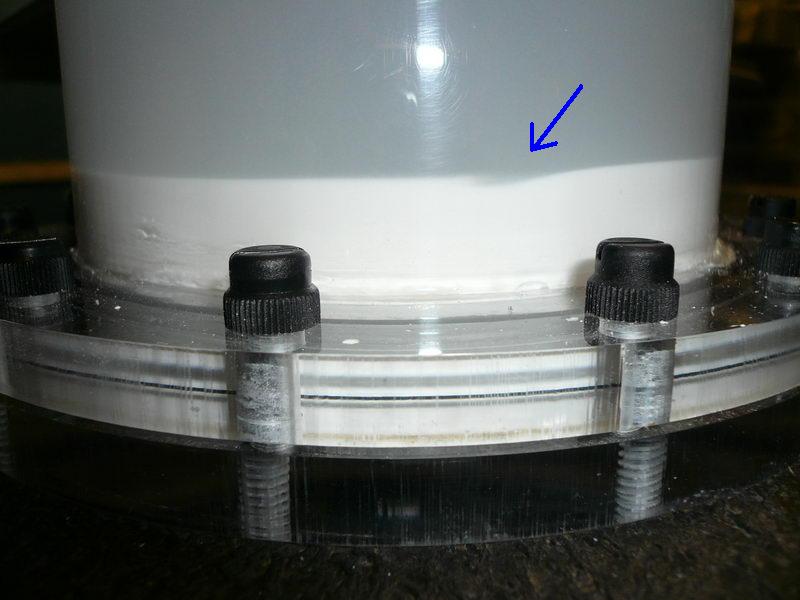
The reactor in operation... you can see the little hump of kalk being pushed by the stirring impeller.
I plan to re-do to power cord for the motor before I put the unit into service.
I have no dry space available inside my stand, so the reactor has to fit in or above the sumps. I have 3 interconnected sumps. Since the reactor may sit in water, the mag-drive prime mover has to be on top of the reactor, unlike the traditional mag stir reactors where the motor is beneath the unit.
The reactor chamber is 6"x11.5". RO/DI water is pushed into the reactor by an Aqualifter, drawn from my ATO reservoir. Supersaturated kalkwasser is displaced by the pure water feed and will flow into the opposite end of the sump from where the AquaController probes are. Dosing will be controller by the AC3 with time of day, dosing amount/time, and pH factored into the AC3 programming. Periodic stirring will be controlled by a standard lamp timer, perhaps 5 minutes 2x daily.
The stirring action is provided by a 5-RPM motor magnetically coupled to the stirrer shaft & impeller; a total of (16) N43 neodymium magnets were used (8 each for the driver and driven parts.)
With the exception of a few stainless steel screws and the John Guest fittings, all components were obtained from Murphy's Surplus, Industrial Liquidators, California Electronics, the scrap bins at Ridout, or parts I already had on hand. Total $$$ investment was quite low! The acrylic cylinder was only $5. Time investment, on the other hand, was significant... I really took my time. I mainly have woodworking tools... table saw, compound miter saw, band saw, drill press, router, etc, all of which were used. I used the drill press on its highest speed as a light-duty vertical mill to make things like the o-ring groove in the bottom flange, cutting smaller circles, etc. (professional machinists, try not to cringe too much!)
The parts ready for assembly after cleaning and final polishing...
The bottom really didn't need to be removable, but I wanted to make the flanges just for the experience.
The mag-drive...
The motor mount...
The assembled mag-drive unit...
After thorough leak and functional testing, final assembly, a vinegar bath, and initial loading with Mrs. Wages & RO/DI...
The gizmo in the lower right of the pic above is a weighted intake; it's weighted to ensure that the RO/DI water intake line stays at the bottom of the ATO reservoir.
The reactor in operation... you can see the little hump of kalk being pushed by the stirring impeller.
I plan to re-do to power cord for the motor before I put the unit into service.
Last edited:
")