Just a little grow out system build.. open to advice and suggestions
- Thread starter bvysochin
- Start date
- Joined
- Nov 2, 2009
- Messages
- 1,210
- Likes
- 81
- Points
- 48
Been a while since we updated.. lots of new adventures since then... including, a baby!
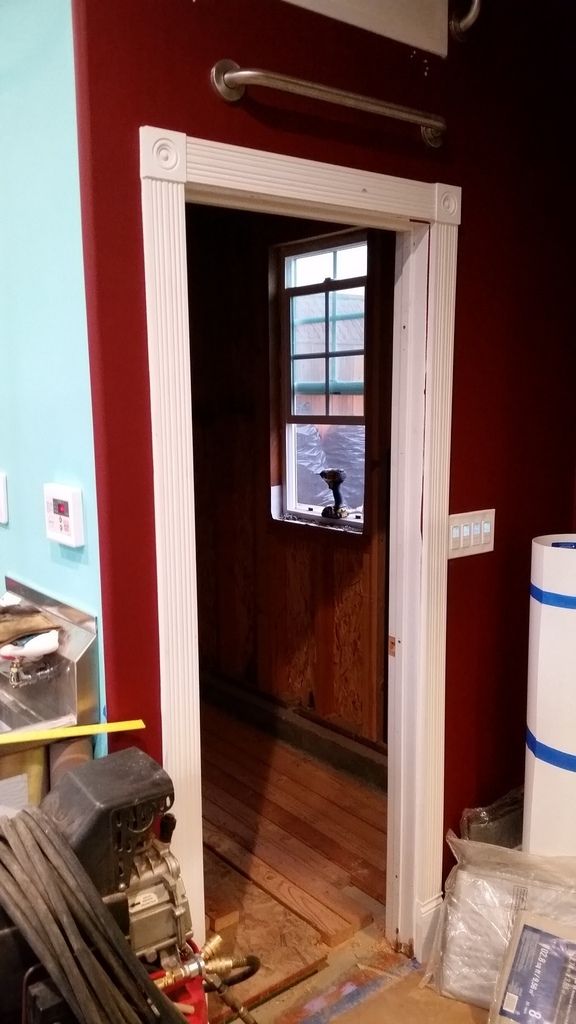
Future bathroom. You can see the digital timers for the individual fans on the right. Still need to paint/install doors and do a bunch of trim / touch up everywhere.
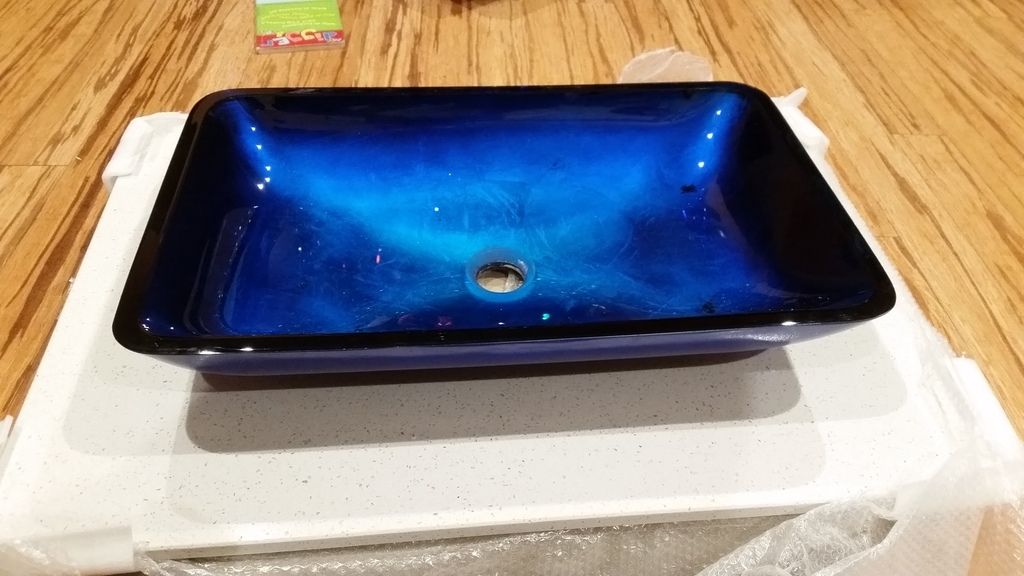
Started acquiring bathroom supplies.. Future sink. Has a really cool glass waterfall faucet to go with it.
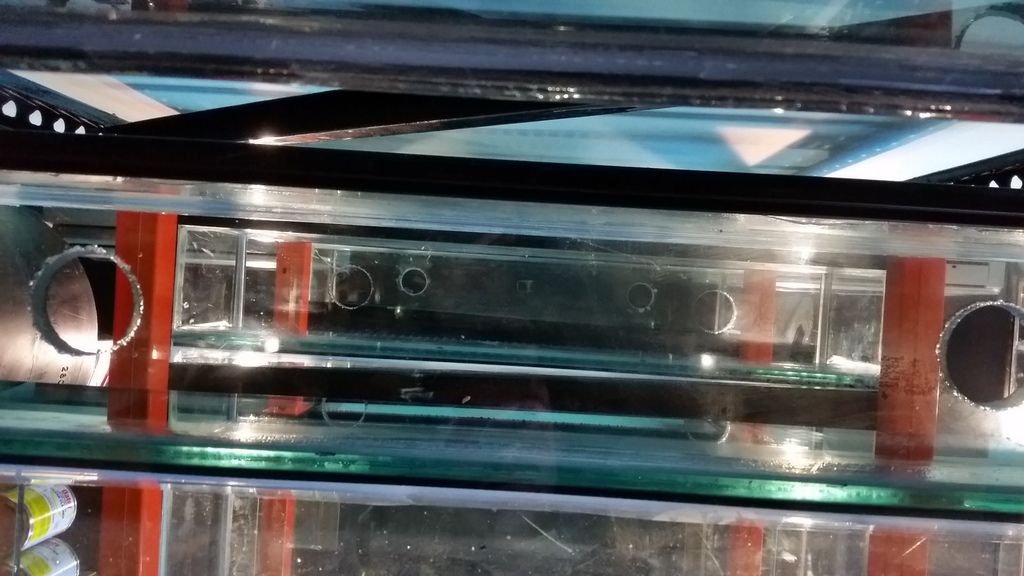
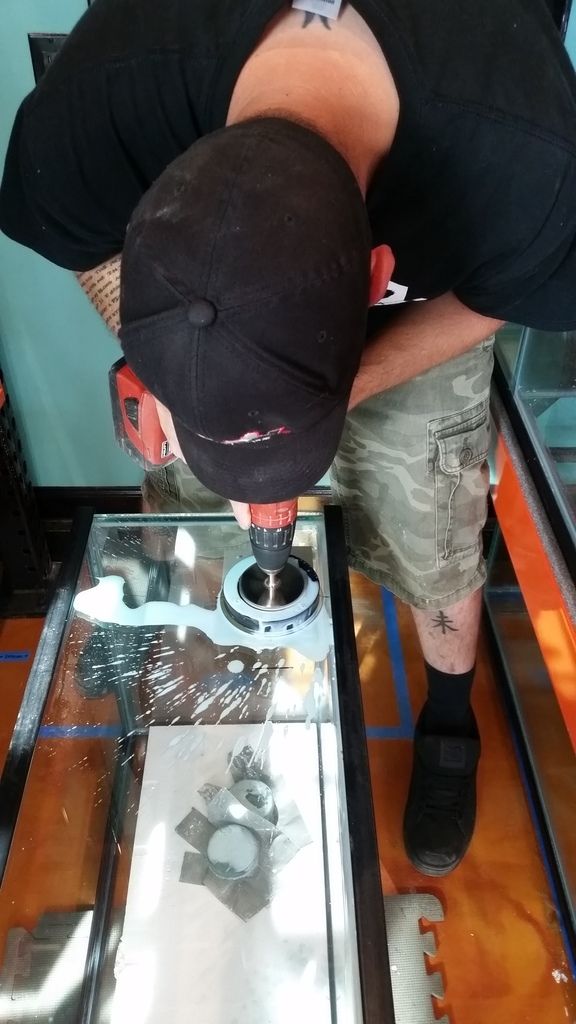
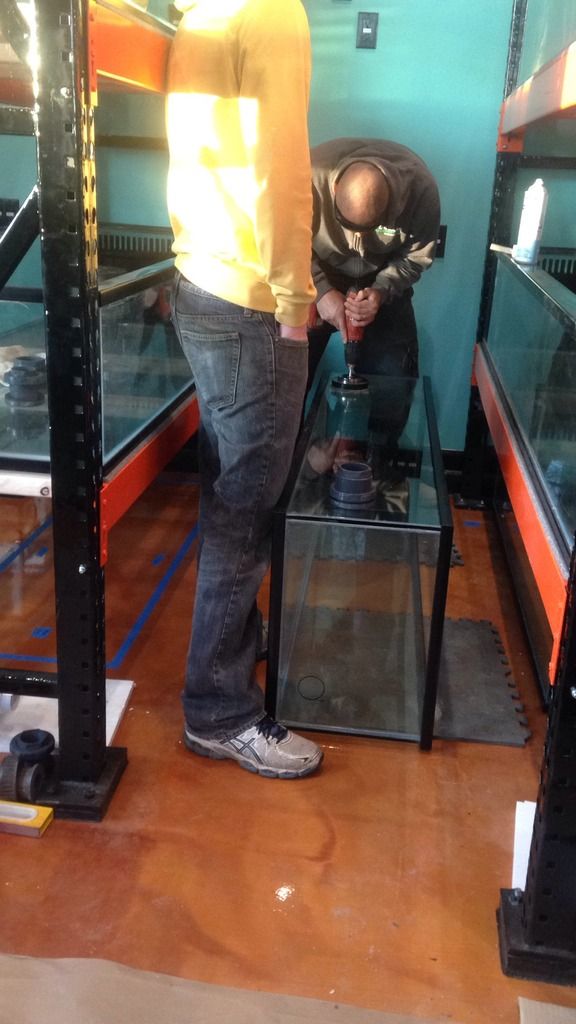
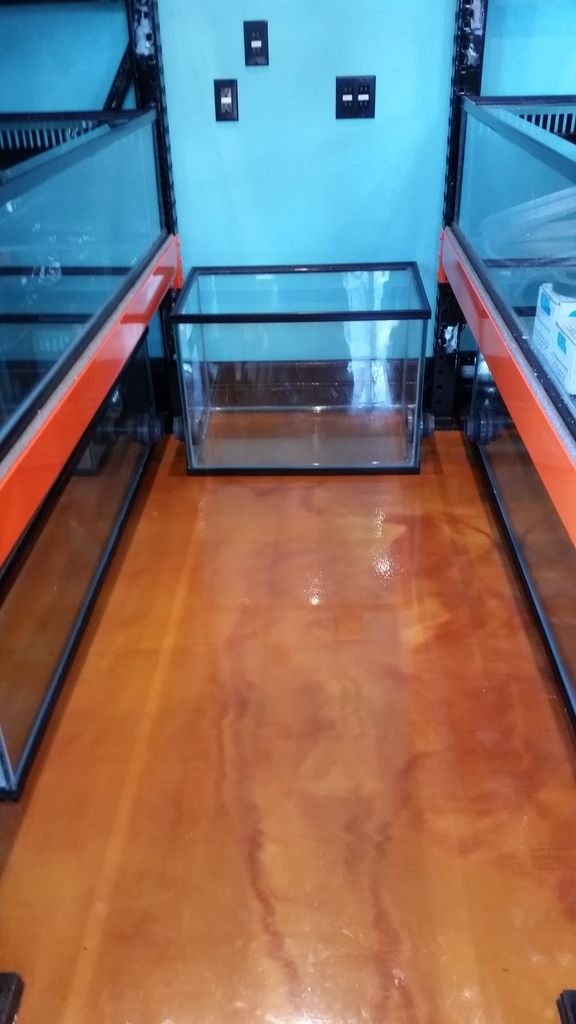
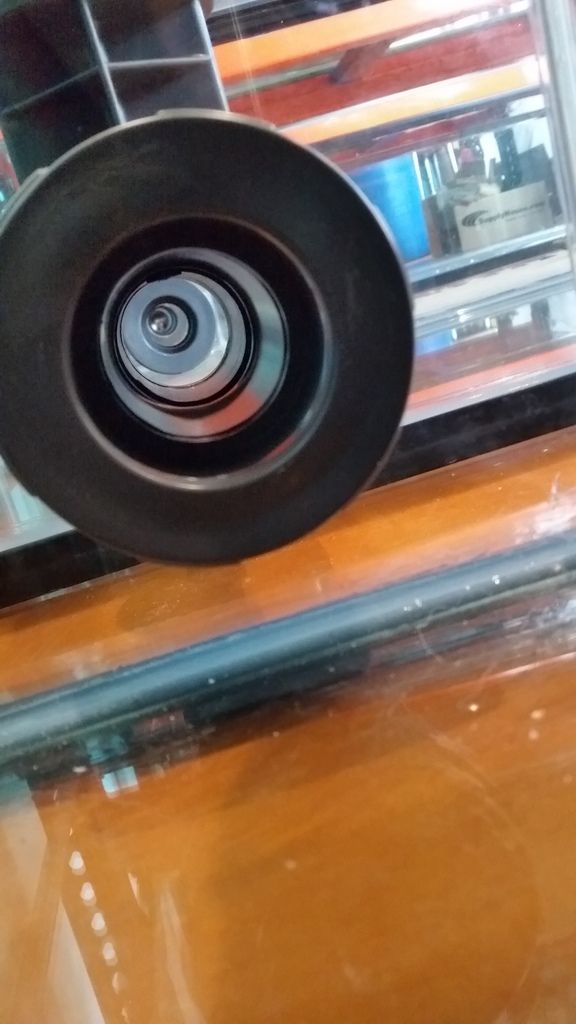
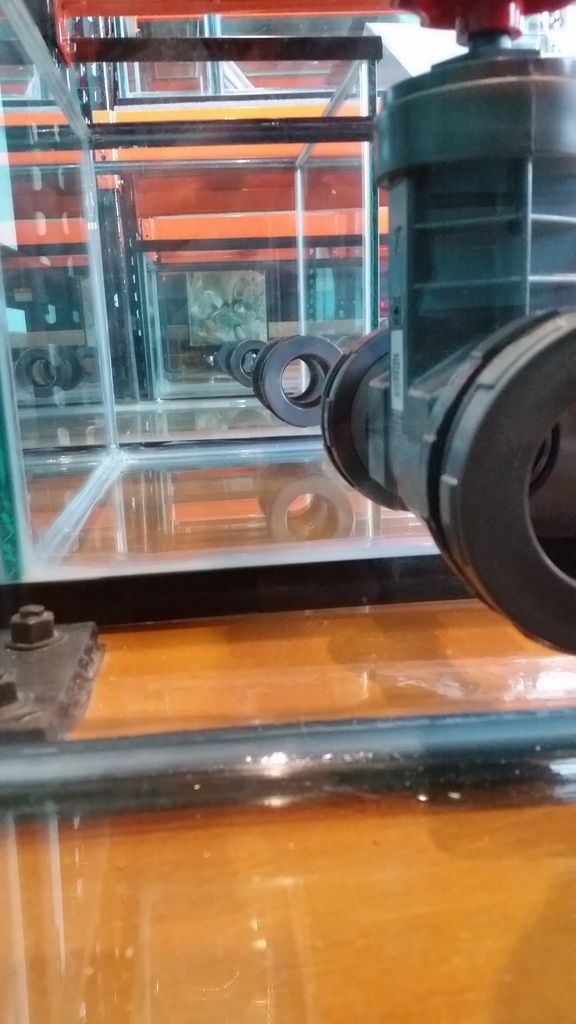
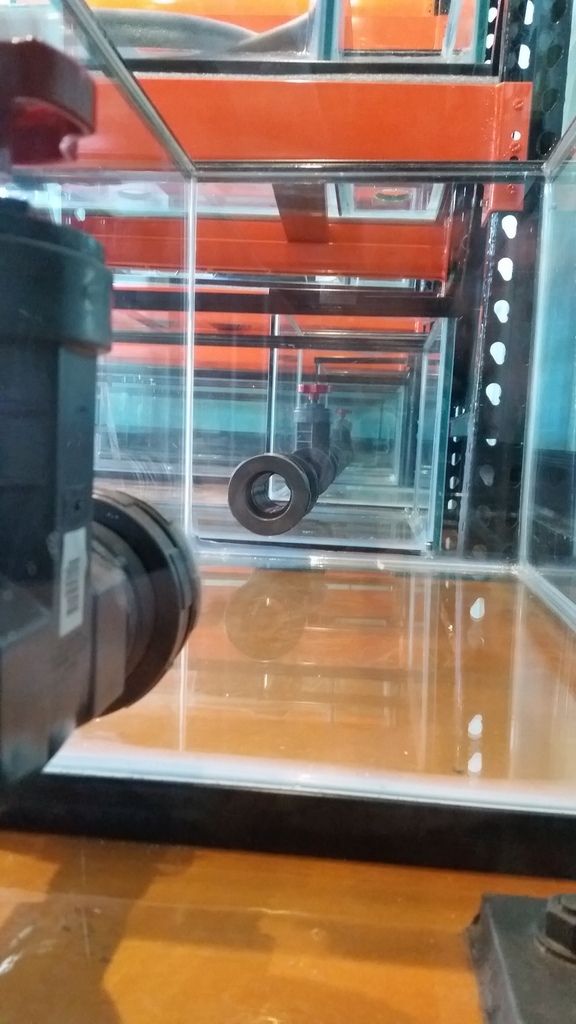
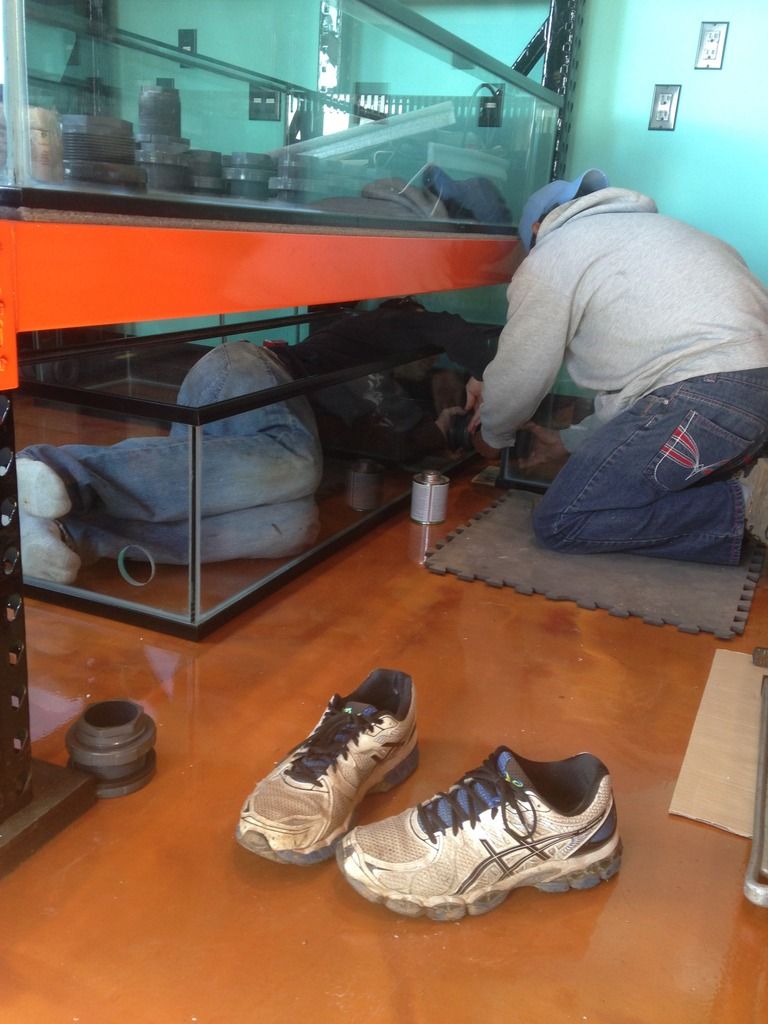
We went with all schedule 80 bulkheads.. Between 1.5" and 2" ones, over 40 of them.. Come to find out, our holes that were drilled in the bottoms of our tanks were slightly too small to accommodate the larger bulkheads. Like a tiny bit too small.. maybe 1/8". Ugh. For future info, incase anyone else runs into this problem, a rotozip with a diamond cutting bit, with glass cutting lube, works great for reaming the holes out to the proper size. Little bit of chipping on the outer edges but nothing that the huge gasket of a schedule 80 bulkhead can't seal. Worked fantastic and vastly superior in our opinion.. The gasket alone is probably 3x as thick. A bit overkill, but well worth it!
Sumps were picked up.. and needed to be drilled. Everything was so tightly fit together, there wasn't much room for error. Huge, huge, HUGE thanks to Steve for coming over and spending hours and hours drilling these for us. 18 holes in total.
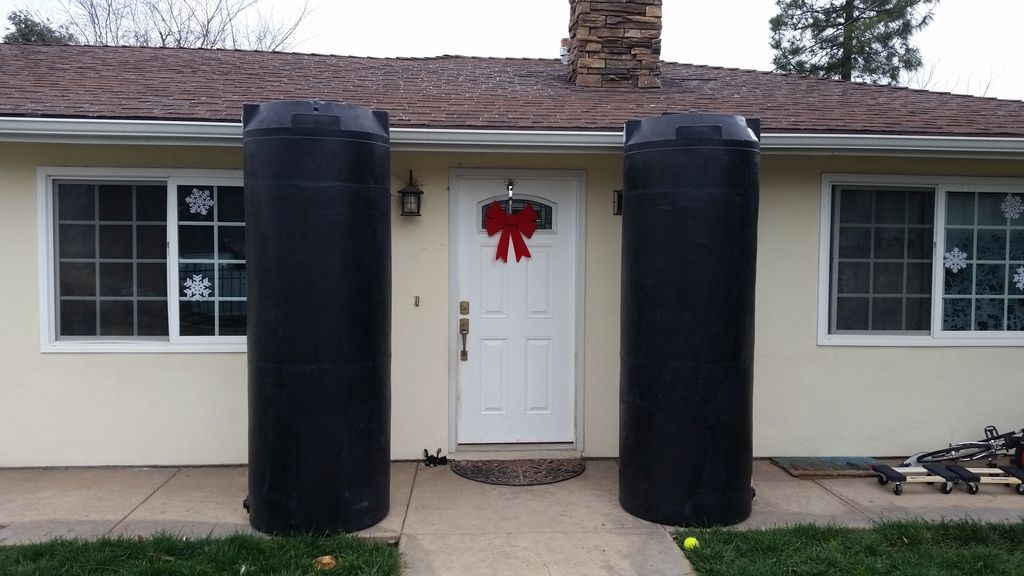
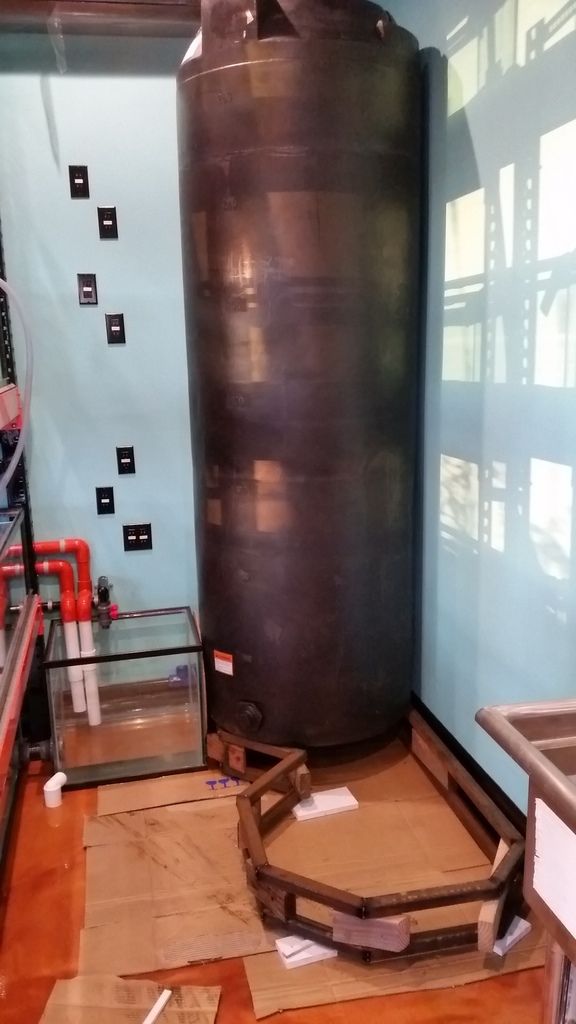
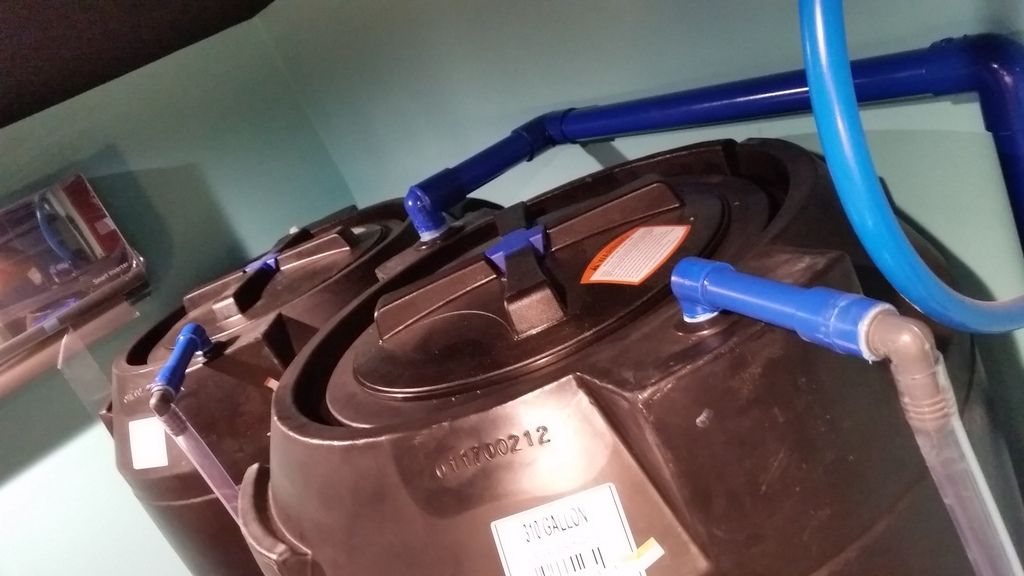
Originally, we had planned to use 2x 24" x 30" x 96" tall rectangular water barrels for the water change station. For some reason, I thought I remembered being able to source them out... When the time came to order them, I was S.O.L. Couldn't find anything in those dimensions.. Sucks because everything was planned around those dimensions. Aisle spacing, tank sizing, rack sizing/spacing, everything. Had to modify our plans a bit and compromise.. Oh well. Decided to go with 32" diameter, 96" tall, 310 gallon capacity.
Water barrels have arrived.. Cody.. I feel your pain. These things were freaking expensive and came from halfway across the country from the only plant that makes them in this particular size.. ugh.
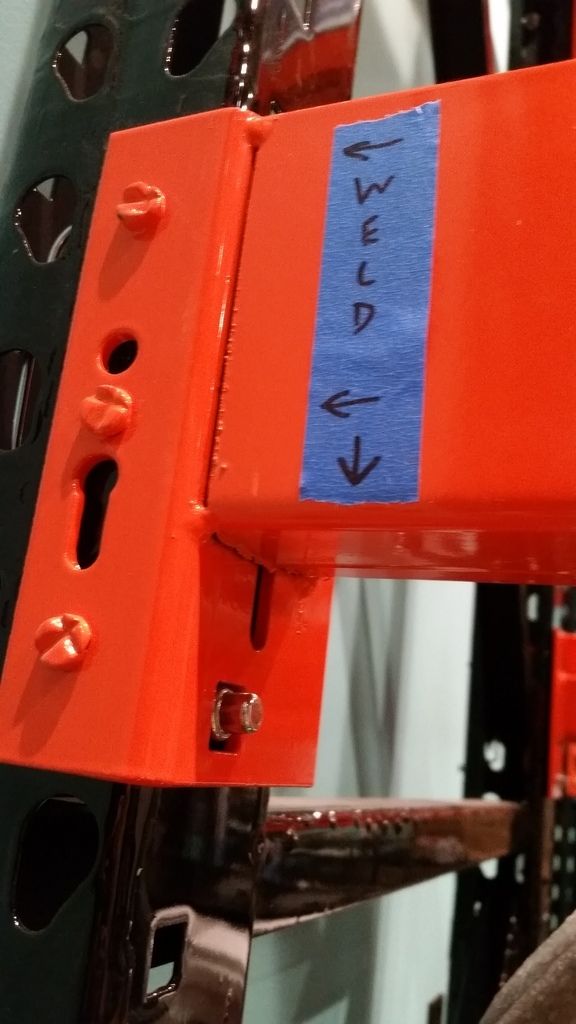
Noticed this while inspecting our racks.. Someone must have been welding these towards the end of their shift on a Friday.. Completely missed welding this cross beam.. Only a few tacks holding it together. Crisis averted..
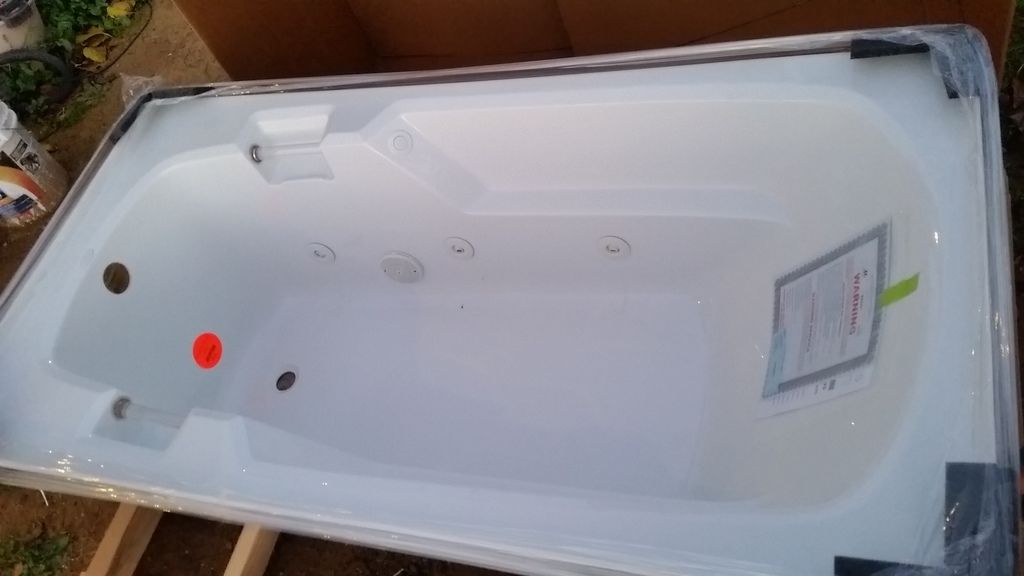
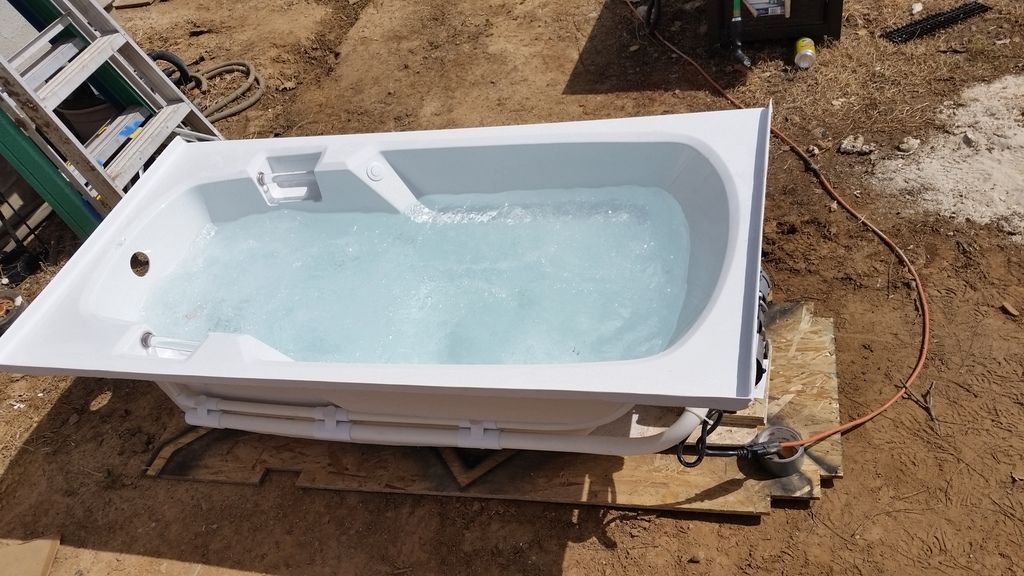
Picked up a tub for the bathroom.. to lounge in after a long fragging session")
Starting to plumb the sumps.. Imagine trying to get 14 holes to line up in a straight line, across 8 glass tanks, across 25 feet. That's what you're seeing below.. Again.. huge thanks to Steve!
Need to do more yoga...
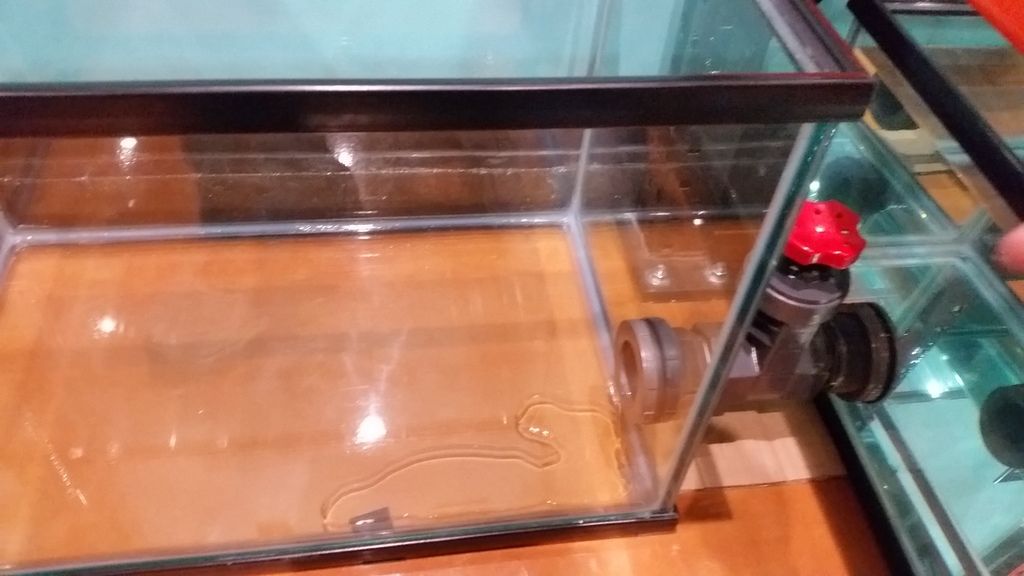
A size reference.. these 2" gate valves are pretty massive. Probably not the highest quality, but good enough for this project!
Leak testing..
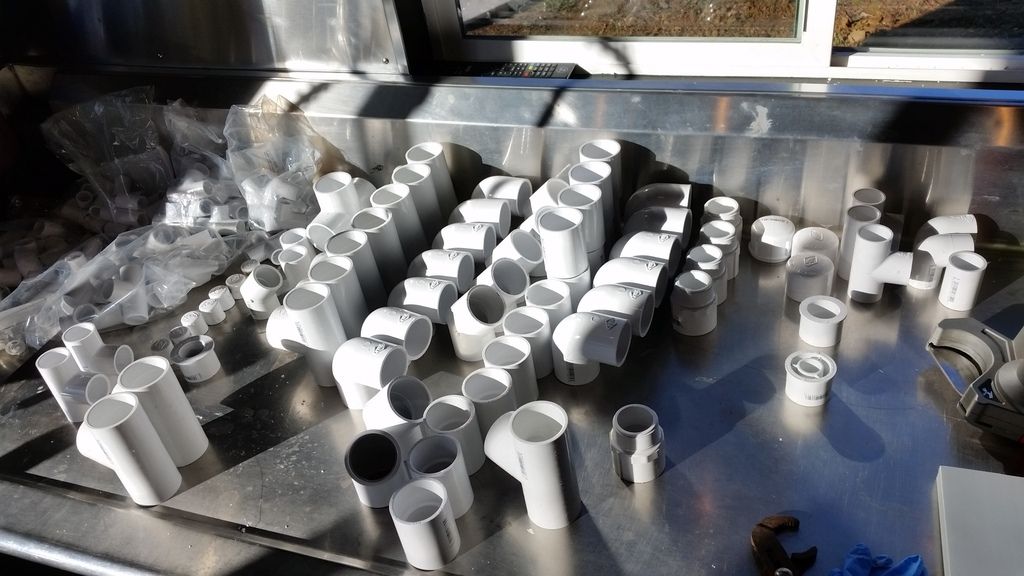
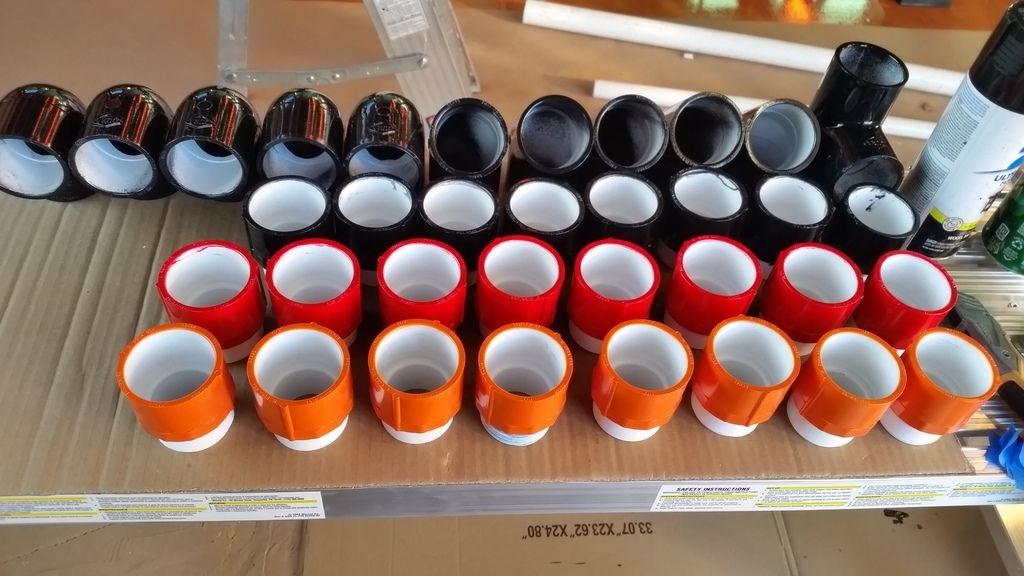
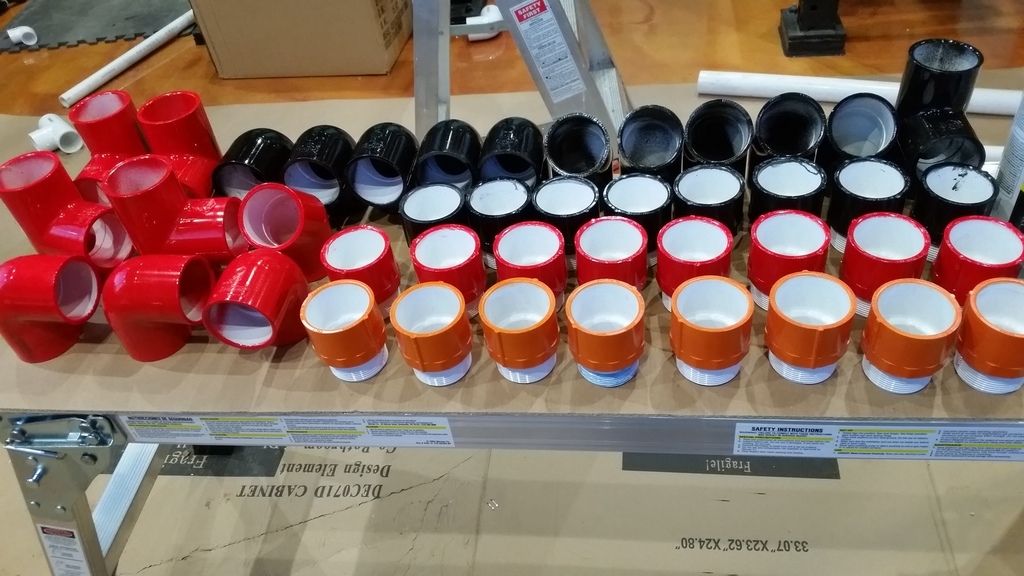
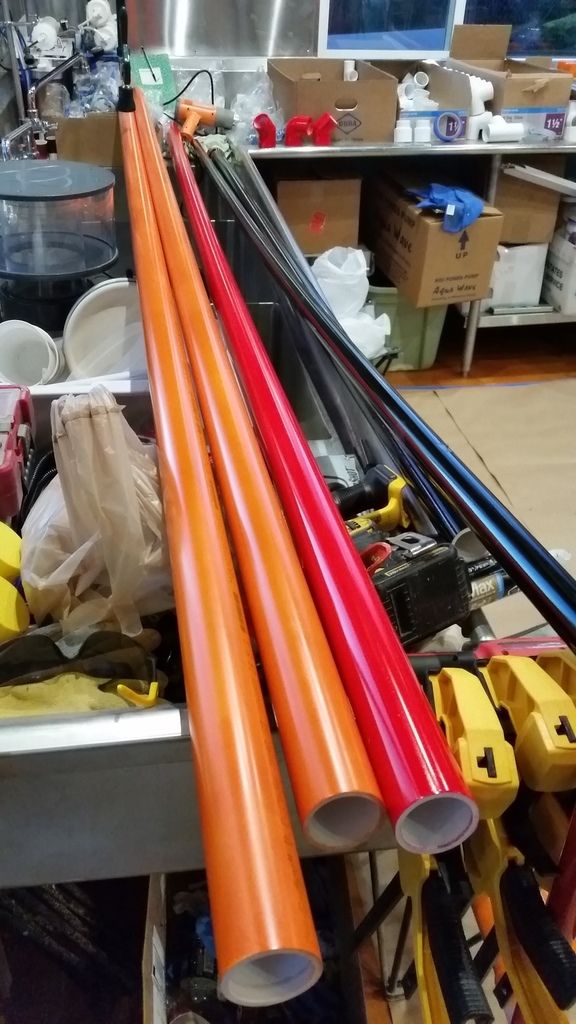
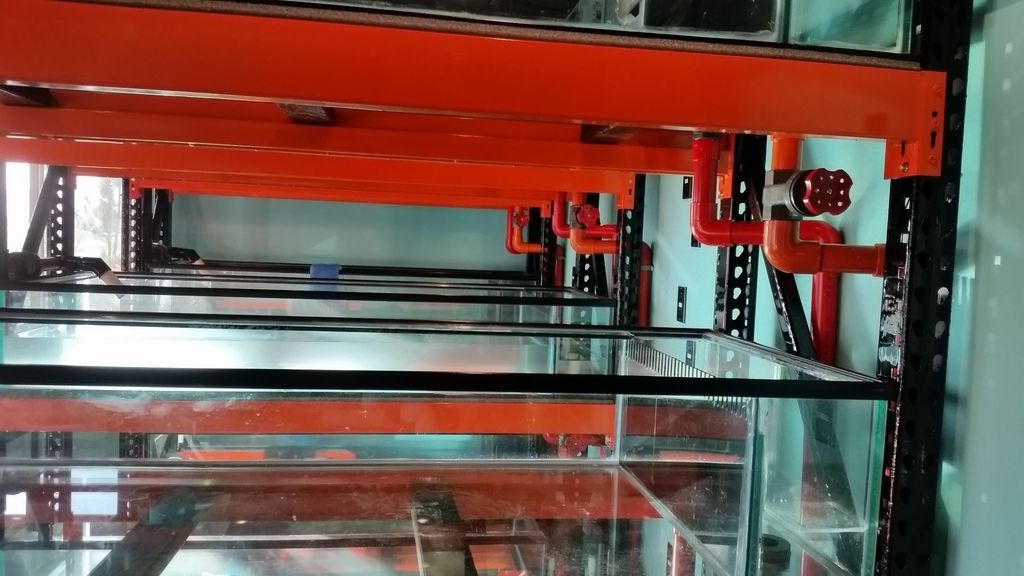
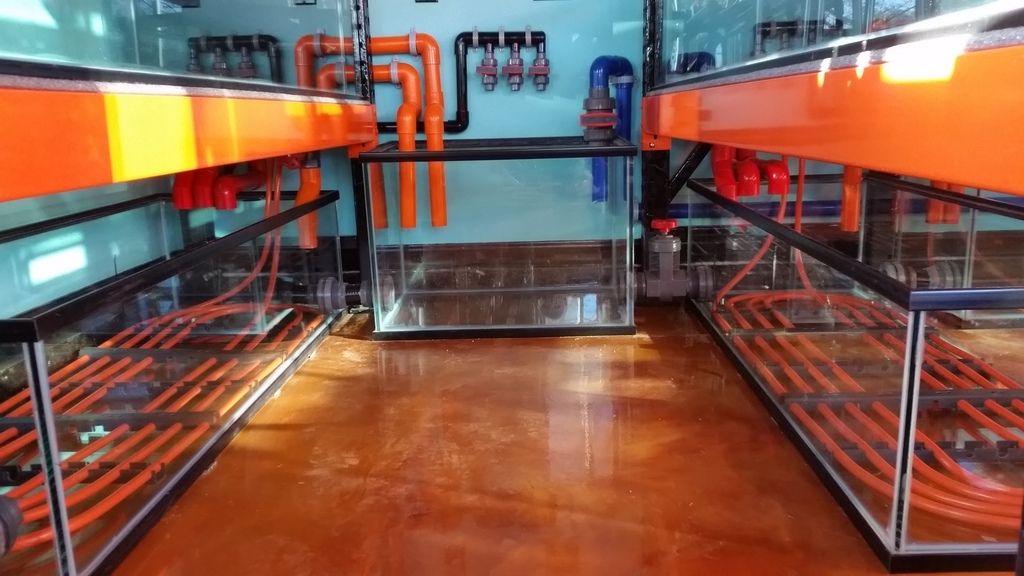
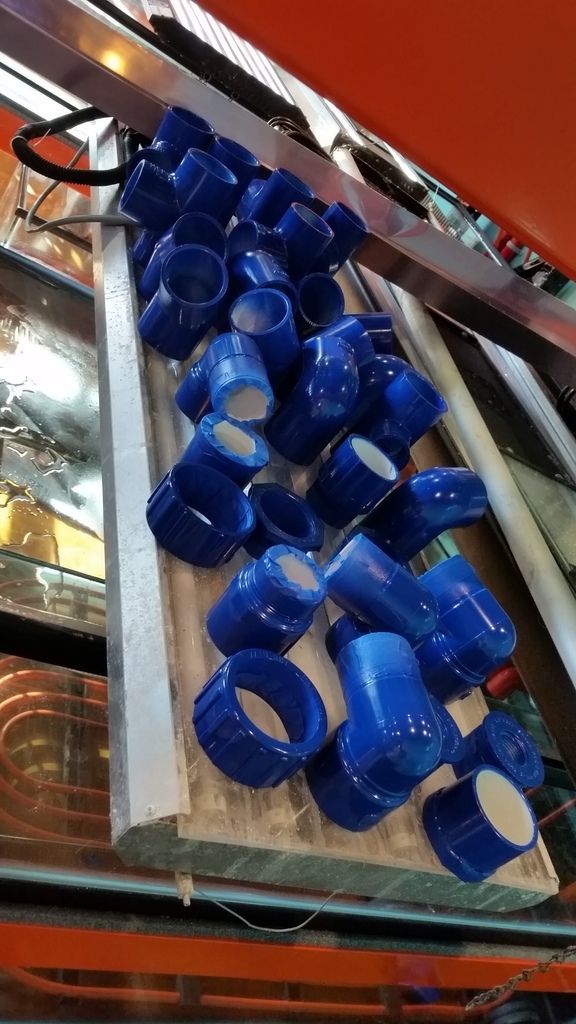
Started doing the plumbing on the tanks. We wanted colored PVC but didn't like the cost, or the lack of availability of fittings, etc. So.. we decided to paint it ourselves. This whole plumbing process took so much longer than was anticipated, between the tight spacing, painting everything, securing everything, and leak testing.. It took about 5 full 10-12 hour days with two people.
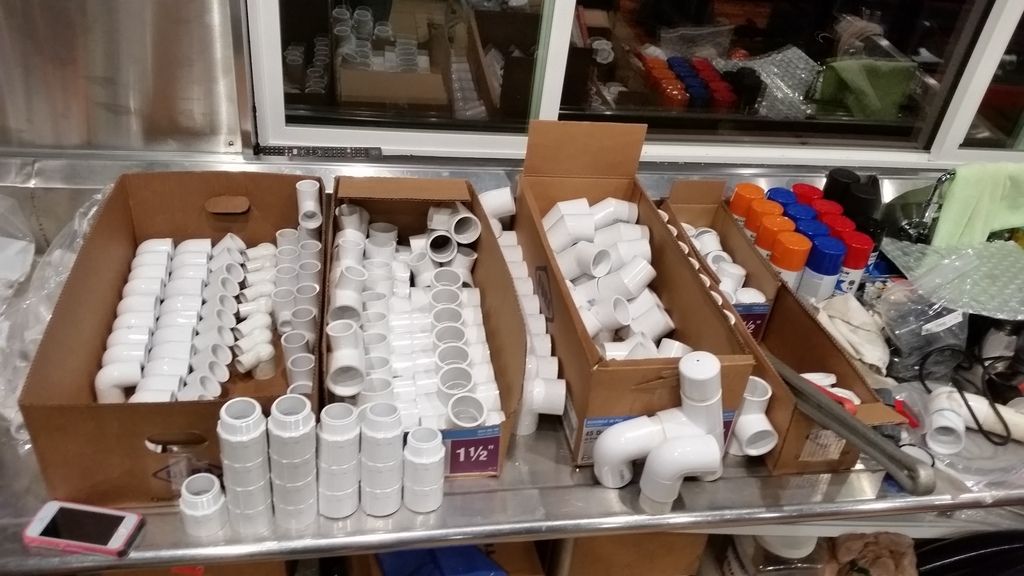
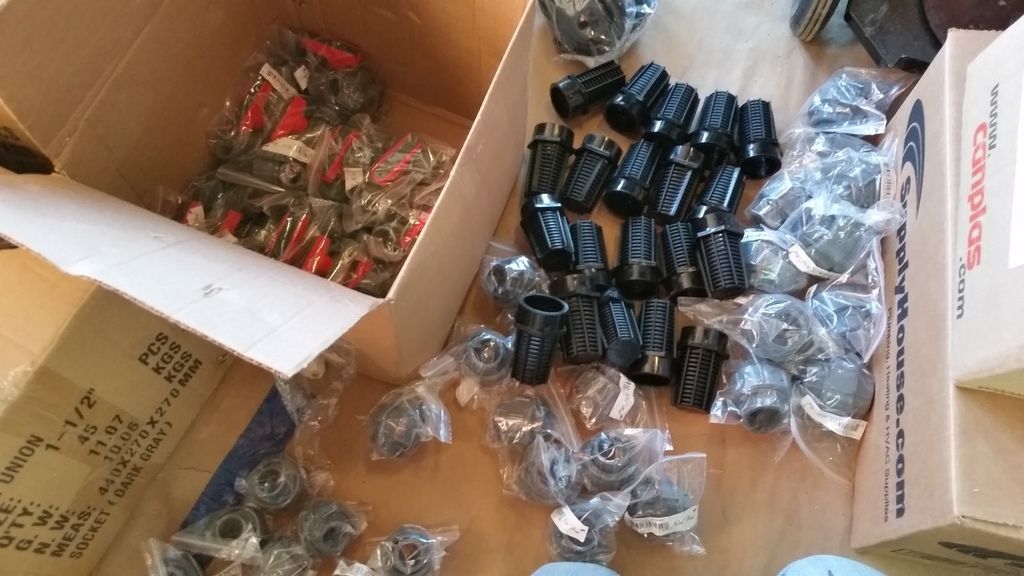
Getting supplies ready.. bought out every 1.5" PVC elbow between three major home improvement stores in this area.. lol. These pictures show like 1/3 or 1/4 of what we had to buy..
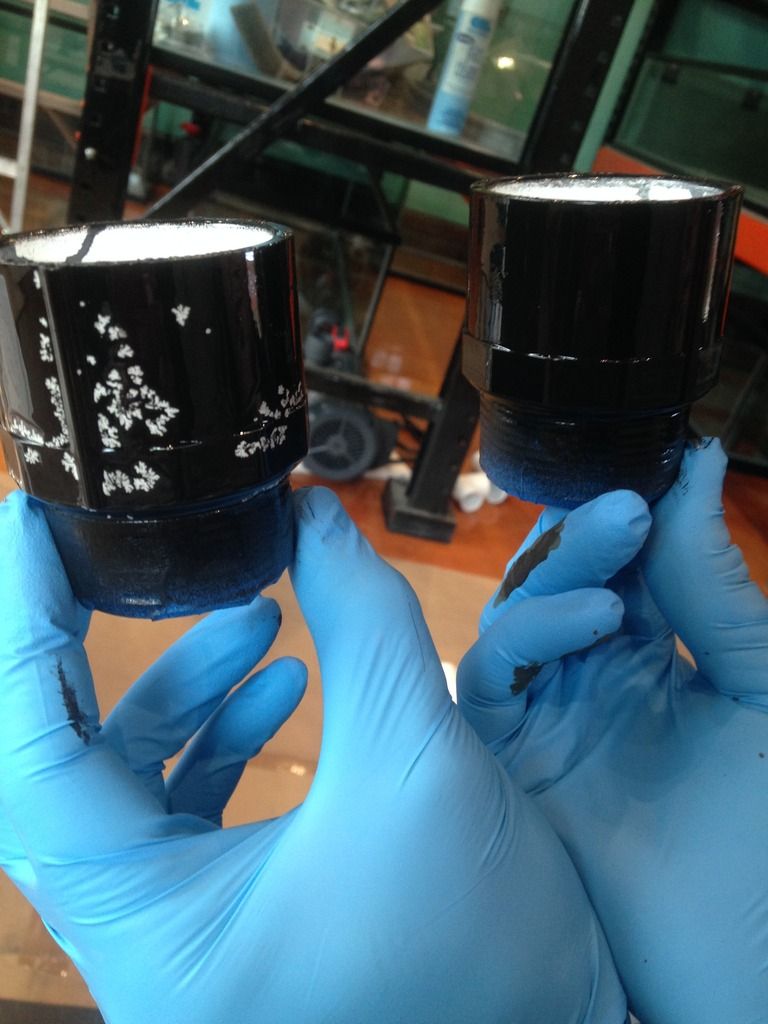
Left fitting: regular spray paint for plastic with no primer applied before painting..
Right fitting: krylon fusion applied directly to a pvc fitting, no primer applied before painting..
Plumbing..
Never knew my body could bend in these ways before this project..
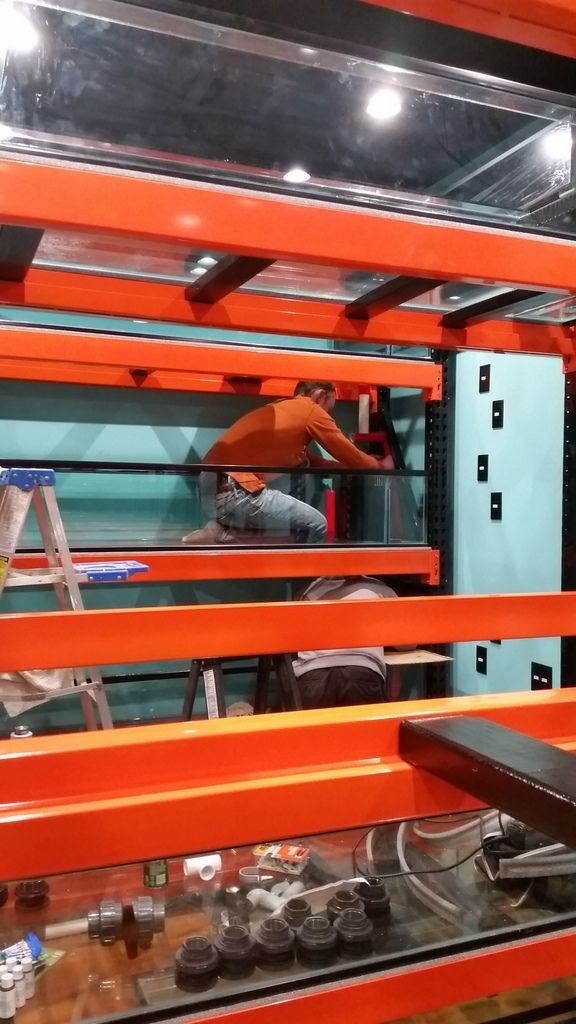
Shortly after getting one row done.. we wanted to leak test. We were originally just planning on going with regular old durso stand pipes, as we've never had issues with noise in the past.. but then again, our return flow rates were never this high. As such, we used one of the 1.5" holes as the overflow, and the second 1.5" hole as an emergency. On the upper two tanks, we tied the emergency drains together into one.. What a mistake..
While leak testing, the noise was absolutely horrendous. Like standing next to a huge waterfall. Couldn't have a conversation or even think.. And that's with only 3 of the 12 tanks running.
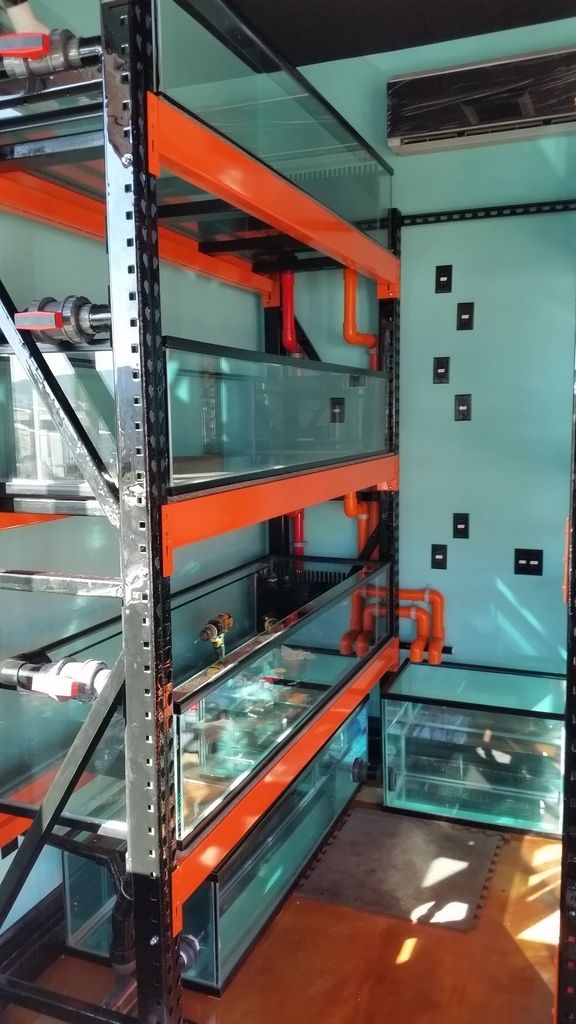
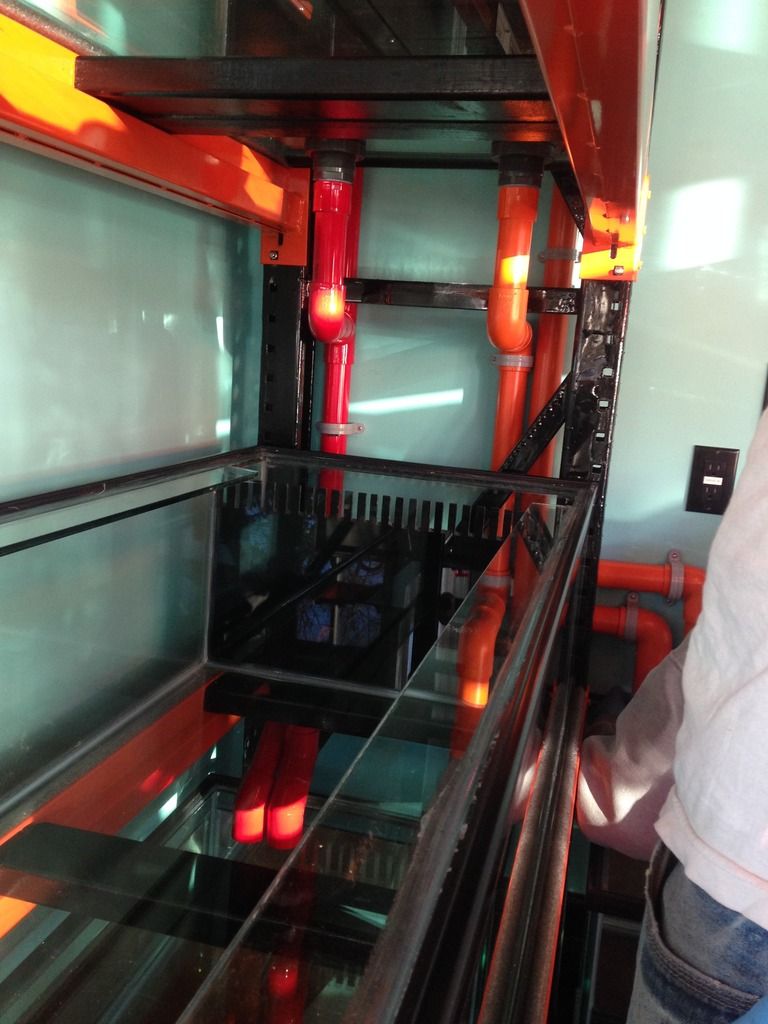
We only had two holes drilled in the overflow areas on the tanks, so a bean animal was out of the question, but herbie is what we decided to go with. This required modifying our original plumbing plan.
We made it so that every tank had a dedicated siphon overflow line, and a wet overflow line, leading down into the sump. If the siphon overflow was to ever clog, the 1.5" wet overflow could easily handle the overflow, and the loud noise would alert us to an issue..
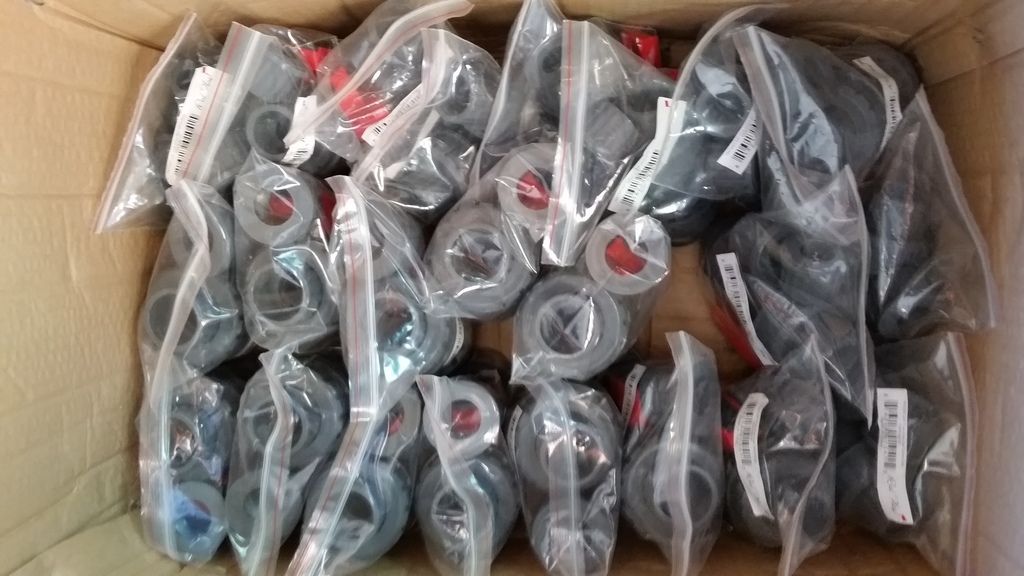
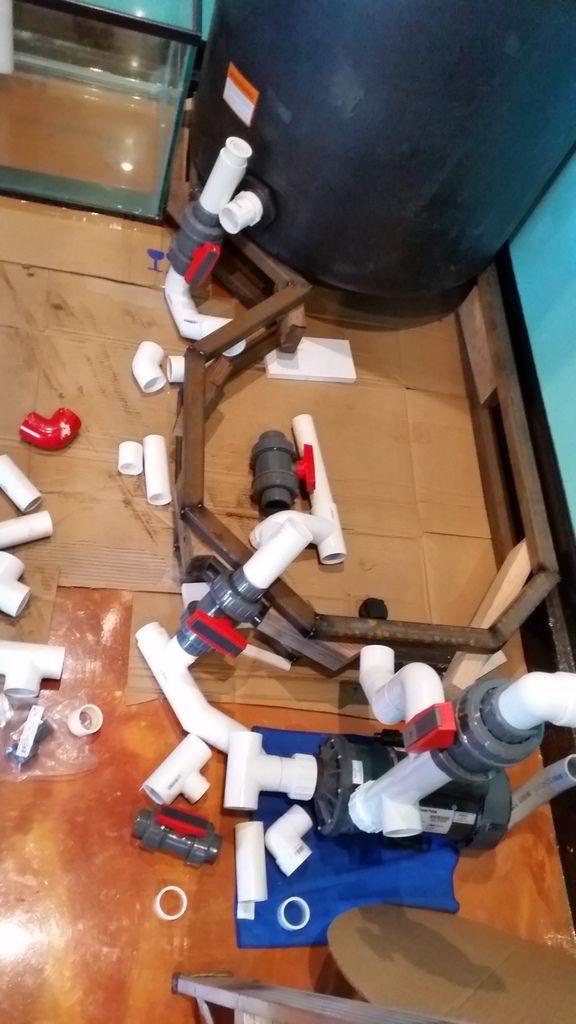
Plumbing fittings.. and valves.. and gate valves.. and bulkheads.. and strainers.. and unions.. and etc etc etc. This only shows about 1/4 of what was bought.
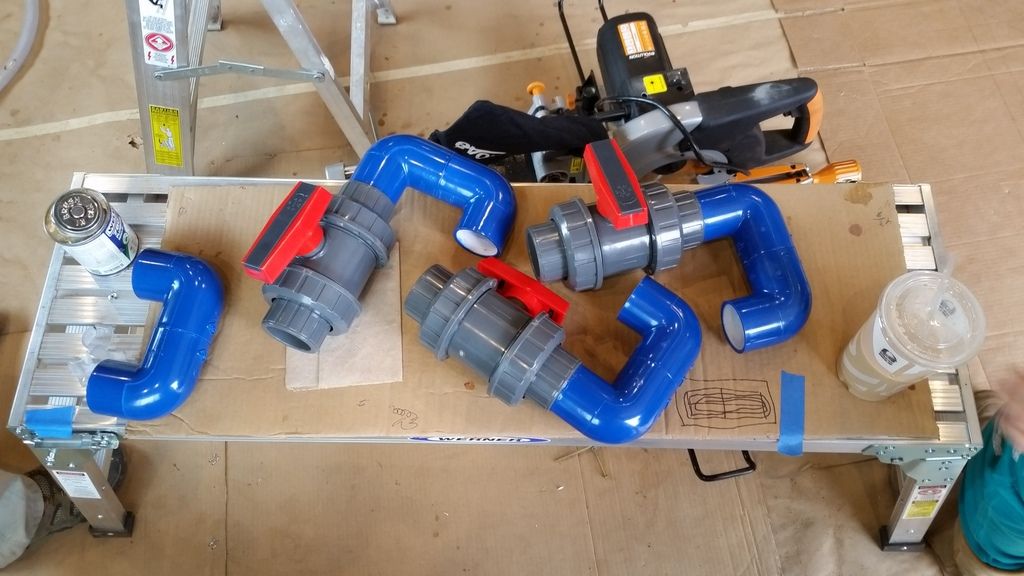
These true union ball valves are sweet! Super easy to turn, adjustable (for when they get tight to turn), and even come with both threaded and glue end connectors..
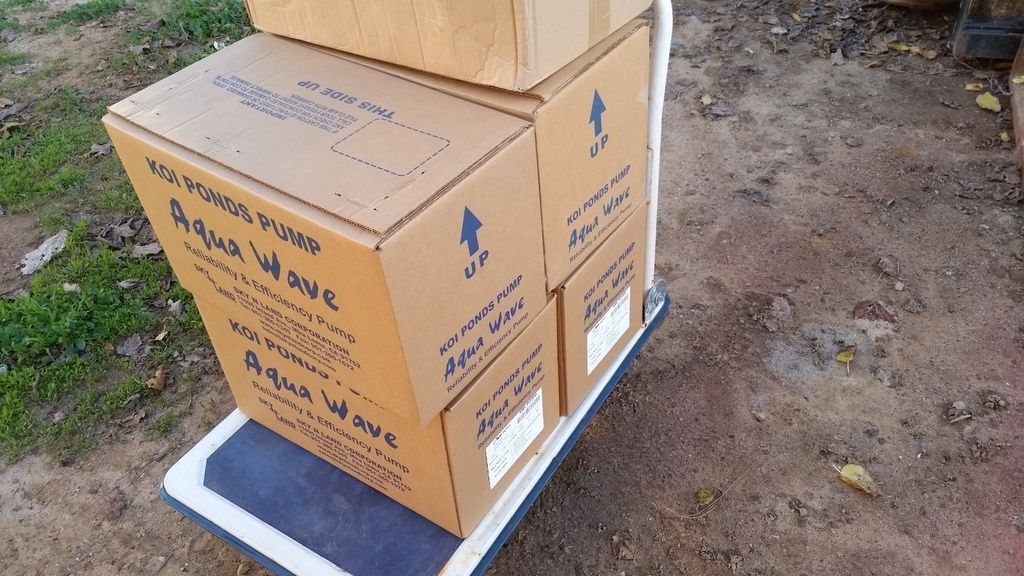
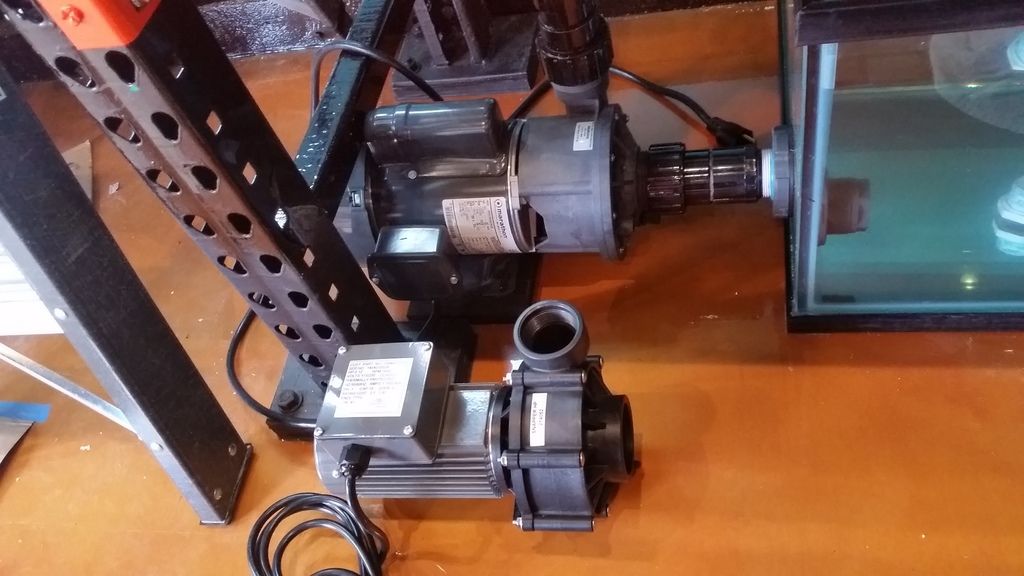
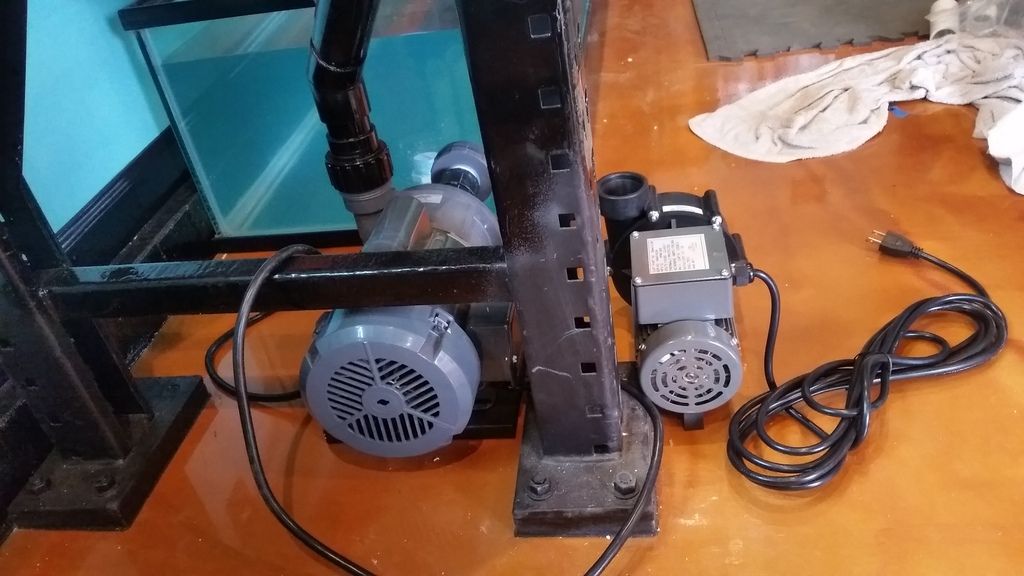
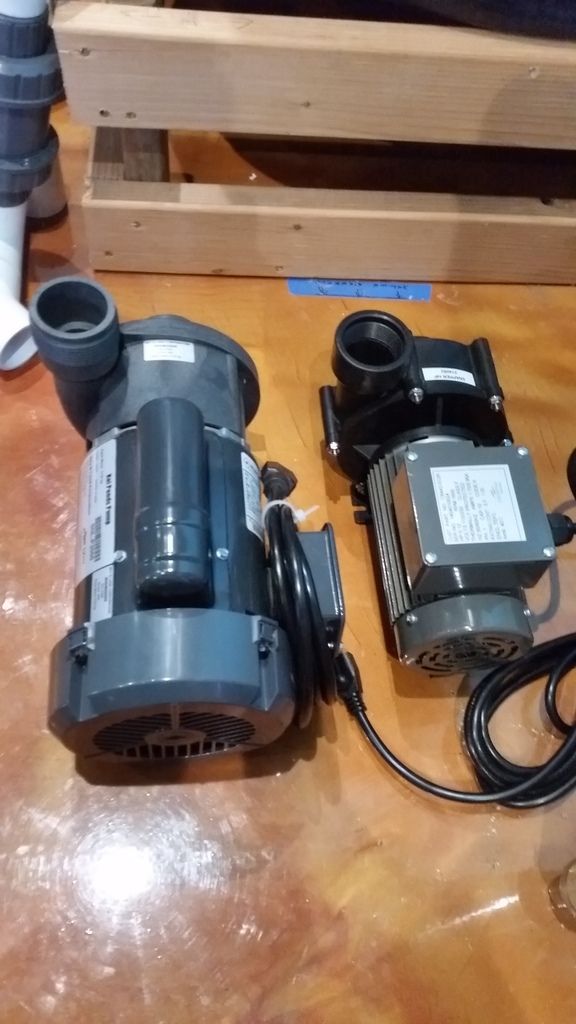
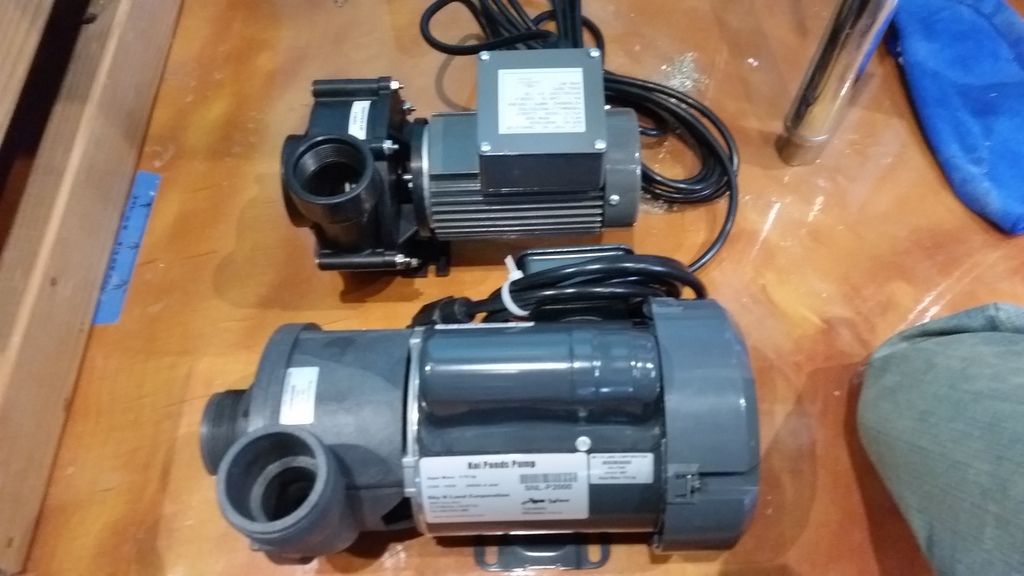
Return pumps. Wanted something inexpensive (relatively speaking), energy efficient, readily serviceable and replaceable. As tempting as the new DC pumps were.. we decided against them at this point. Well see how these hold up in the long term. The price was right, and this company was recommended by another reefer. 165-170 watts running with about 45-50 gpm at 8' head.
Size comparison vs a Reeflo Dart/Snapper.
Future bathroom. You can see the digital timers for the individual fans on the right. Still need to paint/install doors and do a bunch of trim / touch up everywhere.
Started acquiring bathroom supplies.. Future sink. Has a really cool glass waterfall faucet to go with it.
We went with all schedule 80 bulkheads.. Between 1.5" and 2" ones, over 40 of them.. Come to find out, our holes that were drilled in the bottoms of our tanks were slightly too small to accommodate the larger bulkheads. Like a tiny bit too small.. maybe 1/8". Ugh. For future info, incase anyone else runs into this problem, a rotozip with a diamond cutting bit, with glass cutting lube, works great for reaming the holes out to the proper size. Little bit of chipping on the outer edges but nothing that the huge gasket of a schedule 80 bulkhead can't seal. Worked fantastic and vastly superior in our opinion.. The gasket alone is probably 3x as thick. A bit overkill, but well worth it!
Sumps were picked up.. and needed to be drilled. Everything was so tightly fit together, there wasn't much room for error. Huge, huge, HUGE thanks to Steve for coming over and spending hours and hours drilling these for us. 18 holes in total.
Originally, we had planned to use 2x 24" x 30" x 96" tall rectangular water barrels for the water change station. For some reason, I thought I remembered being able to source them out... When the time came to order them, I was S.O.L. Couldn't find anything in those dimensions.. Sucks because everything was planned around those dimensions. Aisle spacing, tank sizing, rack sizing/spacing, everything. Had to modify our plans a bit and compromise.. Oh well. Decided to go with 32" diameter, 96" tall, 310 gallon capacity.
Water barrels have arrived.. Cody.. I feel your pain. These things were freaking expensive and came from halfway across the country from the only plant that makes them in this particular size.. ugh.
Noticed this while inspecting our racks.. Someone must have been welding these towards the end of their shift on a Friday.. Completely missed welding this cross beam.. Only a few tacks holding it together. Crisis averted..
Picked up a tub for the bathroom.. to lounge in after a long fragging session
Starting to plumb the sumps.. Imagine trying to get 14 holes to line up in a straight line, across 8 glass tanks, across 25 feet. That's what you're seeing below.. Again.. huge thanks to Steve!
Need to do more yoga...
A size reference.. these 2" gate valves are pretty massive. Probably not the highest quality, but good enough for this project!
Leak testing..
Started doing the plumbing on the tanks. We wanted colored PVC but didn't like the cost, or the lack of availability of fittings, etc. So.. we decided to paint it ourselves. This whole plumbing process took so much longer than was anticipated, between the tight spacing, painting everything, securing everything, and leak testing.. It took about 5 full 10-12 hour days with two people.
Getting supplies ready.. bought out every 1.5" PVC elbow between three major home improvement stores in this area.. lol. These pictures show like 1/3 or 1/4 of what we had to buy..
Left fitting: regular spray paint for plastic with no primer applied before painting..
Right fitting: krylon fusion applied directly to a pvc fitting, no primer applied before painting..
Plumbing..
Never knew my body could bend in these ways before this project..
Shortly after getting one row done.. we wanted to leak test. We were originally just planning on going with regular old durso stand pipes, as we've never had issues with noise in the past.. but then again, our return flow rates were never this high. As such, we used one of the 1.5" holes as the overflow, and the second 1.5" hole as an emergency. On the upper two tanks, we tied the emergency drains together into one.. What a mistake..
While leak testing, the noise was absolutely horrendous. Like standing next to a huge waterfall. Couldn't have a conversation or even think.. And that's with only 3 of the 12 tanks running.
We only had two holes drilled in the overflow areas on the tanks, so a bean animal was out of the question, but herbie is what we decided to go with. This required modifying our original plumbing plan.
We made it so that every tank had a dedicated siphon overflow line, and a wet overflow line, leading down into the sump. If the siphon overflow was to ever clog, the 1.5" wet overflow could easily handle the overflow, and the loud noise would alert us to an issue..
Plumbing fittings.. and valves.. and gate valves.. and bulkheads.. and strainers.. and unions.. and etc etc etc. This only shows about 1/4 of what was bought.
These true union ball valves are sweet! Super easy to turn, adjustable (for when they get tight to turn), and even come with both threaded and glue end connectors..
Return pumps. Wanted something inexpensive (relatively speaking), energy efficient, readily serviceable and replaceable. As tempting as the new DC pumps were.. we decided against them at this point. Well see how these hold up in the long term. The price was right, and this company was recommended by another reefer. 165-170 watts running with about 45-50 gpm at 8' head.
Size comparison vs a Reeflo Dart/Snapper.
- Joined
- Nov 2, 2009
- Messages
- 1,210
- Likes
- 81
- Points
- 48
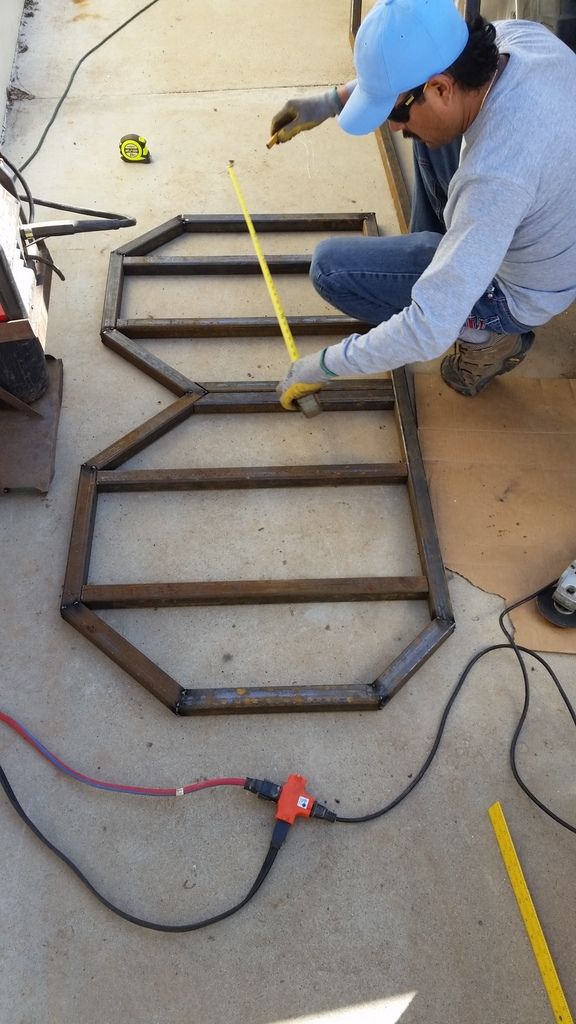
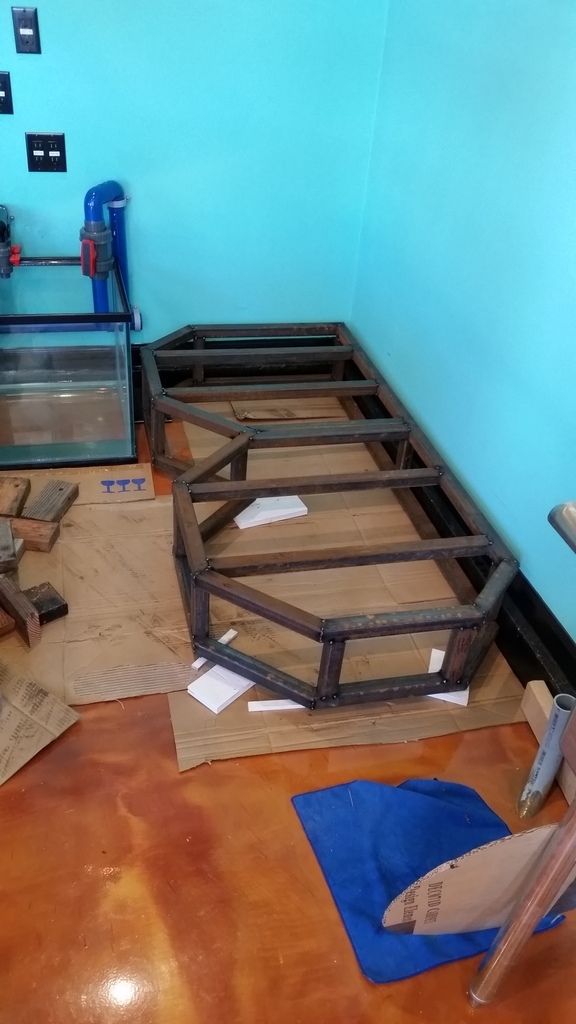
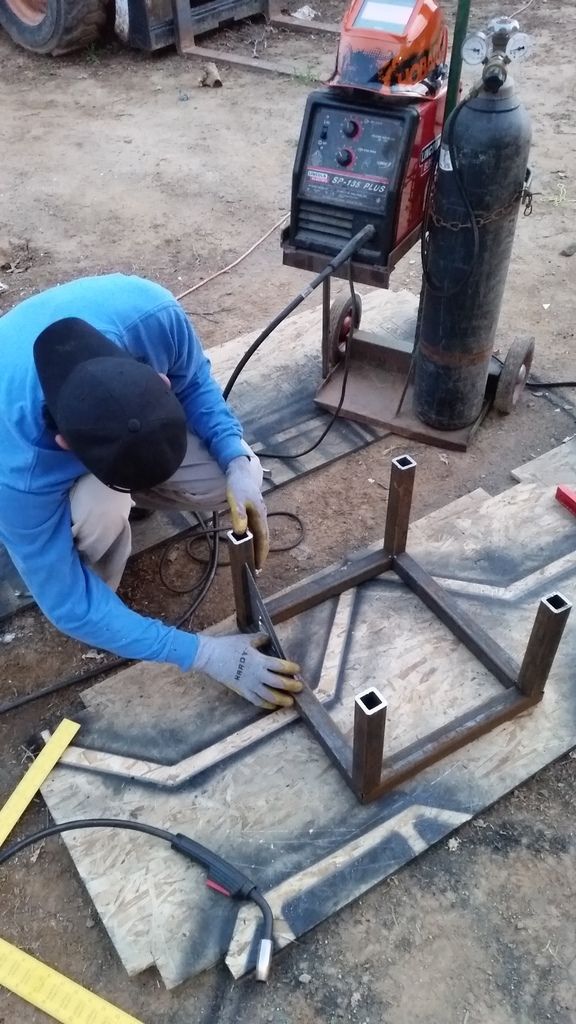
Time to put those huge water barrels to use.. Needed to make a small stand for the water change station to be slightly elevated to allow room for the pump.
Went with 1.5" .250 wall thickness steel tubing. 267 lbs for just the steel. A bit overkill, but we figured with over 5,000 lbs of water, we didn't want to take any chances.
Don't have any experience with metal fabrication, etc... so.. next hurdle: trying to figure out how to cut the tubing!
A 14" abrasive disc saw was hardly tickling the steel.. and after 10 minutes, was about a quarter of the way through. Looked like the steel was being tempered more than anything..
Got a new toy.. a slow (relatively speaking) cutting miter saw..
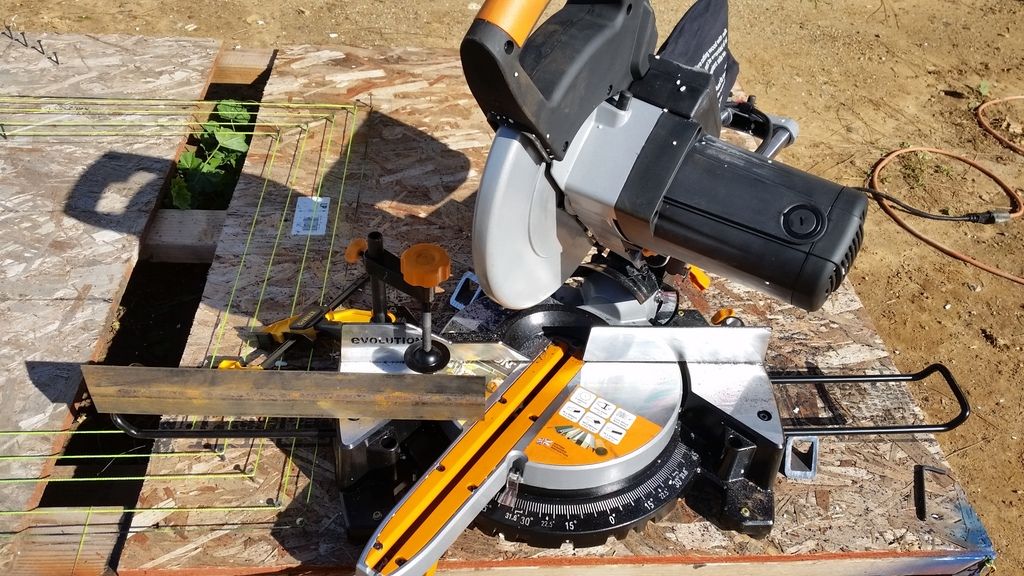
A cut that took about 10 seconds or less. Good enough for this project!!

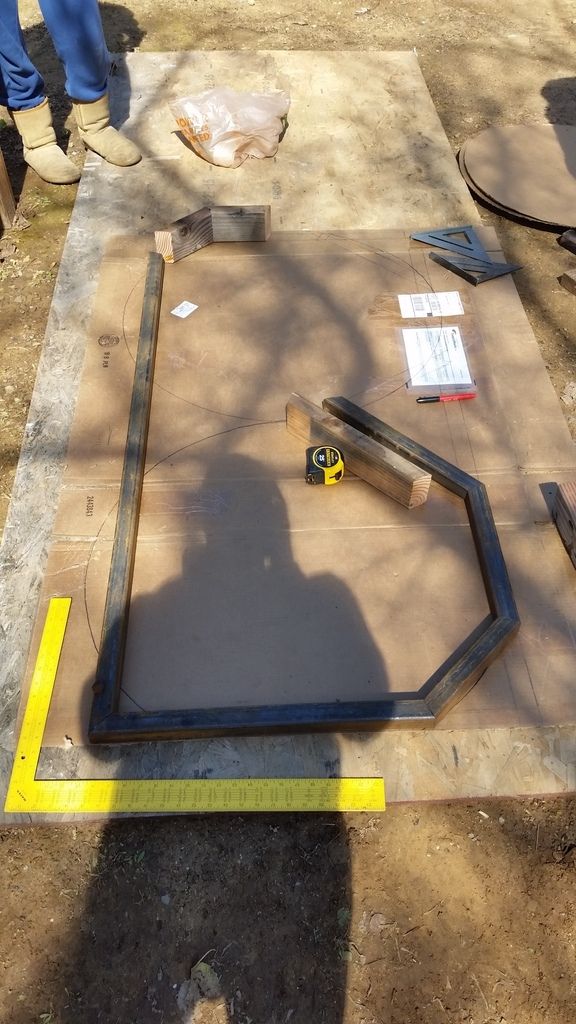
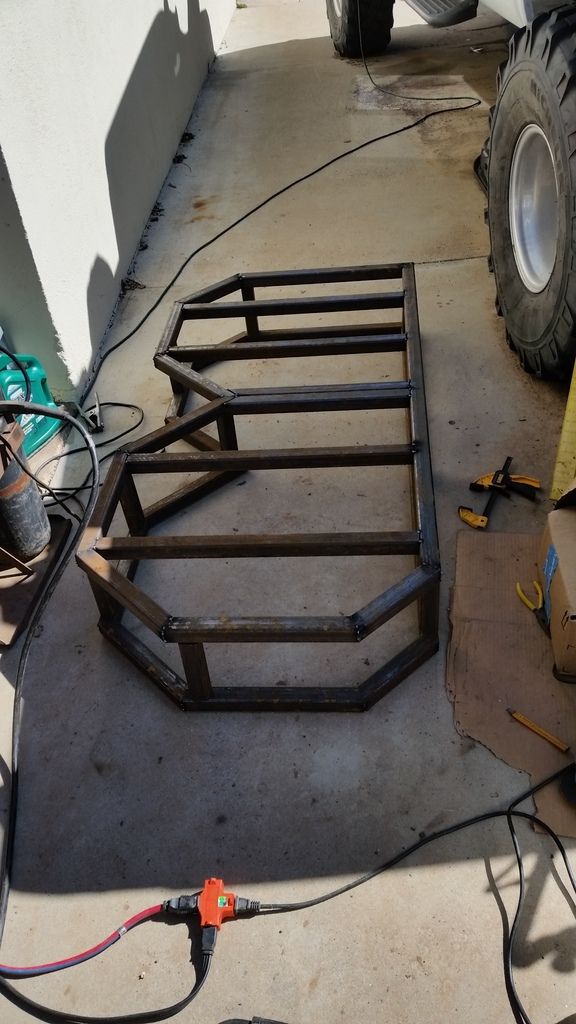
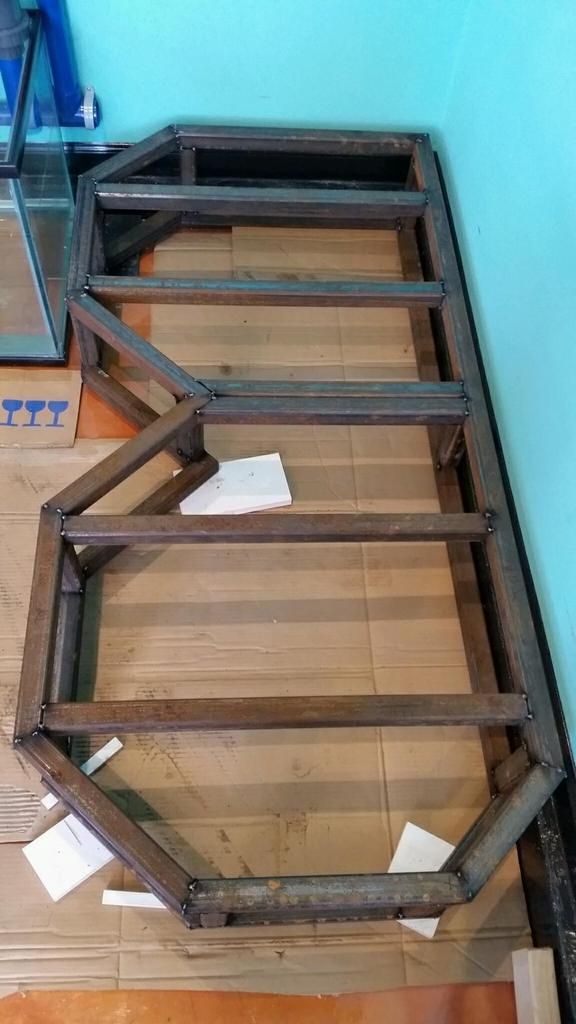
Our first attempt at building a steel stand..
Temporary tack welding
A quick mock up..
Literally, hours of brain power wasted trying to figure out how in the world to fit all the plumbing, valves, and pump, into a tiny space.
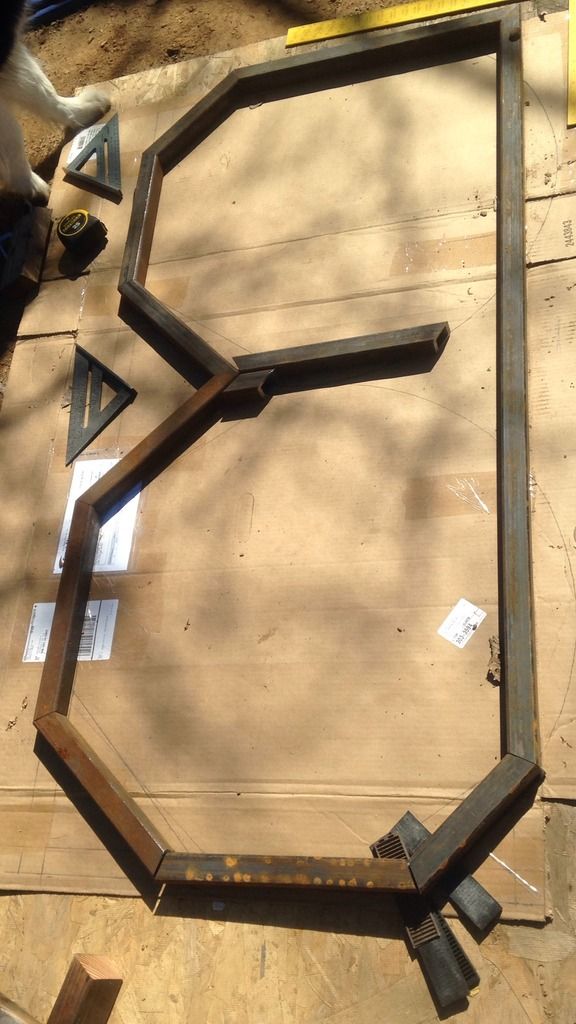
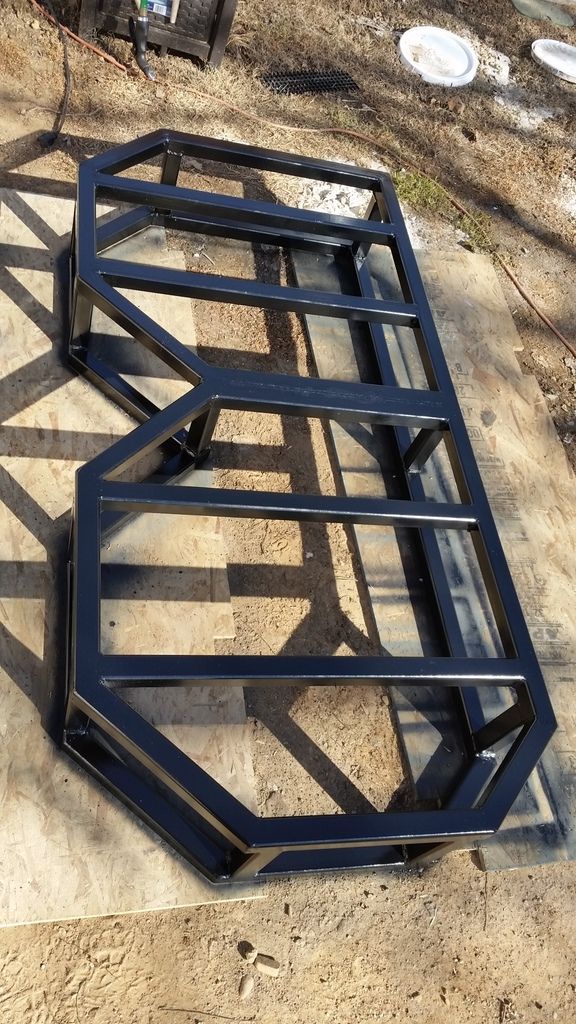
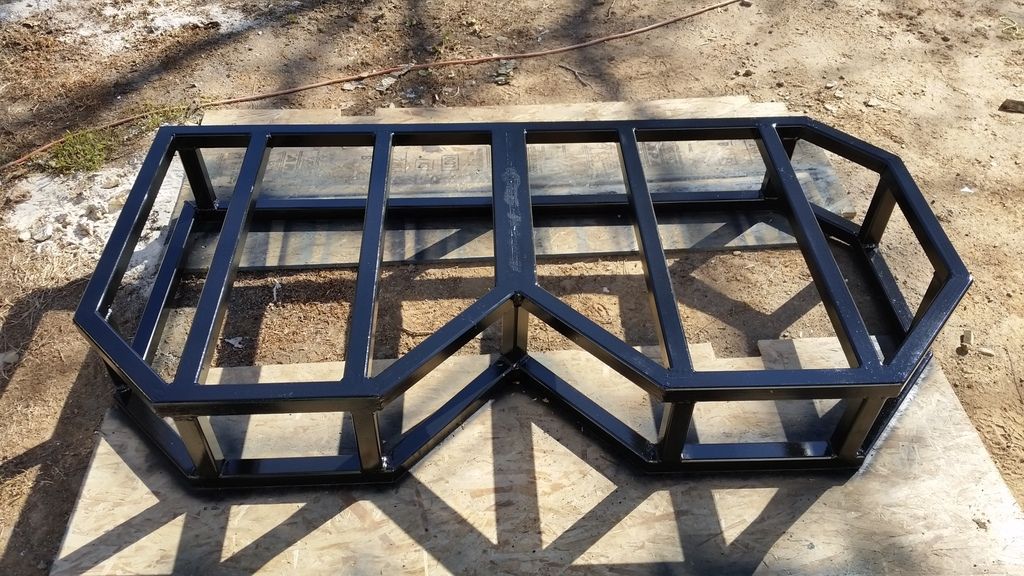
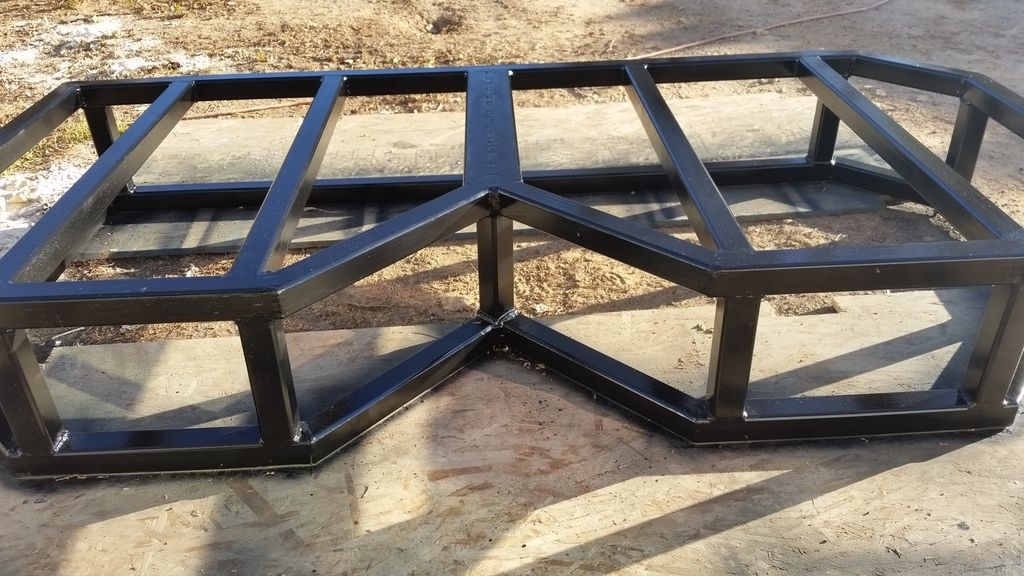
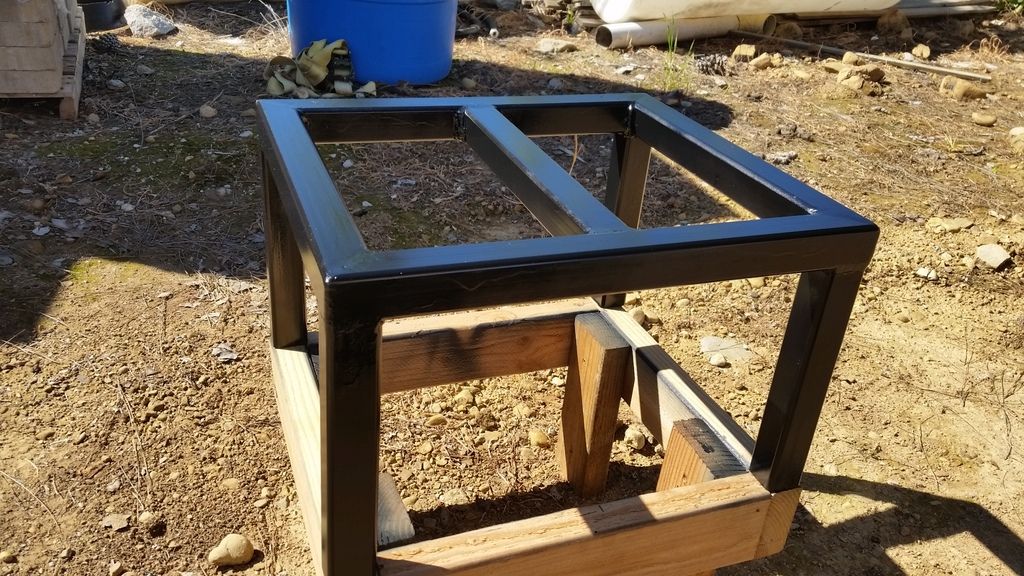
Okay, for real this time..
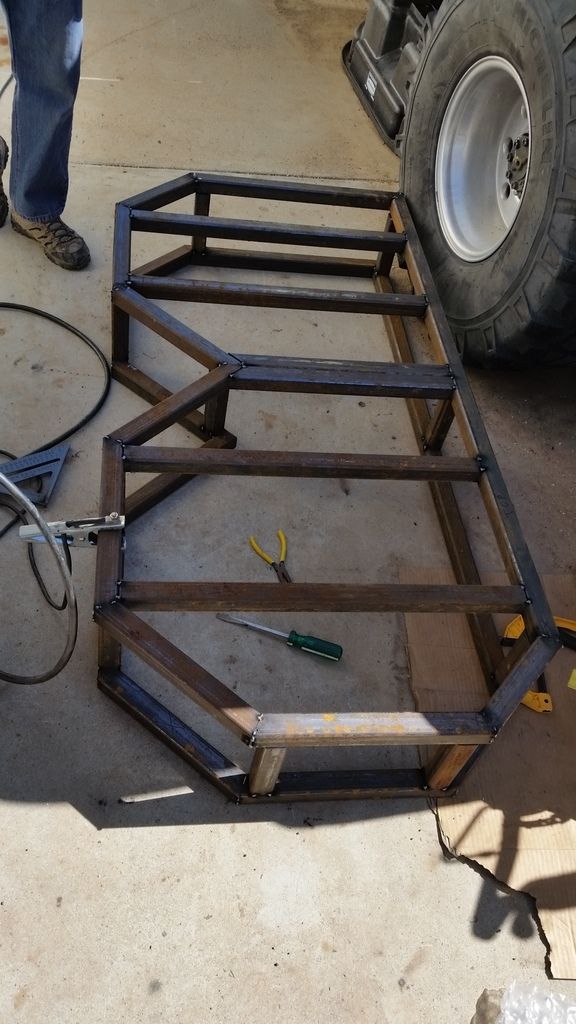
More tack welding
Another mock up...
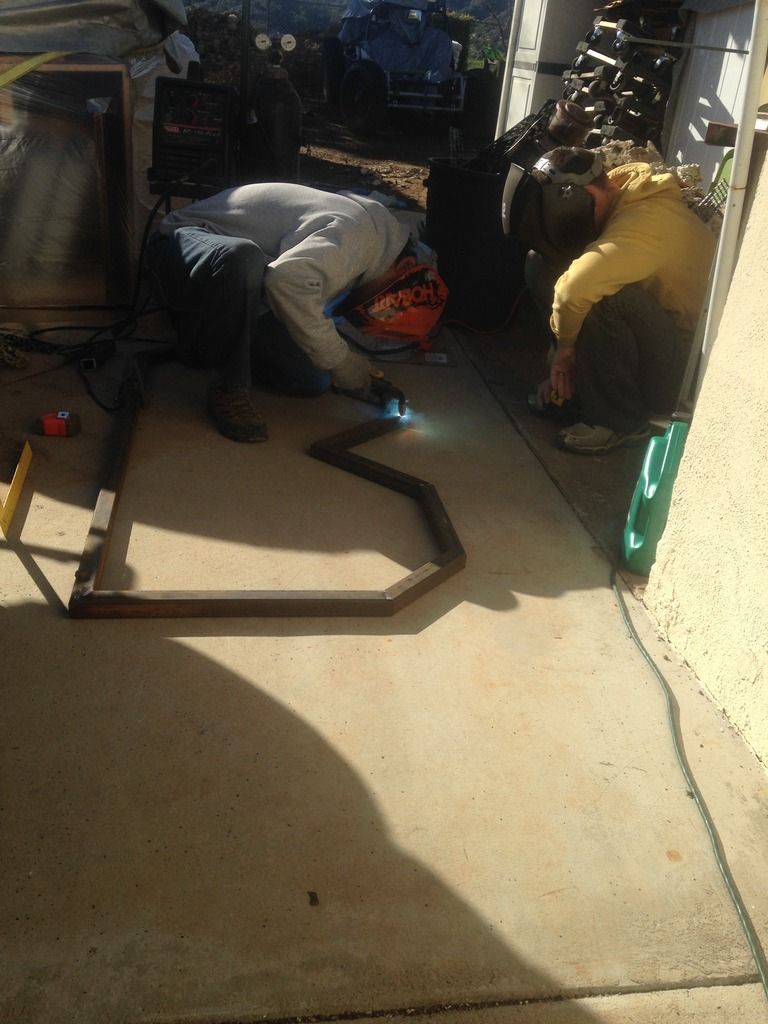
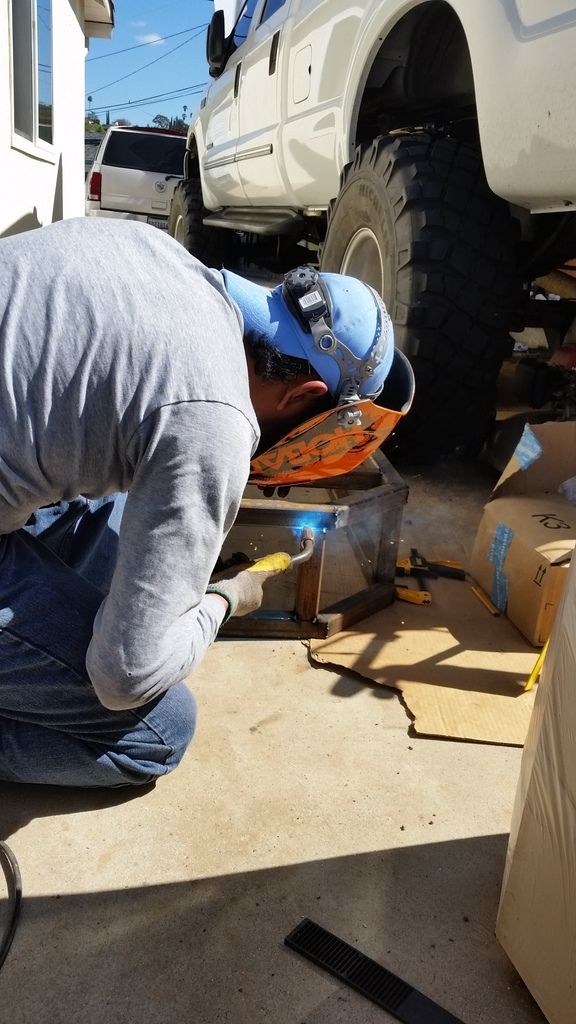
Afterwards, everything was taken to my very helpful neighbor across the street who laid down some very serious welds with his huge MIG.. Afterwards, primed, and painted.. and voila! Was actually a fun project and we're confident this thing can survive an earthquake..
Next dilemma.. a smaller water storage container to fit between the containers that are now 4" larger than expected, and the already-installed stainless sink... Ugh.
A few days or searching and we decided on a 55 gallon Ace Rotomold. 18" x 18" x 44" tall, with expensive shipping, like last time.. Ugh.
Making a little stand for it..
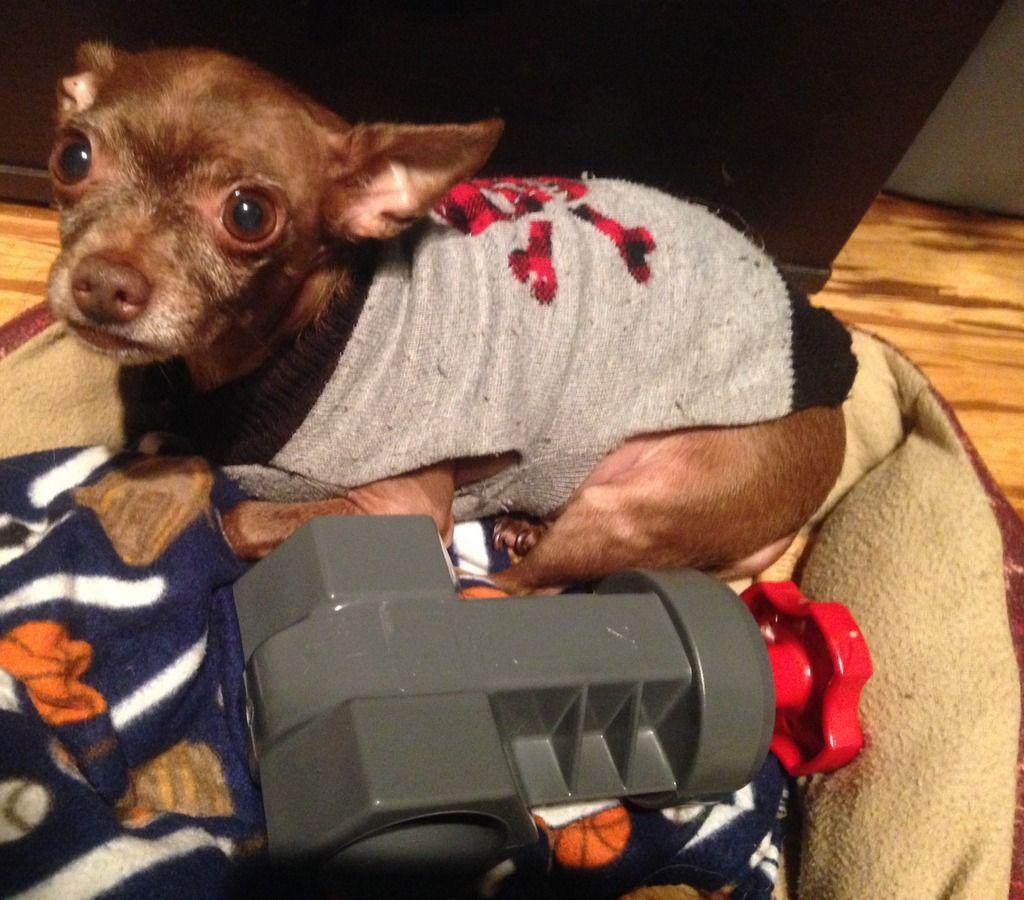
So cute..
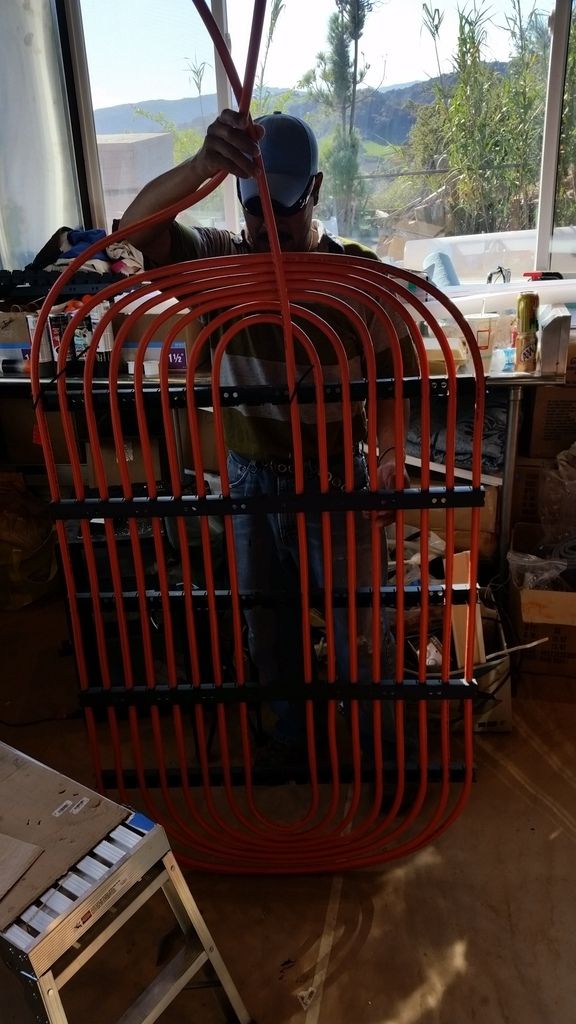
One of four pex heating loops that will be going into the sumps. This Pex-Al-Pex stuff is actually pretty cool!
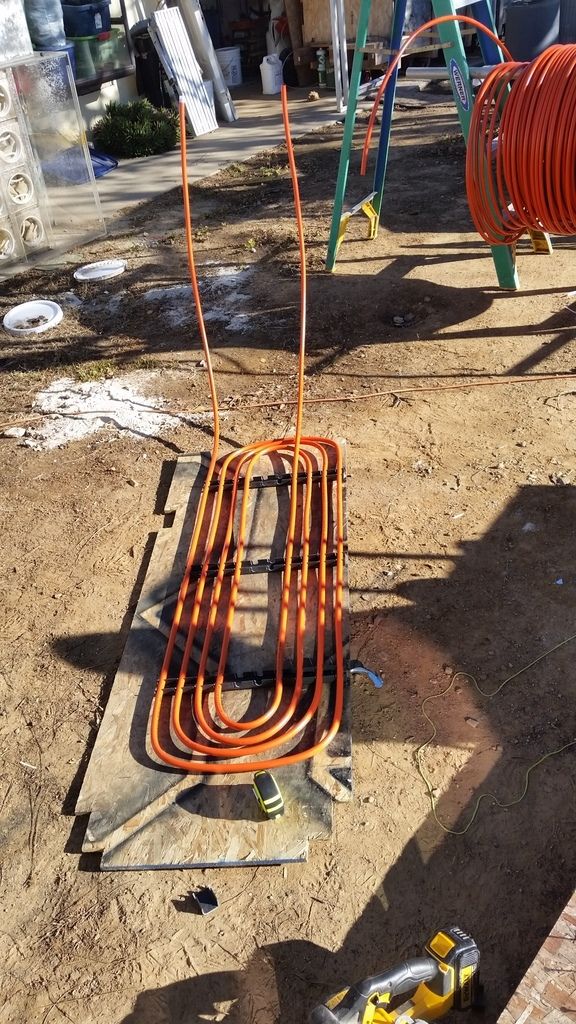
Another huge pex loop.. Still need to finalize the system design and order the necessary components to put this into action.,
An updated sump/plumbing photo.. excuse the dirty floors.
Water testing the jetted tub..
Time to plumb the water change station.
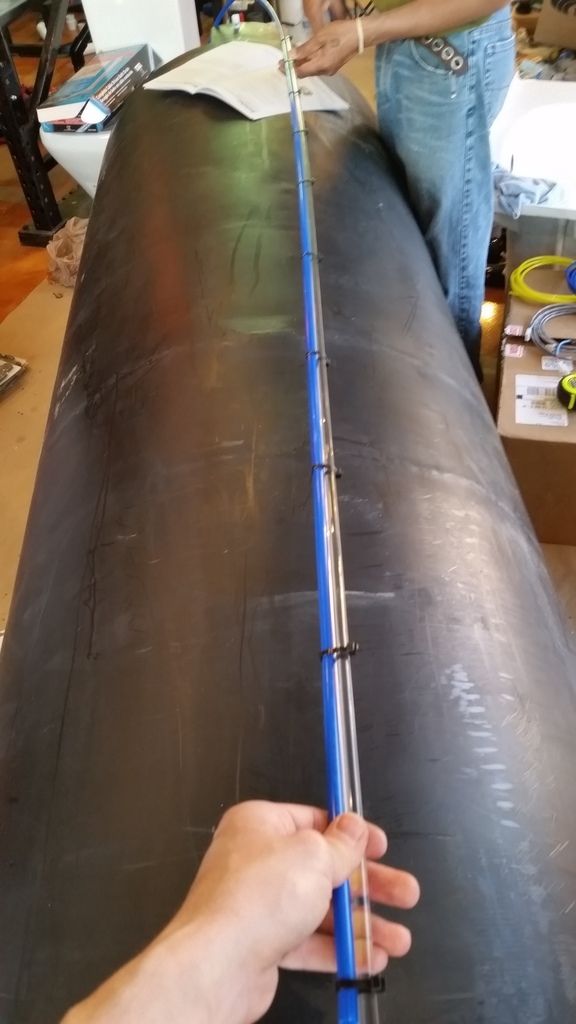
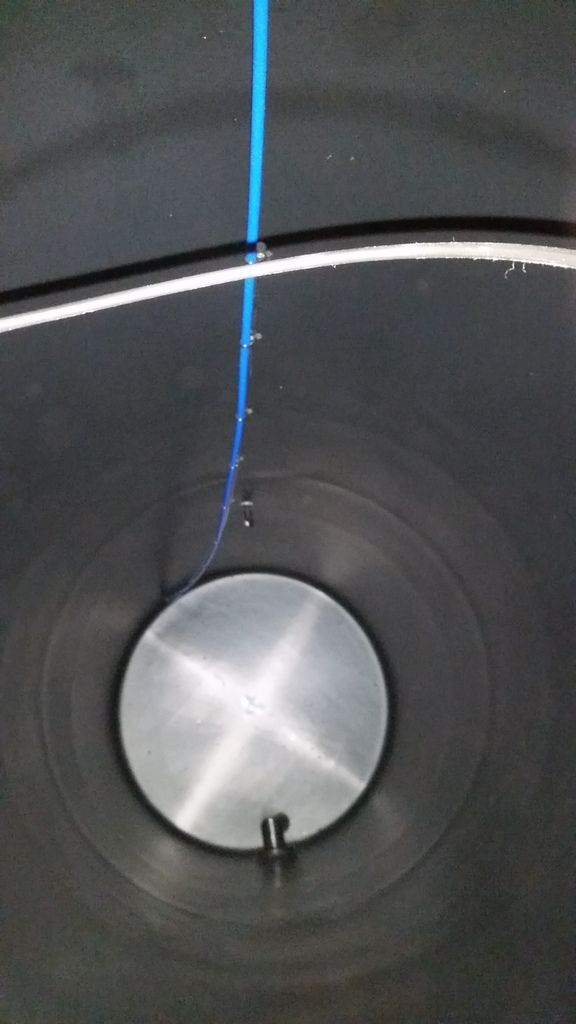
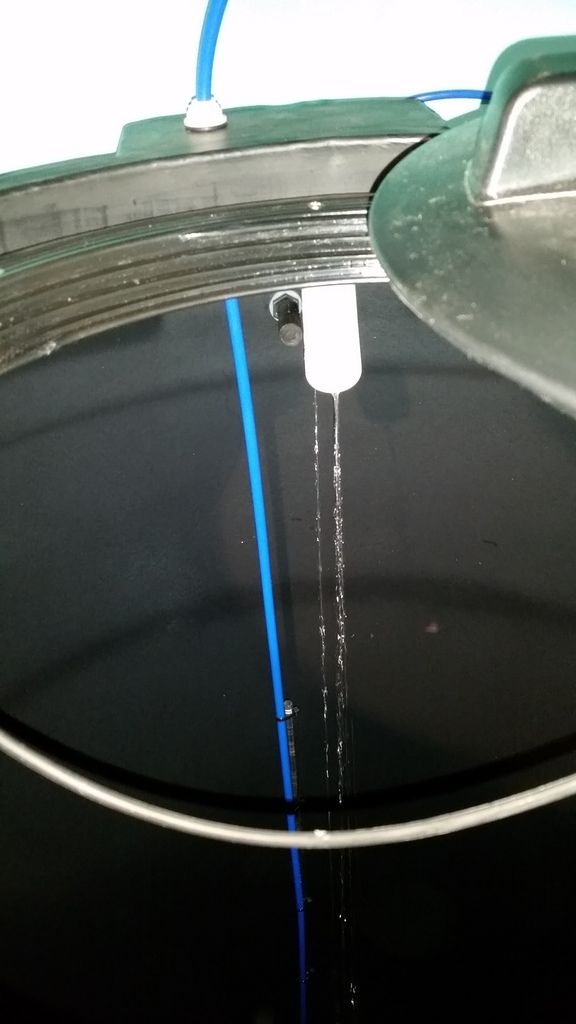
Pure water feed for the awesome Spectrapure RO system that was ordered. At the end of filling up the fresh water container, and periodically during operation, this system actually draws up fresh RODI water from the fresh water container to "pickle" the membrane for future use.. this eliminates any TDS creep that you would normally see with an R.O. system.. To keep the line from curling up inside the 8' tall barrel, we used a piece of spare acrylic rod and zip tied the 3/8 line to it.
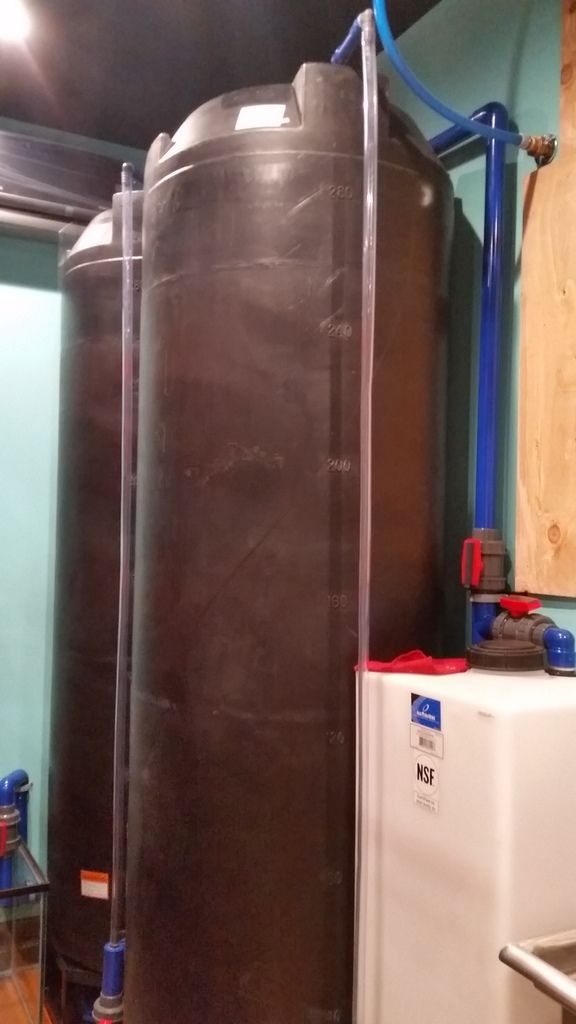
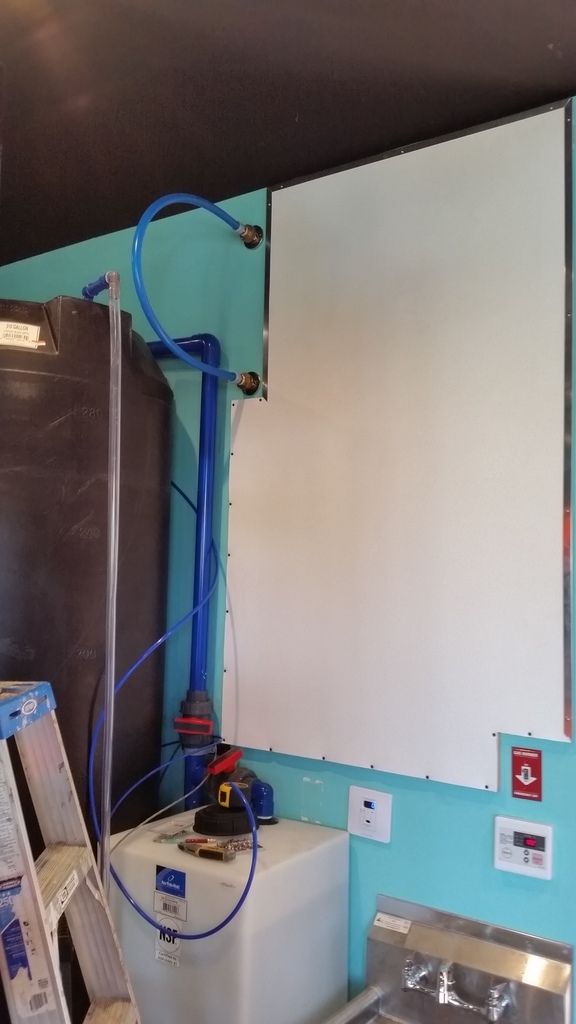
Top of the water change system.. this is 10' up in the air. Notice the 2-3" clearance between the mini split AC unit and the top of the barrel.. tight tight tight spacing for this entire project..
Water change station.. almost done..
Needed space to mount the RO system, and future recirculating heat system, with LOTS of plumbing in the wall directly behind.. So.. this piece of plywood will serve a very useful job, providing us a medium to screw into.
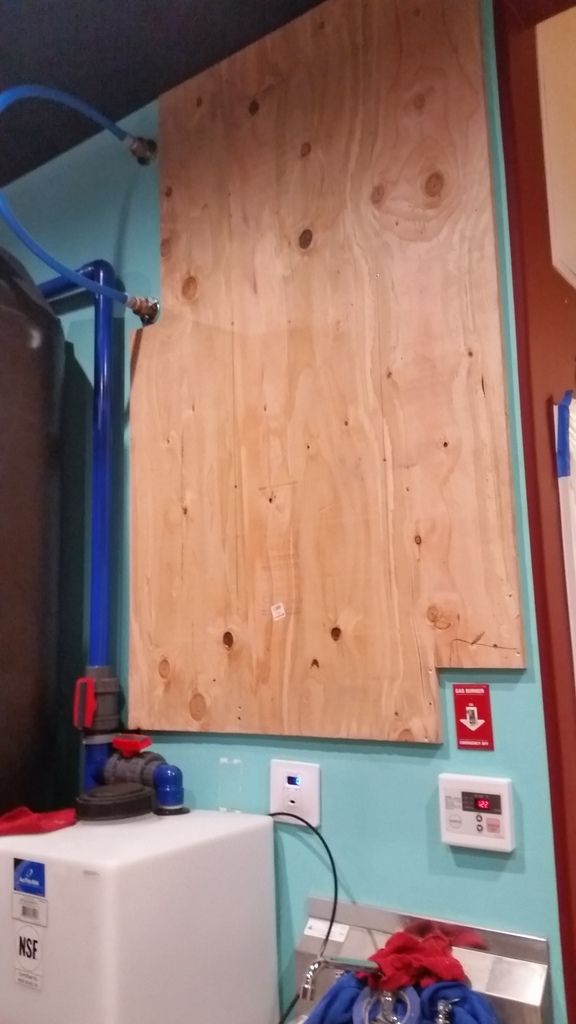
Starting to make some water.. tanks are so close to getting wet!!
Time to wrap the plywood and make it look pretty and durable. We used "polywall" utility paneling.. It's almost like FRP, and is pretty resilient, durable, and waterproof. We then framed the edges with aluminum trim for a cleaner look. Can't believe it, but we don't have a picture of it all completed.. Will have to take one.

RO system temporarily mounted, and starting to make a small batch of salt water.. With this water change system design, we can quickly open up a 200 gallon box of IO, grab a 50 gallon bag, and just dump it in, without having to measure out the correct amount of salt. The little white barrel wasn't absolutely necessary, but the alternative would have been climbing a ladder about 9 feet to dump salt into the top of the black barrel... No thanks.
Went with an amazing Spectrapure UHE system.. 1:1 ratio, 100 gpd, comes with booster pump, computer controlled auto flush, and high/low floats already included. Was originally going to DIY a system using an Apex with solenoids and floats.. but why reinvent the wheel when something like this is already available in an easy-to-install package.. 420 TDS coming in, 3 TDS coming out of the membrane (99%+ rejection rate).. We expect this DI resin to last A REALLY LONG time.. Sweet!!

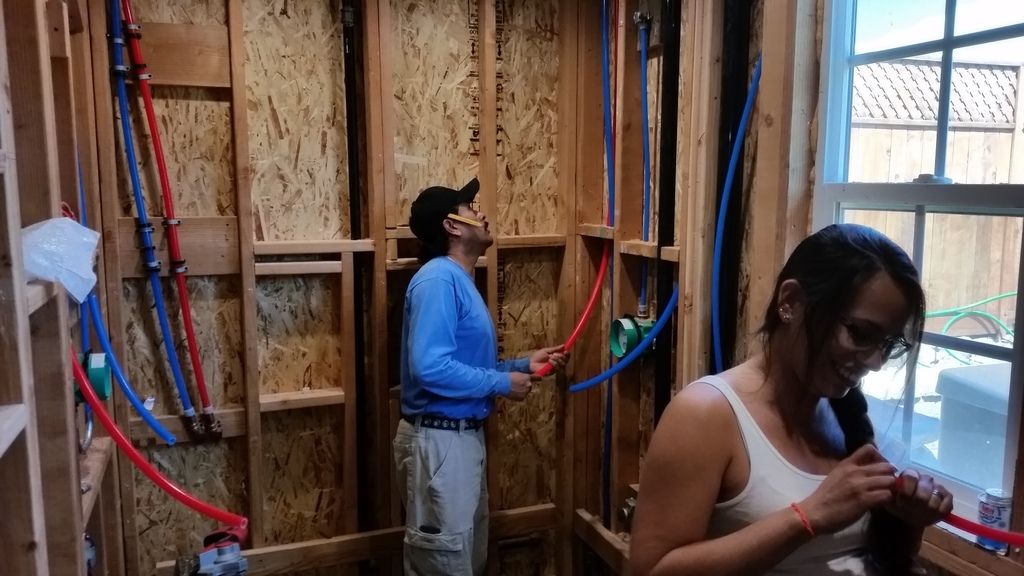
Starting to work on the bathroom.. this photo was taken 4 days before our baby girl was born..
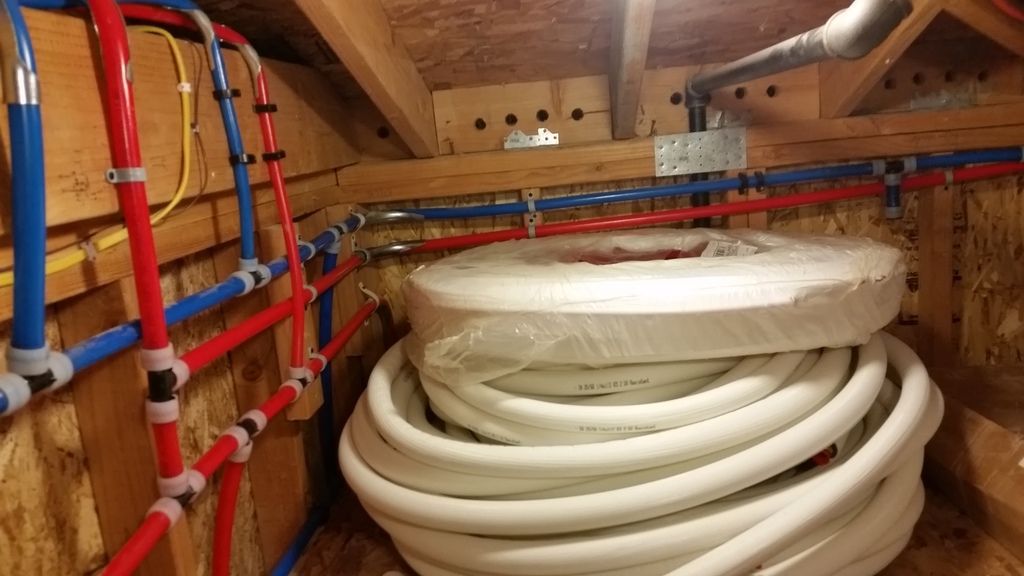
Plumbing up in the attic.. excuse the mess.. The white coiled up tubes are the copper line sets for the AC units that still need to be installed, before summer comes!
And that's it for now guys.. still a work in progress, but slowly getting there.. in between the 2-3 hour newborn feeding sessions..
Went with 1.5" .250 wall thickness steel tubing. 267 lbs for just the steel. A bit overkill, but we figured with over 5,000 lbs of water, we didn't want to take any chances.
Don't have any experience with metal fabrication, etc... so.. next hurdle: trying to figure out how to cut the tubing!
A 14" abrasive disc saw was hardly tickling the steel.. and after 10 minutes, was about a quarter of the way through. Looked like the steel was being tempered more than anything..
Got a new toy.. a slow (relatively speaking) cutting miter saw..
A cut that took about 10 seconds or less. Good enough for this project!!
Our first attempt at building a steel stand..
Temporary tack welding
A quick mock up..
Literally, hours of brain power wasted trying to figure out how in the world to fit all the plumbing, valves, and pump, into a tiny space.
Okay, for real this time..
More tack welding
Another mock up...
Afterwards, everything was taken to my very helpful neighbor across the street who laid down some very serious welds with his huge MIG.. Afterwards, primed, and painted.. and voila! Was actually a fun project and we're confident this thing can survive an earthquake..
Next dilemma.. a smaller water storage container to fit between the containers that are now 4" larger than expected, and the already-installed stainless sink... Ugh.
A few days or searching and we decided on a 55 gallon Ace Rotomold. 18" x 18" x 44" tall, with expensive shipping, like last time.. Ugh.
Making a little stand for it..
So cute..
One of four pex heating loops that will be going into the sumps. This Pex-Al-Pex stuff is actually pretty cool!
Another huge pex loop.. Still need to finalize the system design and order the necessary components to put this into action.,
An updated sump/plumbing photo.. excuse the dirty floors.
Water testing the jetted tub..
Time to plumb the water change station.
Pure water feed for the awesome Spectrapure RO system that was ordered. At the end of filling up the fresh water container, and periodically during operation, this system actually draws up fresh RODI water from the fresh water container to "pickle" the membrane for future use.. this eliminates any TDS creep that you would normally see with an R.O. system.. To keep the line from curling up inside the 8' tall barrel, we used a piece of spare acrylic rod and zip tied the 3/8 line to it.
Top of the water change system.. this is 10' up in the air. Notice the 2-3" clearance between the mini split AC unit and the top of the barrel.. tight tight tight spacing for this entire project..
Water change station.. almost done..
Needed space to mount the RO system, and future recirculating heat system, with LOTS of plumbing in the wall directly behind.. So.. this piece of plywood will serve a very useful job, providing us a medium to screw into.
Starting to make some water.. tanks are so close to getting wet!!
Time to wrap the plywood and make it look pretty and durable. We used "polywall" utility paneling.. It's almost like FRP, and is pretty resilient, durable, and waterproof. We then framed the edges with aluminum trim for a cleaner look. Can't believe it, but we don't have a picture of it all completed.. Will have to take one.
RO system temporarily mounted, and starting to make a small batch of salt water.. With this water change system design, we can quickly open up a 200 gallon box of IO, grab a 50 gallon bag, and just dump it in, without having to measure out the correct amount of salt. The little white barrel wasn't absolutely necessary, but the alternative would have been climbing a ladder about 9 feet to dump salt into the top of the black barrel... No thanks.
Went with an amazing Spectrapure UHE system.. 1:1 ratio, 100 gpd, comes with booster pump, computer controlled auto flush, and high/low floats already included. Was originally going to DIY a system using an Apex with solenoids and floats.. but why reinvent the wheel when something like this is already available in an easy-to-install package.. 420 TDS coming in, 3 TDS coming out of the membrane (99%+ rejection rate).. We expect this DI resin to last A REALLY LONG time.. Sweet!!
Starting to work on the bathroom.. this photo was taken 4 days before our baby girl was born..
Plumbing up in the attic.. excuse the mess.. The white coiled up tubes are the copper line sets for the AC units that still need to be installed, before summer comes!
And that's it for now guys.. still a work in progress, but slowly getting there.. in between the 2-3 hour newborn feeding sessions..

[MENTION=3291]bvysochin[/MENTION] this update has been worth the wait. First congrats to you and your wife on the new baby girl! This is going to be a great year for you guys. And with this thread, I think I have seen everything. That bath tub is great touch. Nothing better then soaking in a hot bath while admiring your marvelous creation. Cant wait for this thing to get wet.