Smite's UNS 75g Peninsula
- Thread starter Smite
- Start date
View attachment 78987
View attachment 78986
View attachment 78988
Euro hinges are a pain but that quiet close is sweet
Euro hinges are a pain but that quiet close is sweet
Sent from my iPhone using Tapatalk
So I've been going back and forth with ideas and not really getting anywhere but finally pulled the trigger on what I think will work well for management and ventilation under the tank, so I should be getting my first coat of primer on tomorrow morning 
I ended up making my front section a separate cabinet. I'm going to add a few shelves for test kits, frag supplies ect.
 20200925_191202
I decide go with active cooling/venting under the tank. I've added a false ceiling with cutouts for my fans/grills. I've also framed and connected my electrical compartment to this so it directly vents out the top of the stand slots.
false ceiling/fan cutouts/electrical compartment on right hand side.
 20200925_190909
Inside the false ceiling
 20200925_190949
The door to the electrical compartment pulls away and will be held with magnets. My plan is to mount my mp40 controllers to the front and my m2(or varios6) controller. My apex display will be mounted somewhere above, either to the external over flow skin or my floating canopy for easy access.
 20200925_191014
I ended up making my front section a separate cabinet. I'm going to add a few shelves for test kits, frag supplies ect.
I decide go with active cooling/venting under the tank. I've added a false ceiling with cutouts for my fans/grills. I've also framed and connected my electrical compartment to this so it directly vents out the top of the stand slots.
false ceiling/fan cutouts/electrical compartment on right hand side.
Inside the false ceiling
The door to the electrical compartment pulls away and will be held with magnets. My plan is to mount my mp40 controllers to the front and my m2(or varios6) controller. My apex display will be mounted somewhere above, either to the external over flow skin or my floating canopy for easy access.
2 coats of alkyd paint down, takes forever to cure though so I still gotta hit the inside of the doors. I put the doors on prematurely so I'm going to have to do some touch up there, also a bird shit on one of the doors while it was drying I doubt that'll be cleanable since it was just barely dry when it happened. I f***in hate painting lol.
Other than that I'm very happy with the way it came out. Wife pulled out the guns and helped me get it on the stand too, propers to her. That was quite a lift for her!
 20200930_175829 by matthew schueneman, on Flickr
 20200930_181941 by matthew schueneman, on Flickr
 20200930_182314 by matthew schueneman, on Flickr
I doubt that'll be cleanable since it was just barely dry when it happened. I f***in hate painting lol. Other than that I'm very happy with the way it came out. Wife pulled out the guns and helped me get it on the stand too, propers to her. That was quite a lift for her!
Looks great man! I really like it. Can’t wait to see what you do with it.
HAPPY REEFING!
HAPPY REEFING!
Looking good Matt 👍🏻
Such a cool build! Glad you are posting everything!
How did you make the doors?
Sent from my Pixel 2 using Tapatalk
How did you make the doors?
Sent from my Pixel 2 using Tapatalk
@sorinwilcox I should have taken more pictures of building the doors themselves. I watched a bunch of home kitchen cabinet DIY videos until I found a method I was confident I could do. My one mistake was not taking the time to rabbit the 1/4 panels into the frame. I just placed 1/4" ply on the back thinking it would cover my screw holes but overlooked the fact that I can now see the seam between the door and the stand. Not a big deal but I'd do it differently next time.
But in short I used a pocket jig to screw (also wood glue) 1x3 poplar pieces together. I then took the same router bit I used on my top and bottom trim and hit the outer and inside edges of the frames. I glued and nailed the 1/4" sanded plywood to the back of the frames. I thought about frosted glass or plexi but my kids would destroy that for sure. Then it was just a matter of sanding and taking the 35mm bore to the back for the soft close hinges.
I took the rabbit bit (I should have used earlier) to create the finger grooves or grab points on the back side that double as air inlet/outlets for the ventilation slits I cut.

Day to day I go back and forth between sand or BB. I went to pull the trigger on some Tropic Eden reef flakes or meso flakes but everywhere appears to be sold out. I had some acrylic from when I was going to make a false wall on this tank and started to form an idea for a "low-pro" wrasse bed. If i go this route I'm going to put a small trim on it to keep as much sand in as possible. I'd basically silicone this in place and build a small rock wall off/ around it to make it less noticeable/square.
This measures 12" long x 4" off back wall x 3" deep. It would be home to my blue star and moyeri leopard wrasse. White is what I had on hand, but I almost thing clear could be very cool and less noticeable once filled with sand?
 20201007_200457
.
 20201007_200441
I feel like it doesn't take up much room since a 1/4 of it is under my overflow. It will be accesible to siphon but I'll also be placing either a gyre or my Tunze stream 3 blowing just over it so hopefully it wont turn into a detritus trap.
Thoughts?
This measures 12" long x 4" off back wall x 3" deep. It would be home to my blue star and moyeri leopard wrasse. White is what I had on hand, but I almost thing clear could be very cool and less noticeable once filled with sand?
.
I feel like it doesn't take up much room since a 1/4 of it is under my overflow. It will be accesible to siphon but I'll also be placing either a gyre or my Tunze stream 3 blowing just over it so hopefully it wont turn into a detritus trap.
Thoughts?
I doubt detritus would be an issue if your wrasses are sleeping in it. They're stir up the sand when they burrow.
That's a pretty neat idea especially if you can incorporate it into your scape to hide it!
Your build is coming along great! I love the look of the FW rimless tanks.
That's a pretty neat idea especially if you can incorporate it into your scape to hide it!
Your build is coming along great! I love the look of the FW rimless tanks.
Well it's up and running, partially. I broke my CARX and am waiting on replacement parts for GEO. I haven't had to dose in a looooong time. Can't wait to get the reactor back on line. Everything fit so far. I'm going to run my seaside aquatics chaeto reactor so the first section of my sump can be a frag tank.
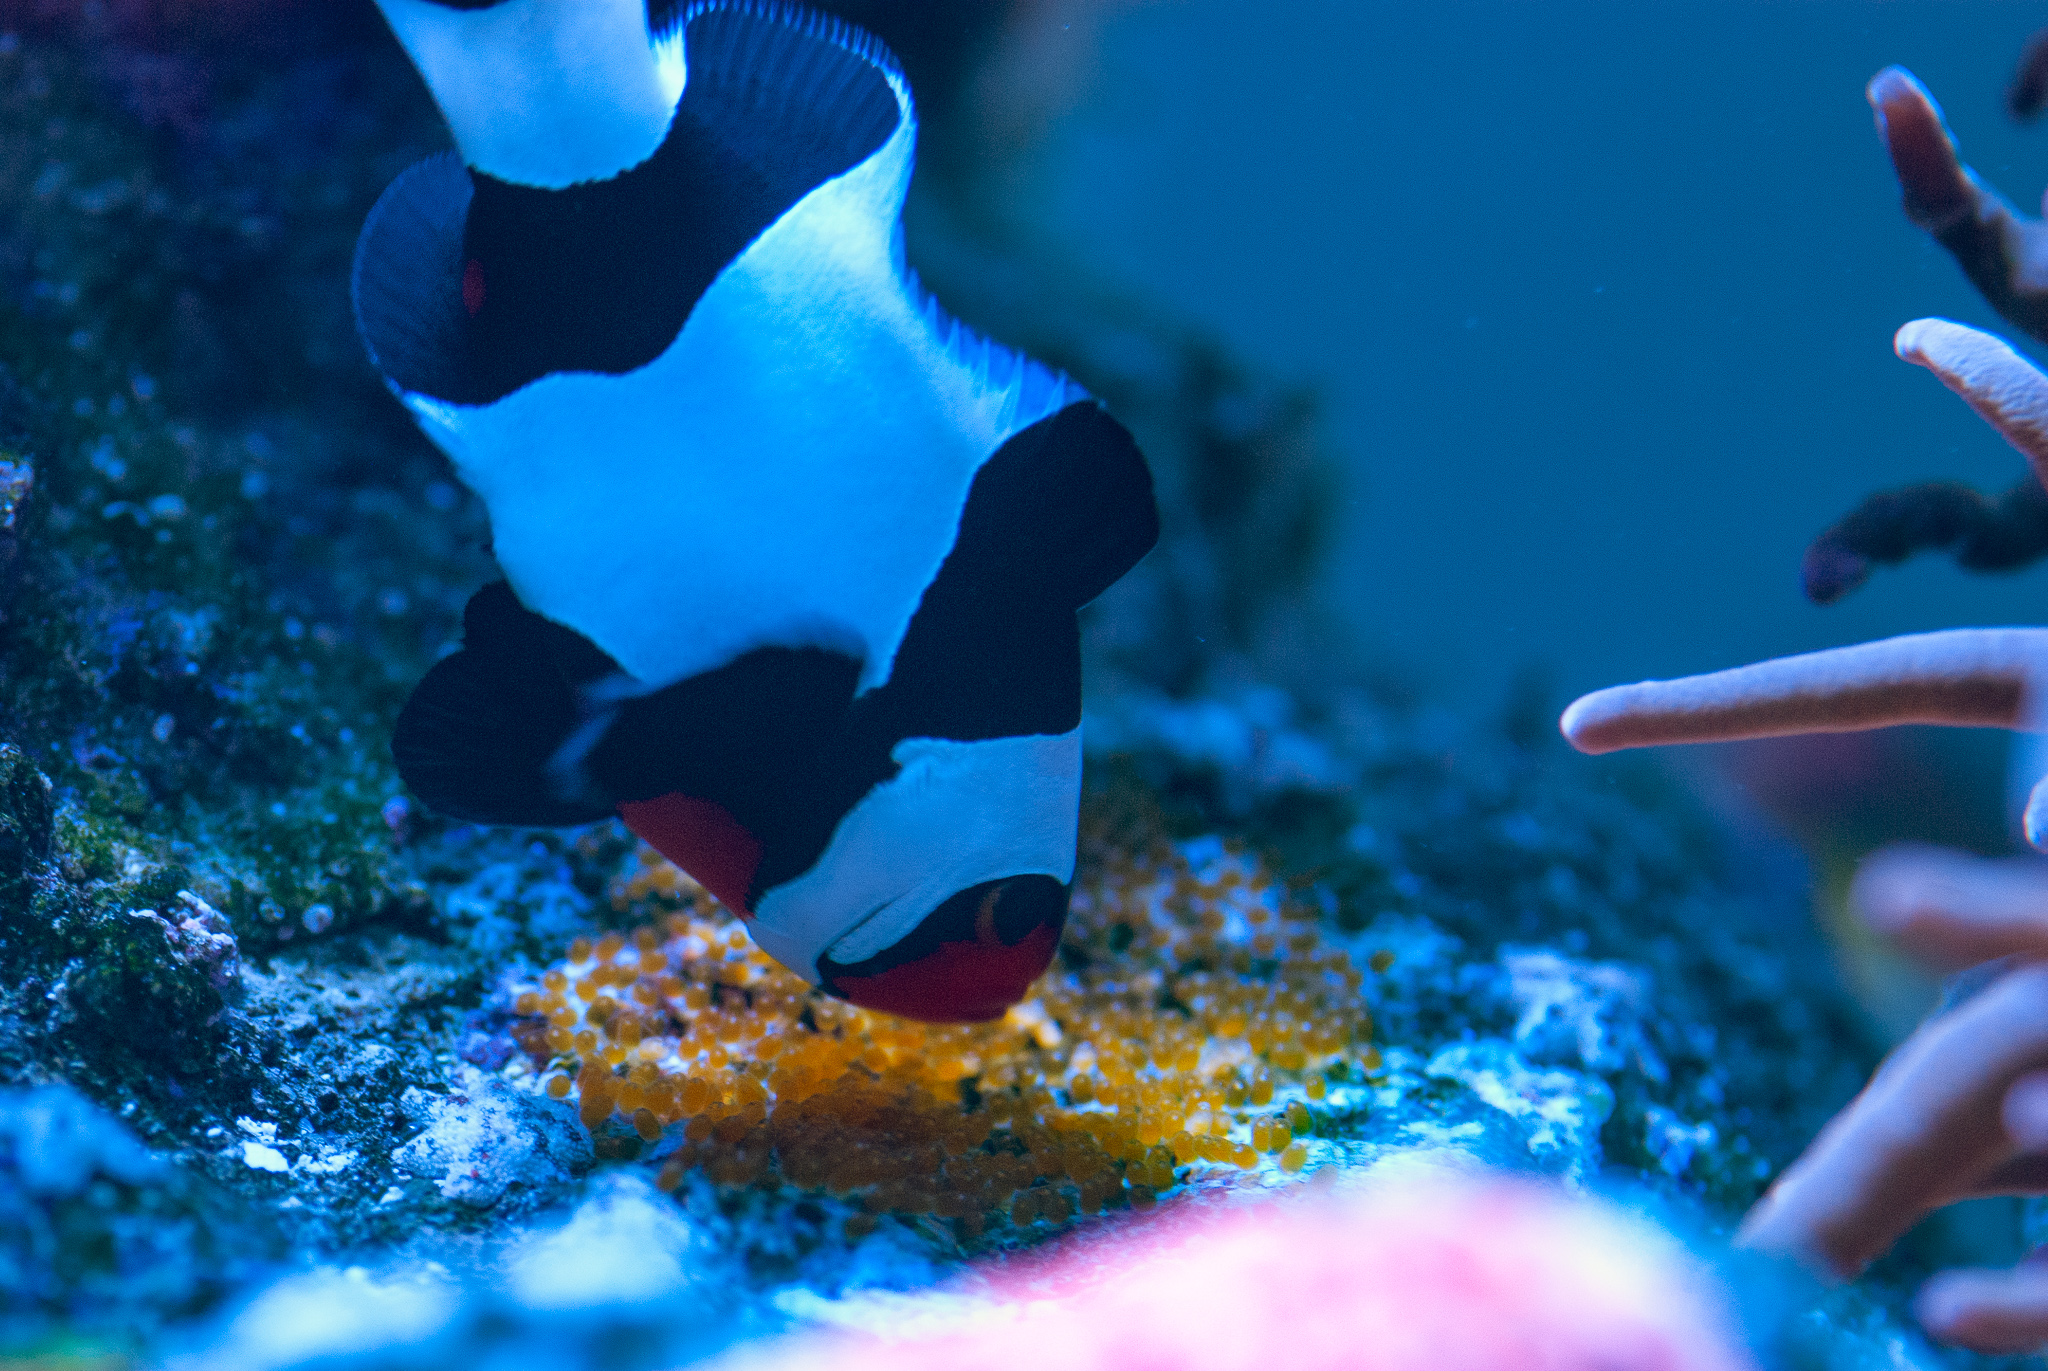
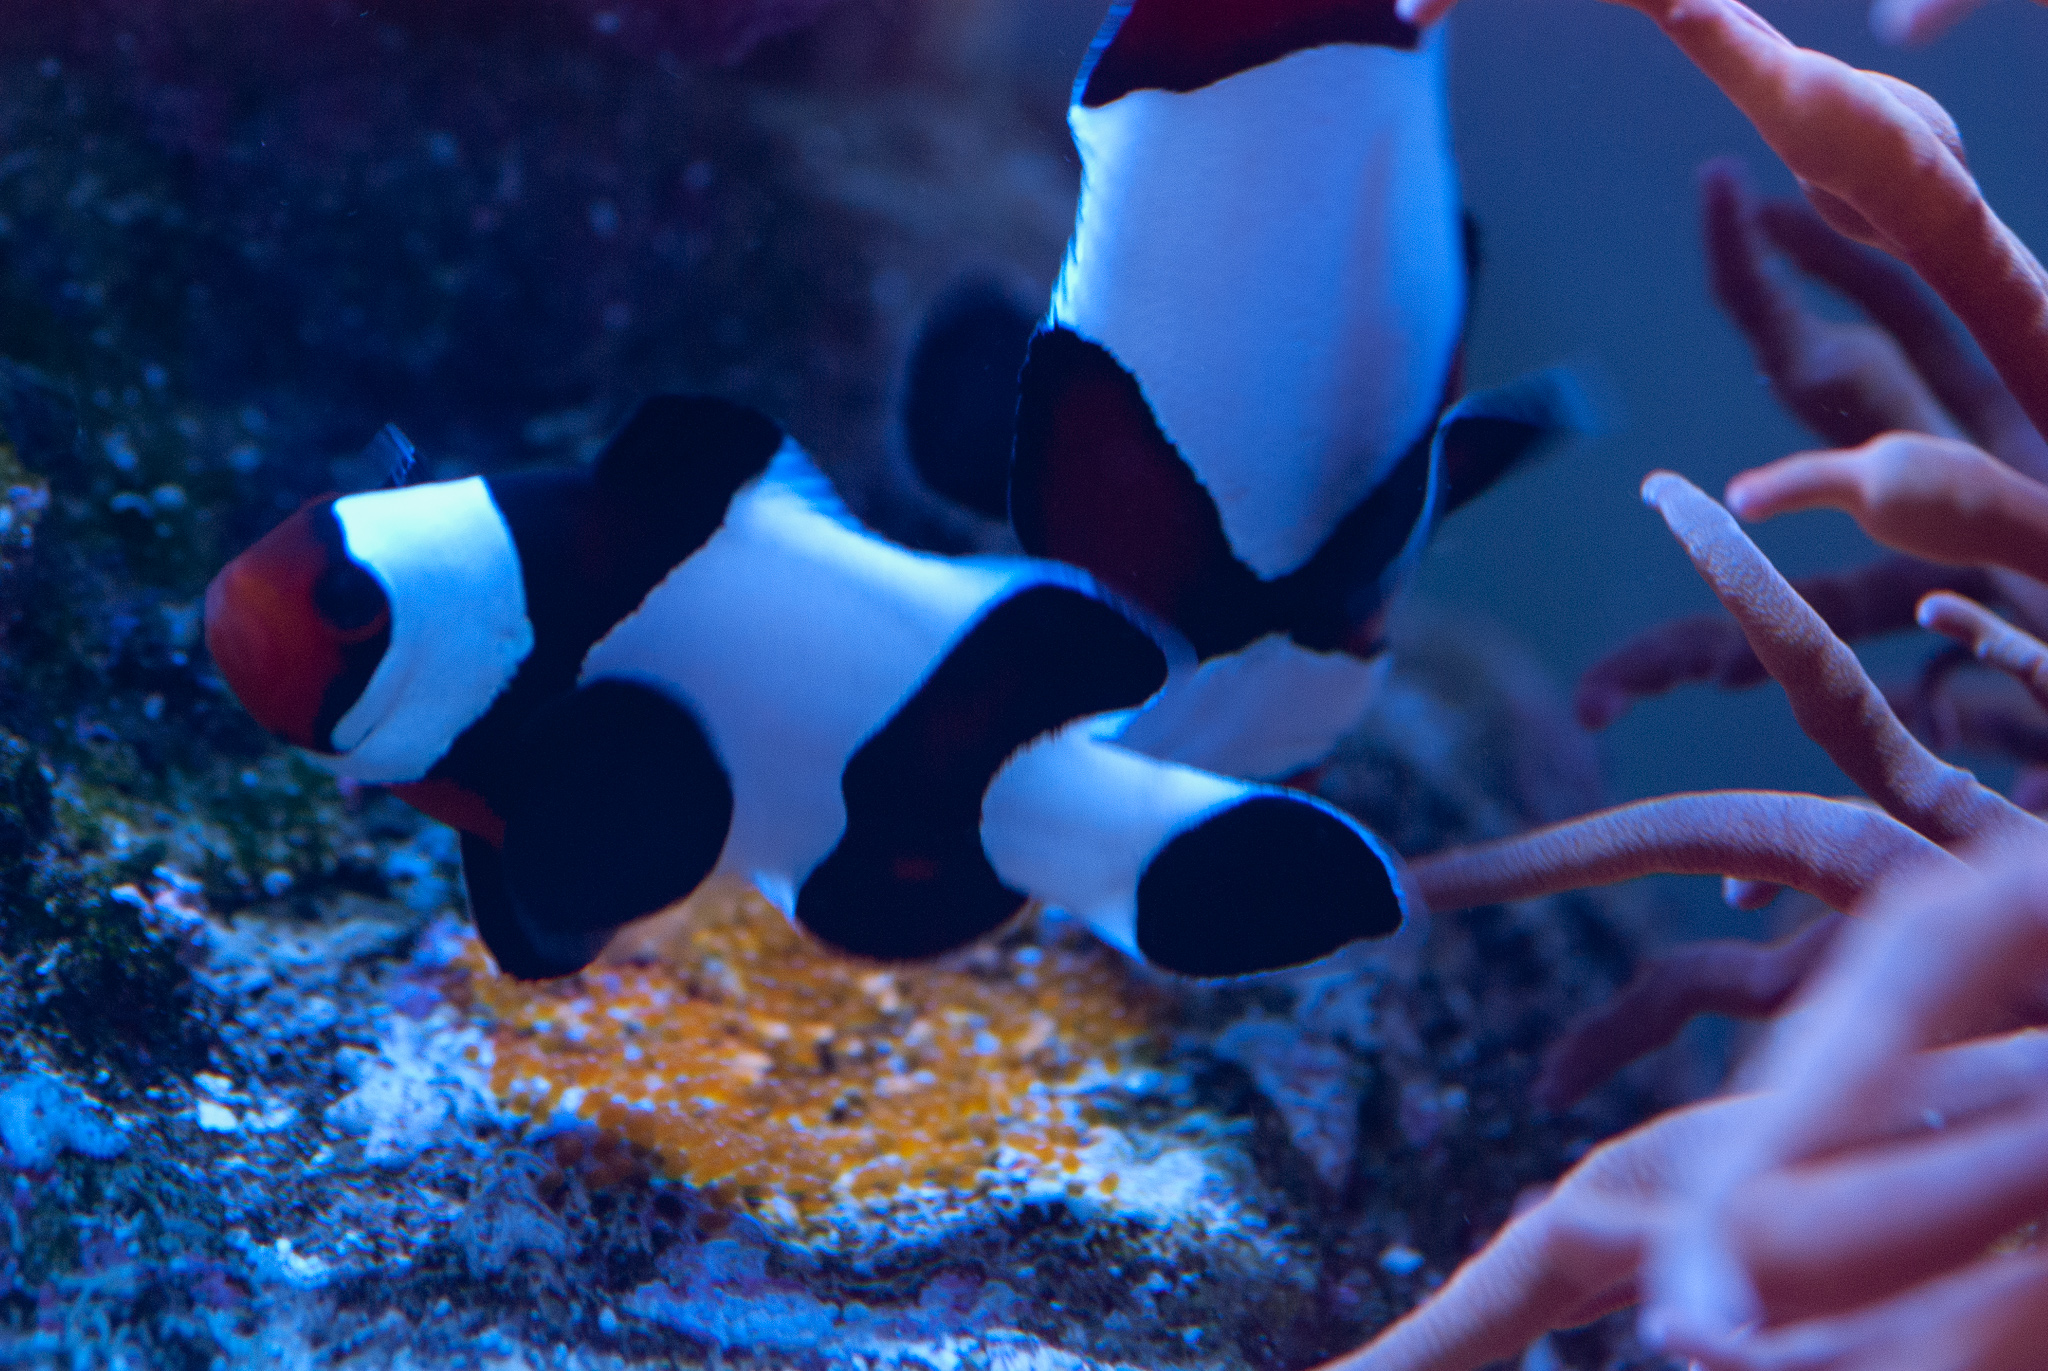
I'm trying to accept the fact that my clowns and anemone just aren't gonna go with the layout of this tank. Barebottom + nem is gonna be a disaster waiting to happen. With space being limited I want to focus on some higher end sps and don't want to risk it. They are gorgeous and constantly spawning now, so it's a bummer. I'm trying to push for a second nem dominant nano but we will see.
These were laid right before the transfer, survived but then I think the cuc took them out.
My white tail tang and 1.4 sunset anthias made it through my QT and were acclimated and just dropped in today. That makes the current fish list:
 20201027_125757
1.4 sunset anthias
white tail tang
blue star leopard - transitioning
moyeri leopard
cleaner wrasse
bangaii cardinal
All i really want to add now is a flasher wrasse or possibly a pintail fairy. I'd like some type of fire fish but not sure it'd hang with the flow.
I'm trying to accept the fact that my clowns and anemone just aren't gonna go with the layout of this tank. Barebottom + nem is gonna be a disaster waiting to happen. With space being limited I want to focus on some higher end sps and don't want to risk it. They are gorgeous and constantly spawning now, so it's a bummer. I'm trying to push for a second nem dominant nano but we will see.
These were laid right before the transfer, survived but then I think the cuc took them out.
My white tail tang and 1.4 sunset anthias made it through my QT and were acclimated and just dropped in today. That makes the current fish list:
1.4 sunset anthias
white tail tang
blue star leopard - transitioning
moyeri leopard
cleaner wrasse
bangaii cardinal
All i really want to add now is a flasher wrasse or possibly a pintail fairy. I'd like some type of fire fish but not sure it'd hang with the flow.

