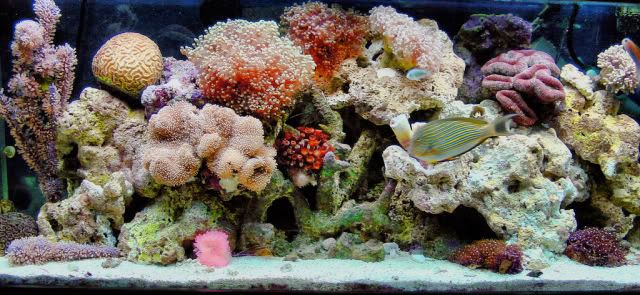
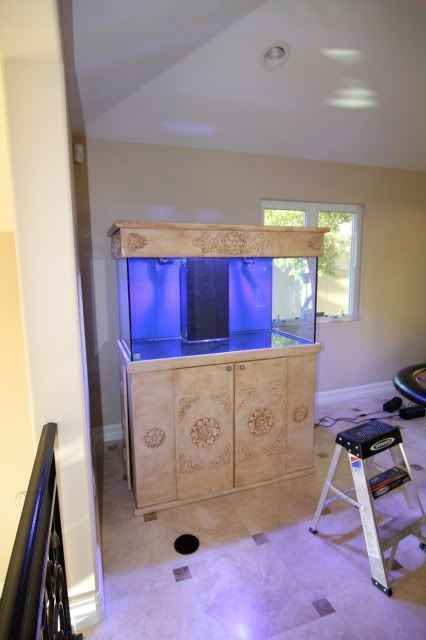
:hello: Hello everyone. Well I used to have my tank set up and everything was fine but we moved to a bigger house and i had to take everything apart and sell off all my livestock during the move.
Here's what it used to look like:
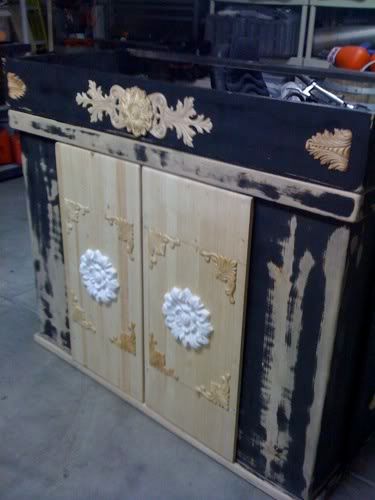
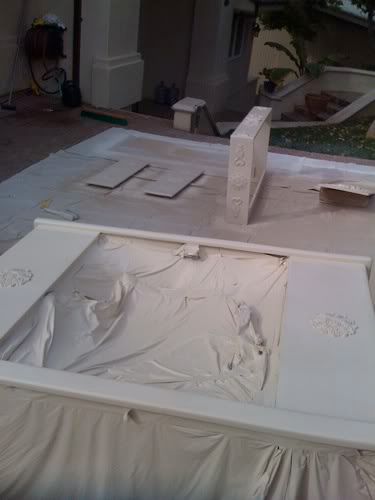
Everything sat in the garage empty for 3 years untouched and collecting dust and finally i decided i couldn't live without my tank anymore. The only catch was that I wanted my tank to match the rest of my house. so i decided to give it an antique faux finish. As a solid black cabinet, it stood out terribly and looked awful. This way it blends in with the rest of the furniture.
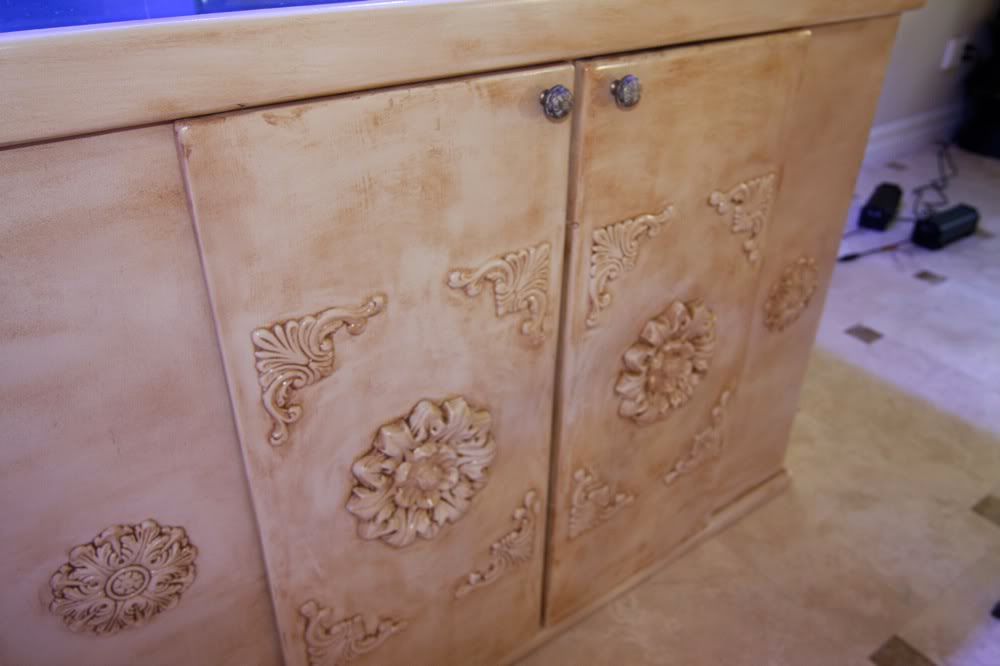
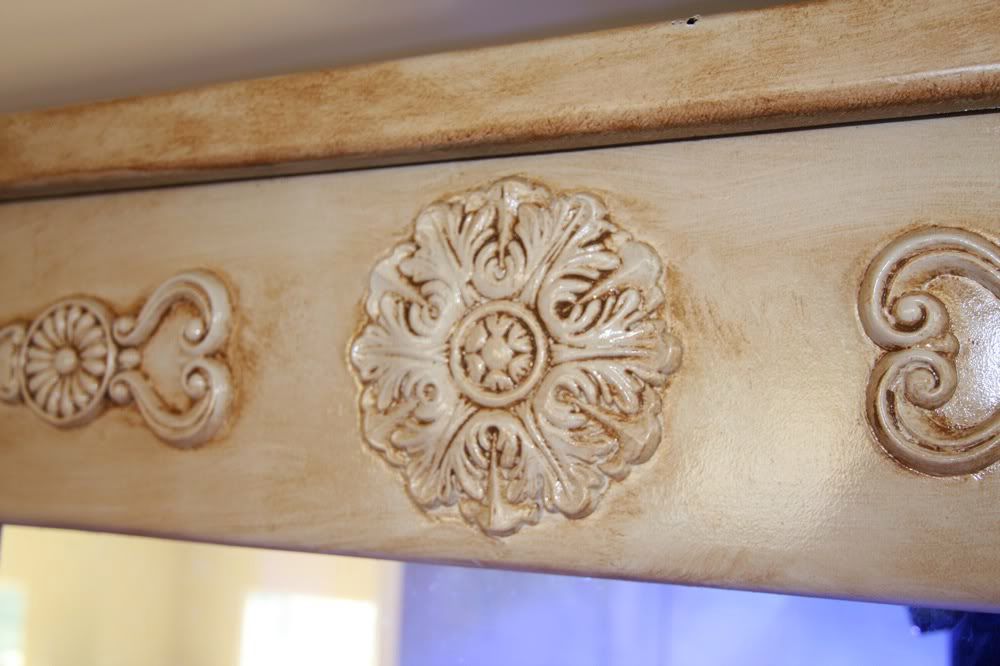
First thing i changed was to get rid of the two silly tiny doors on the front that were separated by an 8 inch wall. I used 3/4" hard wood (no ply wood) from home depot to make the two large doors you see on the front. then, using a micro nail gun and glue, i added moldings and overlays to all the doors and all over the place after sanding the whole thing. I got all the overlays from Superior Molding in Van Nuys. Pricey, but nice and i think worth it when its all done and painted.
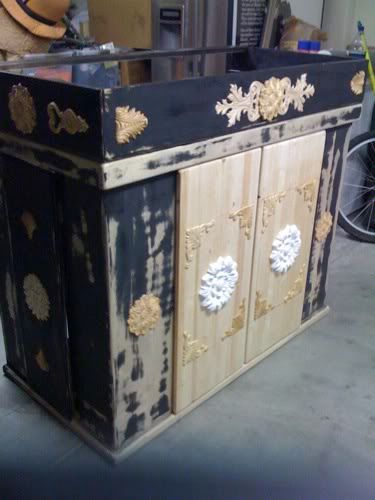
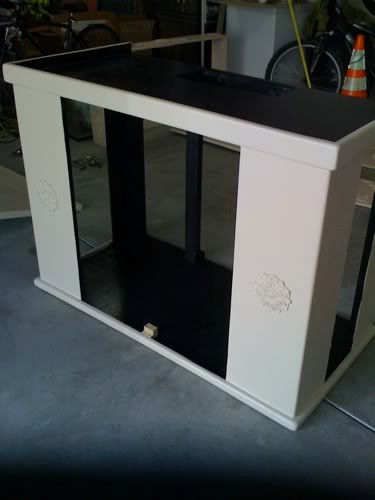
So then a nice base coat over everything:

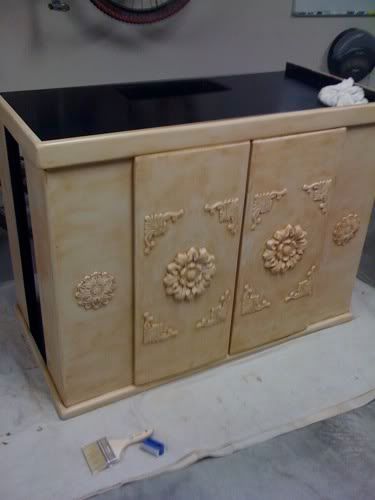
i used black water proof exterior paint for the inside of the cabinet and the backsides of the doors
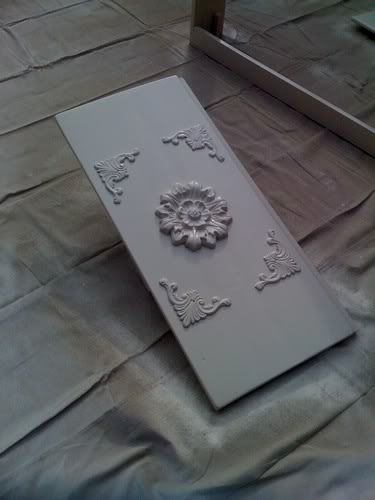
Finally, the antique finish. I picked a very dark brown latex paint, mixxed it with Faux Finish Glaze. (1 part paint : 3 parts glaze), and using natural bristle brushes and moist towels, i gave it the antique finish. Basically you smear the dark paint on and rub it off. Wherever the molding is carved, the dark color stays in the crevices. The longer you let it dry before wiping off, the more prominent the effect. The whole cabinet took me about 3 hours to do. I am by no means a professional, so it was mostly trial and error. I probably wiped it on and off a thousand times before it started to look like how it does now.
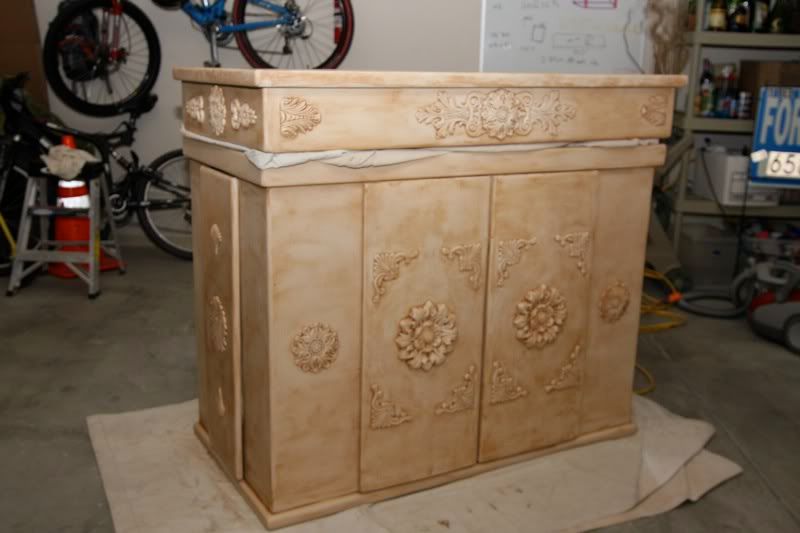
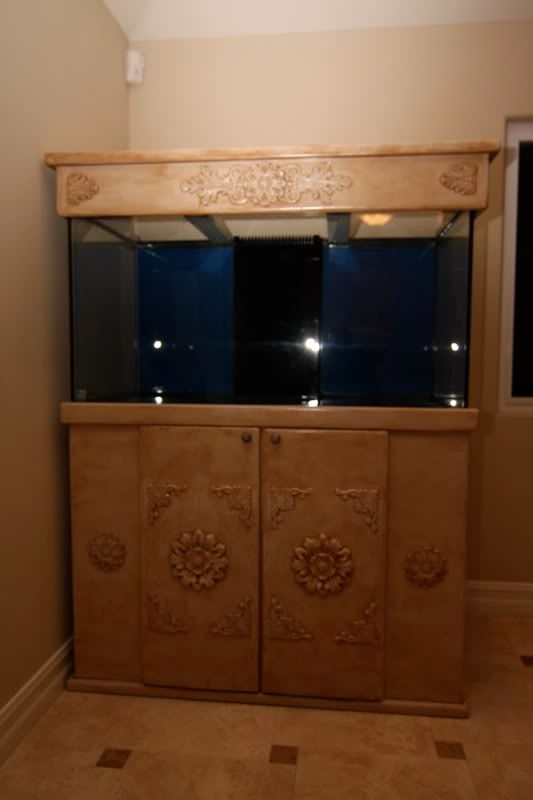
Several coats of clear coat, and its done!
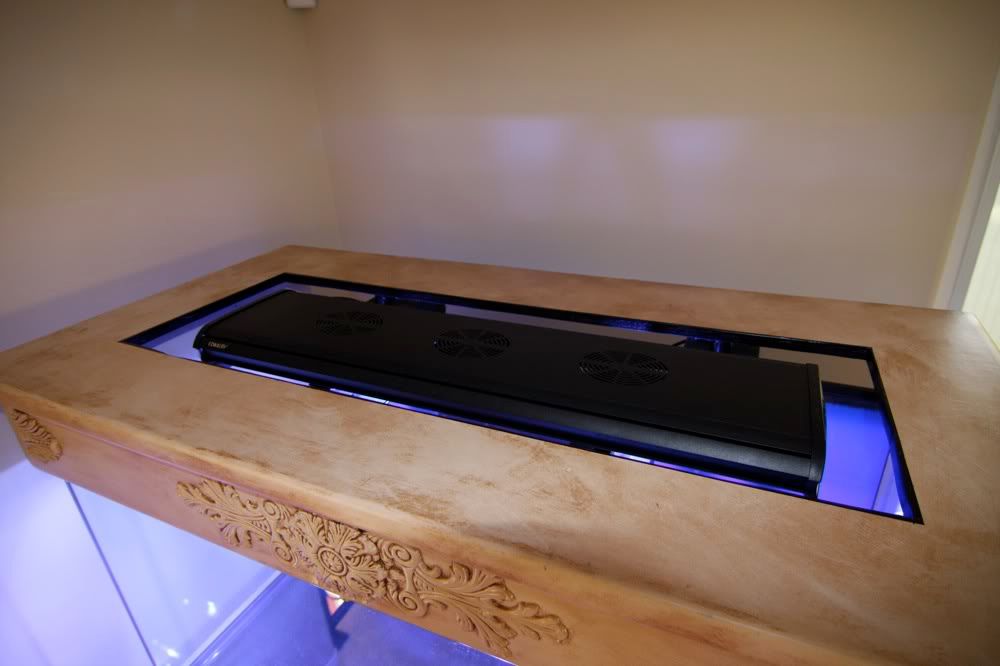
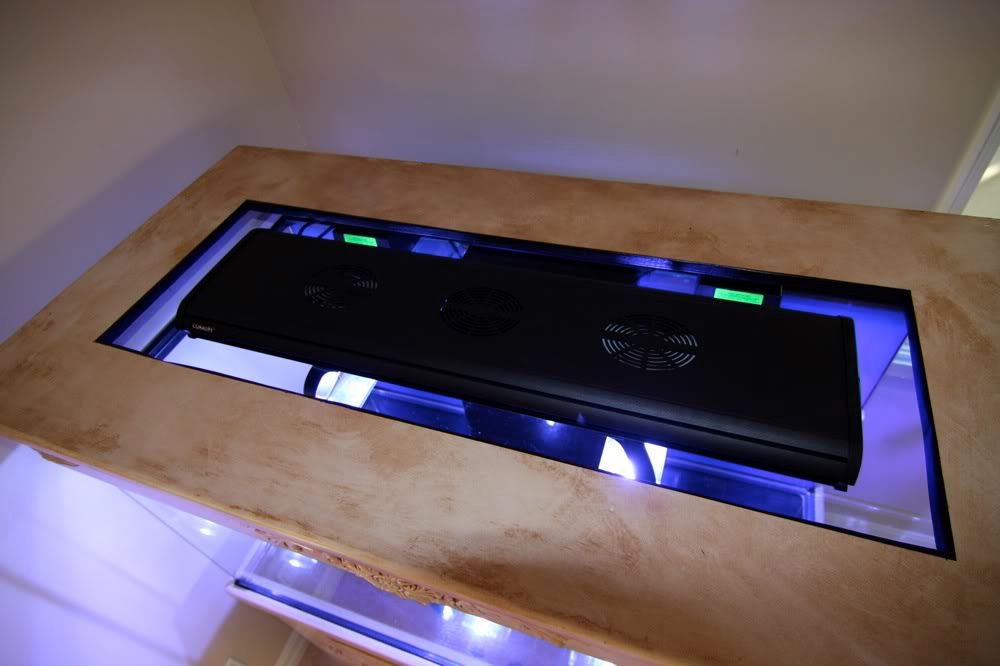
Ordered a new metal Halide light fixture and was bummed when i read in the instructions "should not be used with a canopy"
Here i spent a friggin month making this thing....and now i cant use it? No sir. That's not gonna work for me. So i decided to cheat and make a hole in the top of the canopy. Technically i should be ok now, but i will be monitoring heat levels in the next few weeks to see if its safe or not. Should be fine though....
So thats it for the paint.
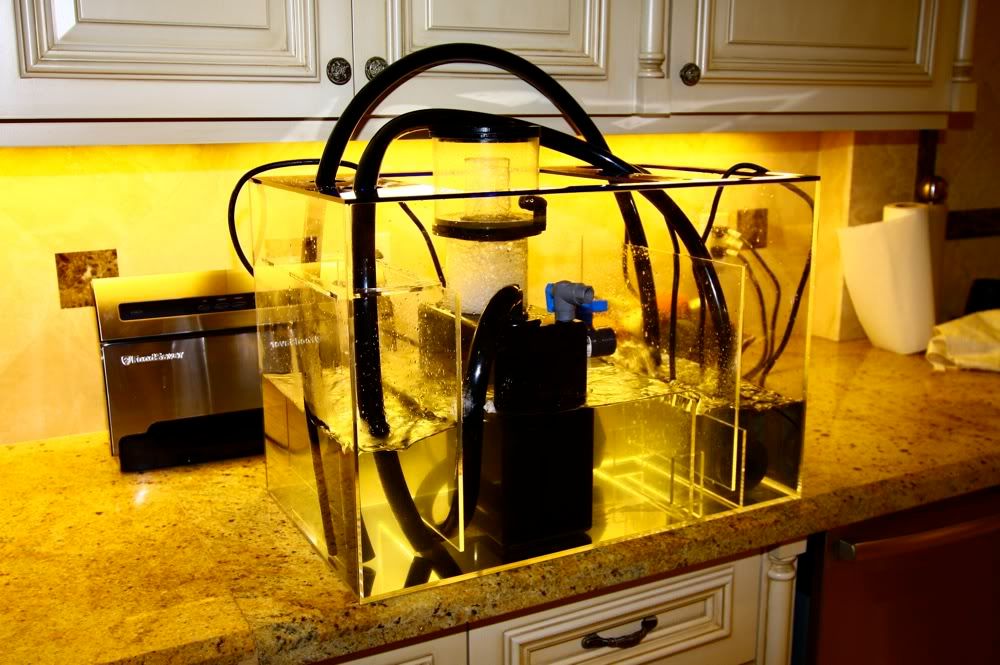
Im still waiting on some parts to arrive that are plumbing related. so while im waiting i decided to clean my skimmer and pumps and test em out to see if they're still working. Theyve been in storage for 3 years.
I put the return pumps, my skimmer/its pump all into a sump to have it all run together make sure everything works.
I used 1/3rd a cup of orange juice to simulate organic waste.
Skimmer still works like a charm. I am very pleased. It removed all the orange juice in about 2.5 hours.
So everything is working nice and its basically just a waiting game. Sitting here waiting on some parts. Will keep you guys posted with any updates.
-Todd
Here's what it used to look like:
Everything sat in the garage empty for 3 years untouched and collecting dust and finally i decided i couldn't live without my tank anymore. The only catch was that I wanted my tank to match the rest of my house. so i decided to give it an antique faux finish. As a solid black cabinet, it stood out terribly and looked awful. This way it blends in with the rest of the furniture.
First thing i changed was to get rid of the two silly tiny doors on the front that were separated by an 8 inch wall. I used 3/4" hard wood (no ply wood) from home depot to make the two large doors you see on the front. then, using a micro nail gun and glue, i added moldings and overlays to all the doors and all over the place after sanding the whole thing. I got all the overlays from Superior Molding in Van Nuys. Pricey, but nice and i think worth it when its all done and painted.
So then a nice base coat over everything:
i used black water proof exterior paint for the inside of the cabinet and the backsides of the doors
Finally, the antique finish. I picked a very dark brown latex paint, mixxed it with Faux Finish Glaze. (1 part paint : 3 parts glaze), and using natural bristle brushes and moist towels, i gave it the antique finish. Basically you smear the dark paint on and rub it off. Wherever the molding is carved, the dark color stays in the crevices. The longer you let it dry before wiping off, the more prominent the effect. The whole cabinet took me about 3 hours to do. I am by no means a professional, so it was mostly trial and error. I probably wiped it on and off a thousand times before it started to look like how it does now.
Several coats of clear coat, and its done!
Ordered a new metal Halide light fixture and was bummed when i read in the instructions "should not be used with a canopy"
Here i spent a friggin month making this thing....and now i cant use it? No sir. That's not gonna work for me. So i decided to cheat and make a hole in the top of the canopy. Technically i should be ok now, but i will be monitoring heat levels in the next few weeks to see if its safe or not. Should be fine though....
So thats it for the paint.
Im still waiting on some parts to arrive that are plumbing related. so while im waiting i decided to clean my skimmer and pumps and test em out to see if they're still working. Theyve been in storage for 3 years.
I put the return pumps, my skimmer/its pump all into a sump to have it all run together make sure everything works.
I used 1/3rd a cup of orange juice to simulate organic waste.
Skimmer still works like a charm. I am very pleased. It removed all the orange juice in about 2.5 hours.
So everything is working nice and its basically just a waiting game. Sitting here waiting on some parts. Will keep you guys posted with any updates.
-Todd
Last edited:
