Coelli's 65g build

Coelli

Premium Member
Supporter
Joined
Sep 9, 2014
Messages
801
Likes
12
Points
18
Location
Tujunga, CA
#1
Starting the build thread - still in progress but here's where I'm at!

Upgrading from a 29g Biocube. Already outgrew it and while everything is growing and thriving, the glass has some clouding so it gives me a good excuse to upgrade. (My boyfriend said he knew it wouldn't be long :p)

Already purchased/have:
65g glass/Starphire front 36x18x24, corner overflow
2 Kessil A360NEs
Jebao DC6000 return
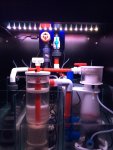
Reef Octopus 110-INT skimmer
ViaAqua Titanium, 300w
2 Jebao WP-10s
Tunze Osmolator Nano ATO
Apex & VDM
JBJ 1/15 chiller, maybe it can keep up!
Fuge light, using a 6500k LED corn bulb from eBay and cheap clip light lamp
Have a JBJ wavemaker kit and a Koralia 425 sitting around in case the WP-10s aren't enough though I'm sure they will be

Still need -
Sump, picking up 20g long tomorrow, then time to measure and get glass cut for baffles. Planning to put fuge on one side rather than in the middle, then tee off the return for flow to the fuge. Picked up a sock holder off eBay already.
Stand is being built, should have in the next week or two (I hope!)
Mounts for the Kessils, will most likely bend electrical conduit and spray it with black appliance paint
3/4" loc-line tee and 3/4-1/2" reducer so I can use my 24" side-outlet flow thing across the back (half pointing down along the rock wall in back, half across the water surface)
Egg crate for the bottom under the sand
More sand and live rock
A sheet of glass or acrylic for the top to keep the fish in and water-friendly cat out (will raise it 1/4" or so to help reduce condensation and help with gas exchange). Velcro under the feet so the cat doesn't kick it off. :p

That's pretty much it so far - it feels really close but it'll be longer than I want! I'm hiring the guys at SPS Coral to come and plumb it for me since I haven't done this before. Installing a manifold for further expansion if necessary!

Still not sure what's going to happen the day of transfer... I have a 10g tank I guess the livestock will go into while the old tank is broken down and new one is set up in its place. Live rock will go in buckets with saltwater to minimize die-off. Sand will be transferred and additional new sand added. Livestock currently is:

Royal Gramma, still young and smallish
Yellow watchman and his pistol shrimp buddy
2 peppermints
Assorted blue-leg hermits
3 nassarius, 3 astrea, 1 margarita, 3 trochus, a couple of stomatellas who will hopefully hide in the rocks and survive
3 duncans, a frogspawn, torch, and various zoa and SPS frags

I keep thinking I'm going to forget something critical... I'll post pics when there's something interesting to show. :p
 
Joined
May 10, 2013
Messages
2,749
Likes
17
Points
0
Location
Sunland, Ca
#3
Dang that was fast. LOL I knew it was coming just didnt think it would be this soon
I got some green birdsnest and a couple polyps of BBEB for you when your ready
 

Coelli

Premium Member
Supporter
Joined
Sep 9, 2014
Messages
801
Likes
12
Points
18
Location
Tujunga, CA
#4
Dang that was fast. LOL I knew it was coming just didnt think it would be this soon
I got some green birdsnest and a couple polyps of BBEB for you when your ready
Haha! I know, right? And I swore at first I would wait a while.... but the cloudy glass is driving me NUTS. I'll definitely take you up on the frags! Thanks neighbor! :)
 
Joined
Mar 4, 2012
Messages
144
Likes
5
Points
18
Location
Woodland Hills
#5
That's awesome. Did you get the SCA cube sold by Diamond Aquatics? That's the one I have. Plumbing is a snap. I have a ton of extra schedule 80 (gray in color) if you want. I have Schedule 80 bulk heads too. They run bigger than schedule 40 but they may work for you. I plumbed the sump with the schedule 80 and found red schedule 40 and re-plumbed. You can check out my sump if you feel adventurous and want to try plumbing. Good luck
Sump.jpg
 

Coelli

Premium Member
Supporter
Joined
Sep 9, 2014
Messages
801
Likes
12
Points
18
Location
Tujunga, CA
#6
That's awesome. Did you get the SCA cube sold by Diamond Aquatics? That's the one I have. Plumbing is a snap. I have a ton of extra schedule 80 (gray in color) if you want. I have Schedule 80 bulk heads too. They run bigger than schedule 40 but they may work for you. I plumbed the sump with the schedule 80 and found red schedule 40 and re-plumbed. You can check out my sump if you feel adventurous and want to try plumbing. Good luck
View attachment 39131
Hey, nice sump! You're so fastidious - I could tell by how clean the chiller was. :) What diameter are the pipes...? I do have bulkheads, but still need everything else. My drain is 1" and return is 3/4".

Oh, forgot about the tank - nope, I got this used from someone here on the forums. It's a 65g tall, rimless :)
 

Smite

Premium Member
Supporter
2020 POTM
Joined
Jun 11, 2013
Messages
6,362
Likes
3,780
Points
83
Location
Garden Grove
#7
Congrats on the upgrade! I recently did a similar upgrade - 20g to 66g display + 30g sump/fuge. I went the bucket route and it worked out great. powerhead + heater and your good.

I did make a mistake by not checking my alk in the new tank vs my bucket water and browned some sps out a bit. Noobie mistake but something to think about. Maybe drip to be safe, I guess it could have been nutrients/phosphate difference as well.

I also did the painted EMT conduit. Went with 1/2". Cant beat 5 bucks for 2 light hangers and looked clean once painted. I mounted them with 2 - 2hole straps so I could get the tank close to the wall but they loosened easily and my pipes wanted to slide down to a lower height. if I were to do it again id go with "minis". Whatever straps you choose, make sure they are stamped E.M.T, if you get "rigid" it will be for a different outside diameter.

Are you going to build the ATO res into the sump? If you can work it in it helps keep the tank looking sharp without a jug on the side.
 
Joined
Mar 4, 2012
Messages
144
Likes
5
Points
18
Location
Woodland Hills
#8
Hey, nice sump! You're so fastidious - I could tell by how clean the chiller was. :) What diameter are the pipes...? I do have bulkheads, but still need everything else. My drain is 1" and return is 3/4".

Oh, forgot about the tank - nope, I got this used from someone here on the forums. It's a 65g tall, rimless :)
The fittings and extra PVC are 3/4" and 1". Let me know and I will give what you need if I have it.
 

Coelli

Premium Member
Supporter
Joined
Sep 9, 2014
Messages
801
Likes
12
Points
18
Location
Tujunga, CA
#10
Time for an update!

The stand was built by a Socalireefer and they did an AWESOME job, I was really stoked when I saw the finished product. It was custom built for the tank and has doors on 3 sides.


My boyfriend and I built a sump out of a 20g long; the fuge is on the left side, lit by a 6500k led eBay bulb and a cheap clip-on lamp.


Then I got it into my head to build a foam/rock wall for the back, because I don't have enough projects to juggle already. :eyeroll: It's going between the left side of the tank and the overflow on the right. I decided not to extend it to the overflow, I'll just put rocks in front of it and let GSP grow up it.

Here it is just after I started the foaming process:


Here it is with half of the sand/epoxy done:


And here it is propped up in my kitchen right now with a heater blowing on it because despite the weather app telling me it wouldn't rain today, it rained this morning. :p I HAVE to finish it TODAY. I don't get home until around 8PM during the week and SPS Coral Store is coming this weekend to plumb the new system and get it running. So the wall has to be done today so it can dry and then get silicone'd to the back of the tank.


One more shot, top-down so you can get an idea of how much dimension it has. There are tons of shelves for coral.


And finally, one last shot of my completely overstuffed Biocube 29. Almost everything is crammed into the front of the tank because I don't want to permanently mount anything since it'll be moving, and if I prop it on the rocks the CUC will knock it down. I already had a lot, but went to a friend's house on Friday and came away with at least a dozen frags; I even have GSP glued to some plastic and hanging from the side of the tank. A few of these frags (GSP, Kenya tree, purple monti cap and possibly the red mushroom and some common zoas) will be going to someone else's tank later today.


Oh, we're still trying to come up with the best mounting system for the Kessils - I was going to go with painted EMT conduit, but I don't know that we'll have time to make them now. :(

That's it for now!
 
Last edited:

Smite

Premium Member
Supporter
2020 POTM
Joined
Jun 11, 2013
Messages
6,362
Likes
3,780
Points
83
Location
Garden Grove
#11
Can't wait to see that in the tank. It's going to look so natural and deep.
 

Coelli

Premium Member
Supporter
Joined
Sep 9, 2014
Messages
801
Likes
12
Points
18
Location
Tujunga, CA
#16
Rock wall completed and rinsed off. Once it's dry, it will get silicone'd into the tank! I didn't go all the way down to the bottom with the sand and epoxy because it will be covered by the sandbed. The right side will be flush with the overflow, and I left enough room on the left to be able to get my Flipper all the way to the back glass.

 
Last edited:

Zoarder

Member
2020 Philanthropist
Supporter
2020 POTM
Joined
Apr 26, 2013
Messages
10,643
Likes
49
Points
48
Location
Los Angeles
#17
Rock wall completed and rinsed off. Once it's dry, it will get silicone'd into the tank! I didn't go all the way down to the bottom with the sand and epoxy because it will be covered by the sandbed. The right side will be flush with the overflow, and I left enough room on the left to be able to get my Flipper all the way to the back glass.

Thats so awesome. Wish I had some skills like yours!
 

Coelli

Premium Member
Supporter
Joined
Sep 9, 2014
Messages
801
Likes
12
Points
18
Location
Tujunga, CA
#18
Thats so awesome. Wish I had some skills like yours!
It seriously was so easy - it took a little time, but the process is really simple. You just:

- Cut the egg crate to size.
- Lay out your rocks, zip-tying anything that's really big or you want to lie a certain way
- Shoot the pond foam around everything, fill up all the spaces and cover the egg-crate
- Let it cure, then use a steak knife to trim anything you don't want, places it's too high, etc. Cut any zip ties too. Use the knife to "shave" the back flat
- Mix 2-part epoxy (I used Bob Smith 30 minute), brush it onto the foam areas with cheap brushes in sections, and pour sand on it
- Let it dry, shake all the extra sand off, and go over any missed parts with the epoxy and foam

For the whole thing (it's about 22"x30") I used three cans of pond foam and one epoxy kit (9oz bottles). I probably could have gotten by with 2 cans of the foam. Probably 25# of live rock. It was totally easy and I'm really glad I decided to do it; now I don't have to worry about stacking rocks or anything falling over, and have a ton of places for coral. All of that vertical space that would have been wasted is put to use and my sandbed retains more footprint. :)
 

Zoarder

Member
2020 Philanthropist
Supporter
2020 POTM
Joined
Apr 26, 2013
Messages
10,643
Likes
49
Points
48
Location
Los Angeles
#20
It seriously was so easy - it took a little time, but the process is really simple. You just:

- Cut the egg crate to size.
- Lay out your rocks, zip-tying anything that's really big or you want to lie a certain way
- Shoot the pond foam around everything, fill up all the spaces and cover the egg-crate
- Let it cure, then use a steak knife to trim anything you don't want, places it's too high, etc. Cut any zip ties too. Use the knife to "shave" the back flat
- Mix 2-part epoxy (I used Bob Smith 30 minute), brush it onto the foam areas with cheap brushes in sections, and pour sand on it
- Let it dry, shake all the extra sand off, and go over any missed parts with the epoxy and foam

For the whole thing (it's about 22"x30") I used three cans of pond foam and one epoxy kit (9oz bottles). I probably could have gotten by with 2 cans of the foam. Probably 25# of live rock. It was totally easy and I'm really glad I decided to do it; now I don't have to worry about stacking rocks or anything falling over, and have a ton of places for coral. All of that vertical space that would have been wasted is put to use and my sandbed retains more footprint. :)
Can I hire you instead? haha jk! Nice write up! Maybe if I redo my 8gallon nano which looks like crap -_-
 
Top