nice mike so what was the relationship from iso and aperture
Well, let me start by explaining what each of the different settings do first. So, the main 3 settings are Shutter Speed, Aperture or F/Stop and ISO.
Adjusting the Shutter Speed actually tells the camera how much light to let in to the sensor. For example if you have a shutter speed of 1/4 of a second, it is going to let in considerably more light than say 1/500th of a second, which is obviously much faster. In leighmans terms, the shutter speed determines how light or dark the picture will be. Adjusting the shutter speed faster, makes for a darker picture. Adjusting it slower makes for a lighter picture.
F/Stop or Aperture - This setting is where the magic in reef photography is. The Aperture is where you adjust the depth of field, or DOF. The larger the area you are trying to get in to focus the longer, or larger the F/stop should be. So this may not be exactly true numbers, but just as an example. If you had a standard 18-55mm lens and you wanted to take a picture of a coral close up in your tank, you would have a very small area, you would need a longer aperture in order to get the entire coral in to focus. If you were to say take the same lens and settings and take a picture of your entire tank, you would need a shorter aperture as you don't need as much light to expose the image and have it still be infocus.
-- ONE NOTE TO THIS: though it may seem like a very complicated relationship (And I am not the best at explaining it as it is very complicated) modern cameras are very user friendly. If you have a DSLR or a higher end P&S (Point N Shoot). You will probably find a setting that might be labeled either AV - Or AP. This stands for Aperture Priority mode, in which a light sensor built in to the camera automatically detects the correct amount of light and sets the aperture accordingly. This is a very helpful tool that many photographers even advanced professionals shoot in this mode.
ISO - ISO is actually pretty easy. It usually starts at ISO 100 and goes up from there. On more Advanced cameras such as the Canon 7D ($1800), or Mark II D ($8,000) you can actually set the ISO incrementally so for example instead of setting ISO 100 and then the next setting is ISO 200 on my T1i. With the more advanced cameras you can set it to say ISO 150 or 175 to even more so customize the photo and conditions you are shooting in. Most people don't know, but ISO actually also is measured in "Stops" just like Aperture is. Most people know that if you shoot something with a low ISO it will usually be blurry if it is any type of movement. And most people know that as you raise the ISO you can take pictures of "Fast action" and it will look like it is standing still. But why is this...well, at a low ISO the camera needs lots of light in order to expose the picture correctly, the only way for the camera to get more light is to take longer to shoot the picture. In a fast action situation that means motion blur in the picture. I am sure all of you have experienced this. The higher you go up in ISO the less and less light the camera sensor needs in order to expose the picture to the correct level. So in turn it can take the picture faster and faster and faster. An unfortunate consequence of this faster and faster ISO is that at some point (Varies depending upon camera model) the higher ISO will not have enough information as the shutter is opening and closing too fast, which will result in a very grainy picture (I am sure most of you have seen this as well).
So the relationship between Shutter Speed, ISO and aperture really relies on what shooting environment you are trying to capture. I like to start out with an Aperture of 8.0 and then adjust it from there. An observation I noticed was that when I changed the F/Stop lower - more and more area would be in focus, however if I went too far say after 5.7 it would become blurry again, or the focal area would be tiny. Pretty interesting.
I have had a ton of people PM me about my initial settings when I first sit down to take a picture...
So, Here they are:
Shooting Mode - M (Manual)
Aperture - 7.1 - 9.0
Shutter Speed usually 1/16th of a second, adjust as needed
White Balance - Cloudy (6,000K) or Shade (7,000K)
ISO - 100 (Always!)
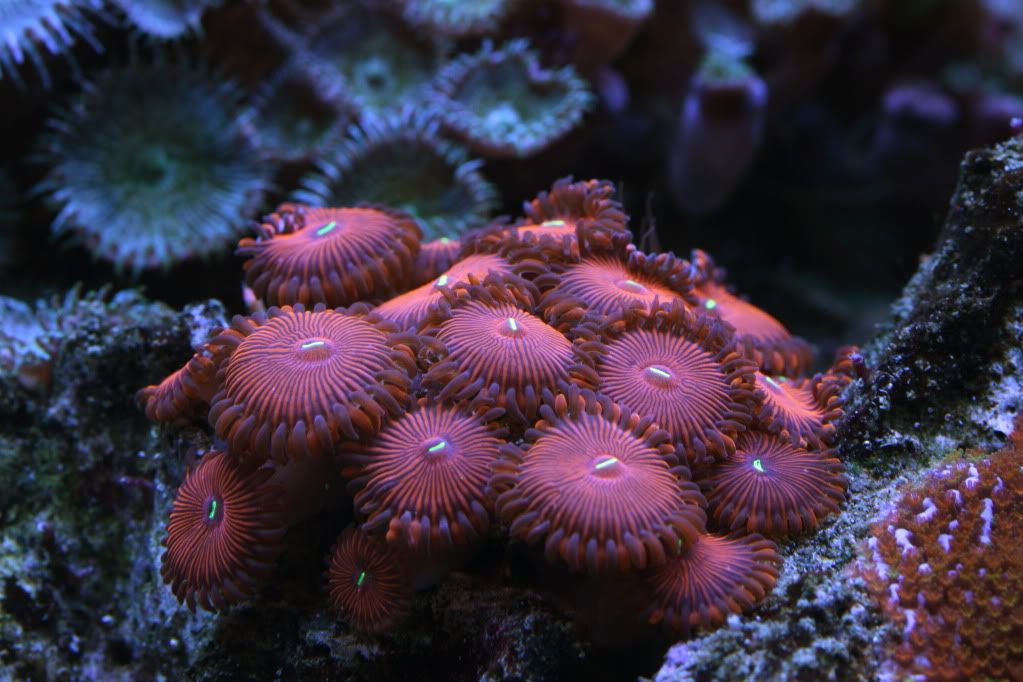
Very nice pics Mike, i really like the big shot of the Mohawk. I stare at the sparkles in person but your photo really gives a lot more detail. Can't wait to see what else you do with it once you get to mess with it after a few weeks. Happy shootin'!
Ya, it definitely takes a ton of practice and trying different settings and what not. I have been shooting for about 2 years now and I can tell you that it is definitely not as easy as it looks! The Mohawk shot is actually one of my favorites. I shot it last night using a tripod and remote shutter button, ISO 100, and Aperture of 8.0. I really like the fact that you can actually see the sparkles all the way up to the mouth of the polyp. Pretty amazing indeed. My wife last night goes..."You can see more detail with the camera than you can with your naked eye!" I just laughed.
Mike, I am in Yorba Linda. The problem is my light doesn't come on till 5:30 in the evening. Whenever you are free, it's cool. Thanks Bro.
Might have to turn it on, sooner. I am pretty farmiliar with Yorba Linda as I went to CSUF. I will be free all day Saturday, let me know! You can PM me your address and i'll let you know a good time. I charge a frag or two if you are cool with that, i'll give you all the photos once I am done with them. I usually shoot between 100 and 300 photos depending on size of the tank and corals.


")