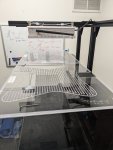
Are you referring to the pocket screws ?
I am referring to this.
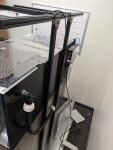
This will fail. All four of them in time. Not sure which first but probably this one. If you added aluminum angle to each of these joints it could help. You'll want to get as big of a piece as you can and make sure it is screwed in close to the top, close to the bottom, and close to the middle of each butt joint. I drill my own so I am not sure what is out there but I am sure you can find one with 3 or 5 holes on each side.
End grain does not hold glue or screws well. There are chapters on books about it but I can sum up hours of research with it will fail in time. It will fail much sooner if exposed to humidity or water. End grain not holding screws or glue well is why we have countless other ways to bring corners together, like pocket screws, dovetails, finger joints, miter bits, talons, dowels, etc etc. We wouldn't have any of those types of joinery if you could just screw into end grain.
Racking is the next concern. It is the stand moving side to side with weight on it and not be able to absorb an outside force. Earthquake is a great example but it doesn't have to be something that drastic. A person bumping into it could collapse it. Closing off the back and sides with plywood would help. Marine ply would be your best option, but it is spendy. You could do a Baltic birch as well, which is what I build my stands out of.
Did you paint the wood to protect it from moisture?
If there is still no water in it, I would also highly recommend getting some pond liner and incasing your sump area up a good six inches on all sides. Basically make your cabinet water proof for 6". I think it works out to like 15g for that size. It is a small increase in price, but it will make the stand sturdier as it protects the base from moisture, but also, if there is every a spill, or sump leak, clogged filter sock, slight spill when taking off the protein skimmer lid, etc etc it will save you a lot of clean up. A couple years back my sump seam failed (store bought sump) and having the pond liner meant I wasn't replacing the floors in my house. I just sucked the water up with a shop vac and fixed the seam. The $20 or whatever I spent on the pond liner easily saved me 10 grand. It's just nice to not have to worry about dripping in the sump regardless; even if there is never a a big thing.
Sorry for being so long winded. I had a store bought stand fail on a 65g tank about 15 years ago; and my hobby is wood working. So I am both a bit paranoid and actually know a good amount about this.
 2.8 MB Views: 0
 2.9 MB Views: 0
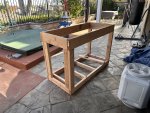 3.9 MB Views: 0
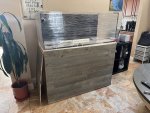 3.9 MB Views: 0