125 to 225 gal upgrade

m2140

New member
Joined
Jan 21, 2014
Messages
84
Likes
0
Points
6
Location
Menifee
#41
Wanted to get an update out on the tank.

I finally got around to getting my power center done.


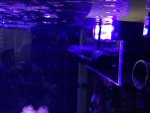
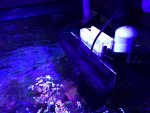
Corals are doing really great. So far running the tank with no power heads has worked out great. The flow accelerators combined with the SCWD's has worked out good and I get quite a bit of random flow with the top and middle of the tank getting a lot of flow and the edges getting slower flow. Works out really great for placing corals and having a mix of SPS and LPS. Here are a couple of pics of the corals.


Sent from my iPad using Tapatalk
 

Smite

Premium Member
Supporter
2020 POTM
Joined
Jun 11, 2013
Messages
6,361
Likes
3,779
Points
83
Location
Garden Grove
#42
Just read the whole build thread. Great job! Building the new wall to fit was a great call. Very well thought out and looks to have paid off. Love the no Powerhead approach. Dream tank right there.
 

m2140

New member
Joined
Jan 21, 2014
Messages
84
Likes
0
Points
6
Location
Menifee
#45
Update to the tank build.

Last weekend I added a frag tank to the tank setup. The frag tank shared the sump with the main tank so I don't have to buy more equipment and increases my overall tank volume to 320 gallons.

The drain is all 1 1/2" pipe and it just drops into my main sump. Supply is 3/4 and running of my main pump. I did not want to add additional pumps and increase my electricity load. At the tank side it's split off into 2 nozzles controlled by a ball valve. I built the stand and stained it to match the main tank. I still need to get a light for it but it's almost done.

Let me know what you guys think. I always wanted a frag tank and my main tank is getting enough growth that I can finally do it. Thank to Tony at Fish and Frag in Hemet for getting a really good deal on a used frag tank.


Sent from my iPad using Tapatalk
 

m2140

New member
Joined
Jan 21, 2014
Messages
84
Likes
0
Points
6
Location
Menifee
#47
So after a failed attempt to try and fit a bigger skimmer I found one problem with my tank setup. I don't have any room to get in an adequately sized skimmer for my tank into my sump. My sump has the space and I have the height, but I don't have enough space to get the skimmer in past the stand. Lesson learned for my next tank build.

I was running 2 skimmers, both ASM (G2 & G1X). But anyone that has Ever used ASM skimmers knows, the pumps are way too loud and are energy hogs. No amount of silicone pads could reduce vibration and noise. I was running 2 and the noise was almost unbearable. Also, the pumps go thru an impeller every 6-12 months so I wanted something more reliable and more energy efficient.

I had a spare Waveline DC-6000 pump laying around. I got an pinwheel impeller for the pump and I set out to run both skimmers with a single pump. The ASM pumps were pumping out about 500 gph, so a single DC-6000 should be more than powerful to run both when it does 1500 gallons an hour.

So I setup the 2 skimmers and split the flow using a T.


Here is the bubbles after initial setup


Here are the bubbles after 30 minutes.


I was able to adjust each body separately to get the right flow.

I also updated the Venturi, rather than use small 1/8 in pipe from the ASM's I wanted more air into the skimmers. I used1/2in push fitting line and made my own muffler to reduce the noise level.


So far this setup is working great. The tank is much, much quieter and my energy consumptions is down sustantilly. Let me know what you guys think. Specially if there is someone else out there that has tried to use a single pump to run 2 skimmers. I would be interested to hear about some long term results.


Sent from my iPad using Tapatalk
 

m2140

New member
Joined
Jan 21, 2014
Messages
84
Likes
0
Points
6
Location
Menifee
#48
I wanted to post an update a couple months into the tank setup now that its been up while. Here are a couple of lessons learned.


SCWD stopped working at about 4 months into the build. Support from the manufacture was just bad. They took a minimum of 2 weeks to respond to every request and after we tried all their troubleshooting steps they just stopped responding. Apperantly running 3000 gallons per hour on 2 SCWD's is not enough flow with short PVC runs. I've had to remove the Mechanism on both housing and will be replacing them with something different when i get a chance. If your on the fence on the SCWD I would recommend against it. My first lasted only 4 months, the other only 6 before they stopped working. I cleaned them out every 3 months and I could not get both of them to spin reliably and they kept getting stuck. I think the housing has gotten a little warped and is not allowing the mech to spin.

Waveline DC pumps have some limitations and drawbacks. I wanted to run the tank as efficiently as possible with a single oversized pump and try and run all my accessories of that one pump. When I added a BRS dual reactor the flow was OK. But as soon as I tapped in my frag tank, the flow in the tank slowed down way too much. While they have the capability to run a lot of gallons per hour, as soon as you tap into that power the flow slows down to a crawl. I've had to change my plumbing 2 times now trying to experiment. At first I had My DC-12000 running just half the tank (2 flow accelerators), BRS dual reactor, and my frag tank. I also had a Wavelike DC-6000 running the other half of the tank, Bio pellet reactor, and a GFO reactor. Even with both pumps running at full power the flow int he tank was just too low. Right now I have the DC-12000 running just the main tank and got some flow back, but with the SCWD not working it's not as good as when i first setup the tank. the DC-6000 is running the frag tank and all the reactors. I've resorted to adding a Gyre in the main tank to get good flow back.

But the biggest drawback with the Wavelike Pumps has been the Noise. The DC-12000 gets really, really loud. There is a high pitch noise that you get based on their speed. I tried using flexible tubing out to a union to make removing the pump for maintenance easier. But that also made the pump loud. I switched back to PVC tubing and it muted the noise, but as this pumps has gotten older it has gotten louder. It's still quieter than most pumps on the market with little to no vibration, but the high pitch noise is really annoying. I'm still playing around on ways to make it quieter.


Dual Skimmers sucks. At first I had 2 ASM skimmers each with their own stick pump. But those pumps are way, way too loud and put in a lot of vibration noise that I just could not take. I then tried running both reactors with a single waveline DC-6000 pump and it did not work. it was promising at first but in the end i did not get much skim. Even though the pump put out more than enough output, i could not get good skim over the long run. I took off the G1X skimmer and setup my Wavelike DC-6000 on just the ASM G2 and it proved too much in the beginning; the cup kept overflowing. Here was the fix: I ended up raising up the skimmer and putting in some plumbing inside the skimmer to have the water output at the bottom of the skimmer. I'm now getting about half a cup of really dark nasty skim every day with the Wavelike pump running at full power. Really happy with the new setup.

Reactors, reactors, reactors. As I started adding more and more fish into the tank I started to have algae problems. The BRS dual reactor was just too small and I could not run anymore than 1.5 cups of GFO and keep a good tumble. I had to carbon dose manually way to much. If you add the problems with the skimmer and flow I had the perfect situation for an algae bloom. it has been a slow process but I have it under control now. I've fixed an old Reactor and I'm now running a lot more GFO with really good tumble. I've added a Bio-Pellet reactor and slowly been getting that started. I'm still carbon dosing while the bio-pellets get established. And lastly, my BRS reactor is running carbon in both blocks. All together combined with some better flow I'm starting to get a handle on the nutrients in the tank.

Lastly, Flow in the tank. I needed more. With the nutrient problems I was having my SPS growth slowed down to a crawl. Because I have a lot of Maxi & Flower Anemones in the tank I cannot just add a ton of power heads. I ended up investing in the MaxSpec Gyre. I've only been running it for about 2 week but i really like the amount of flow this thing creates. When I first got it, the controller broke within 15 minutes of use. it just would keep getting an error and would not run the pump. But after I got replacement I works great now. The only problem i have is my overflows are not wide enough to hold it. It' has a very large footprint and I could not get the magnet to fit in my overflow for that recommended top installation. I tried running it vertically on the side of the tank but I only affected half the tank. I wanted to run just 1 pump. Right now it's at the top center of my tank because my tank has a large piece of glass for reinforcement. I get really good flow for half my tank but the pump is so powerful i have it only running at 40%. I'm going to make an acrylic mount for it so that i can put it over one of my overflows. I will post an update in the next couple of weeks.
 

m2140

New member
Joined
Jan 21, 2014
Messages
84
Likes
0
Points
6
Location
Menifee
#50
Here is the Gyre at the top of the tank:


Here is the new pump plumbing.


Here is my skimmer bay now packed with reactors and the skimmer.


Sent from my iPad using Tapatalk
 

m2140

New member
Joined
Jan 21, 2014
Messages
84
Likes
0
Points
6
Location
Menifee
#51
Here is an update on the Gyre.

I love the thing. It created a ton of flow in the whole tank and I only need 1 instead of 4 or more power heads. I just got done building this mount for it. I needed a mount because my overflows were not wide enough. So I took an old 7in filter sock holder and cut off the rings. I then cut and glued 2 pieces of acrylic on it using Weld On4.

When i had it at the center of the tank I had to restrict the flow to 40% because it moved the sand around too much. Right now I have it set to about 60% and it seems to be Ok. I cannot set it any higher without too much flow.
 

Attachments

m2140

New member
Joined
Jan 21, 2014
Messages
84
Likes
0
Points
6
Location
Menifee
#53
Yeah, i don't like it but i could not get the manufacturer to put in a smaller piece. I had a choice between a huge brace down the center or a smaller one with some euro bracing but the center brace will be partially submerged.
 

m2140

New member
Joined
Jan 21, 2014
Messages
84
Likes
0
Points
6
Location
Menifee
#54
So with summer coming and the temperatures already hitting 90 around me it was time to redesign how all my power supplies and controllers are mounted. Last summer some of the power supplies got a little too warm for my comfort so it was time to rethink mounting. There is a lot of power running thru the ballasts and controllers and I wanted to get fans on key components. I also wanted to make thinks easier to access for maintenance.

I first started by building a cabinet to the side of the tank. My tank is built into the wall so this is on the back of the tank in my office. I then needed a platform to mount stuff to. I came up with a door like setup. The unpainted section you see is setup to swing for easy access and maintenance.


Now to the front of the tank. I only wanted pump controller here. but the challenge was how do i get fans on the controllers and still allow for airflow in a limited space. What I came up with was door behind the main door. You will see later in the pictures on how it works.


Here you see how the door swings for storage


Here is how it looks like as you close the door. I need to get a latch here in the next couple of days.


Front door with my outing platform. I'm using light diffusers commonly used for frag tanks.


Updated pictures of the back mid progress. I decided to put all my power supplies and power strips back here away from the water and just leave the controllers out front.


Here you see how the doors can swing in either direction to allow access for maintenance.


Here is the Fans mocked up. they will pull air from under the tank and the sump directly onto the ballast and power supplies.


Finally after 2 days of building and dressing cables here is the completed power center at the back. PDU on the left and power supplies and ballast on the right


Both door swinging to the left showing the fans and cable management on the PDU


Doors to far left and right showing how the cable is managed and secured. Everything is zipped tied here with key sections using velcros.


Another pic with everything to the right


This is the front with the door closed in. I'm going to put fans on this open section at the back.


Here are all the controllers at the front of the tank. If it's running to a power supply; i have it zip tied. If it runs to the pumps; its secured with velcro so that I can easily remove. I found over the last year that it's a pain to take out the pumps for the cleaning. I have to do it every 6 months so I needed an easier way. This way the pumps are on a separate path from the main power and can be easily removed and put back using velcro


Tell me what you guys think?


Sent from my iPad using Tapatalk
 

m2140

New member
Joined
Jan 21, 2014
Messages
84
Likes
0
Points
6
Location
Menifee
#55
I finally got the new power center completed.

Here are a couple of pics at how the front controllers ended up.


Here is the back where all the power supplies terminate. All power supplies are running cool to the touch and nothing is warm or hot anymore.


I also redid my power supplies for the lights at the top of the canopy.


Sent from my iPad using Tapatalk
 
Joined
Nov 28, 2012
Messages
274
Likes
12
Points
18
Location
San Luis Obispo
#56
Awesome job on the power supplies! Very cool and creative. I am considering a Gyre myself to up the flow a bit.

I have a DC6000 running my skimmer, and have considered DC pumps for the main return, but if I go that route I think that I will bite the bullet and get a fancy one like a red dragon speedy or something, since it will be external and since I want it to be strong and quiet. Man the price is high though.

Keep it up, your tank is inspiring!
 

m2140

New member
Joined
Jan 21, 2014
Messages
84
Likes
0
Points
6
Location
Menifee
#60
Cool set up, are the fans connected to a 110 V power source?
budget is tight so I have to use what I have in my garage. I"m using a cheap little 12 volt power supply. I just cut the cables and solder and use a block to distribute the power. I use cat 5 cable to make all of my connection because I have a ton of it left over. The only drawback is having to encase the whole distribution block in shrink wrap to avoid rusting.
 

Latest posts

Top