60G 24x24x24 build, first tank

Joined
Mar 5, 2022
Messages
86
Likes
38
Points
0
Location
San Diego
My Tank Build
#1
This will be my first official post, the beginners section seems appropriate since this is also my first salt water tank. I am working through a 60G cube build and have gotten to the point where I am dry fitting the plumbing so I am close to getting it wet!

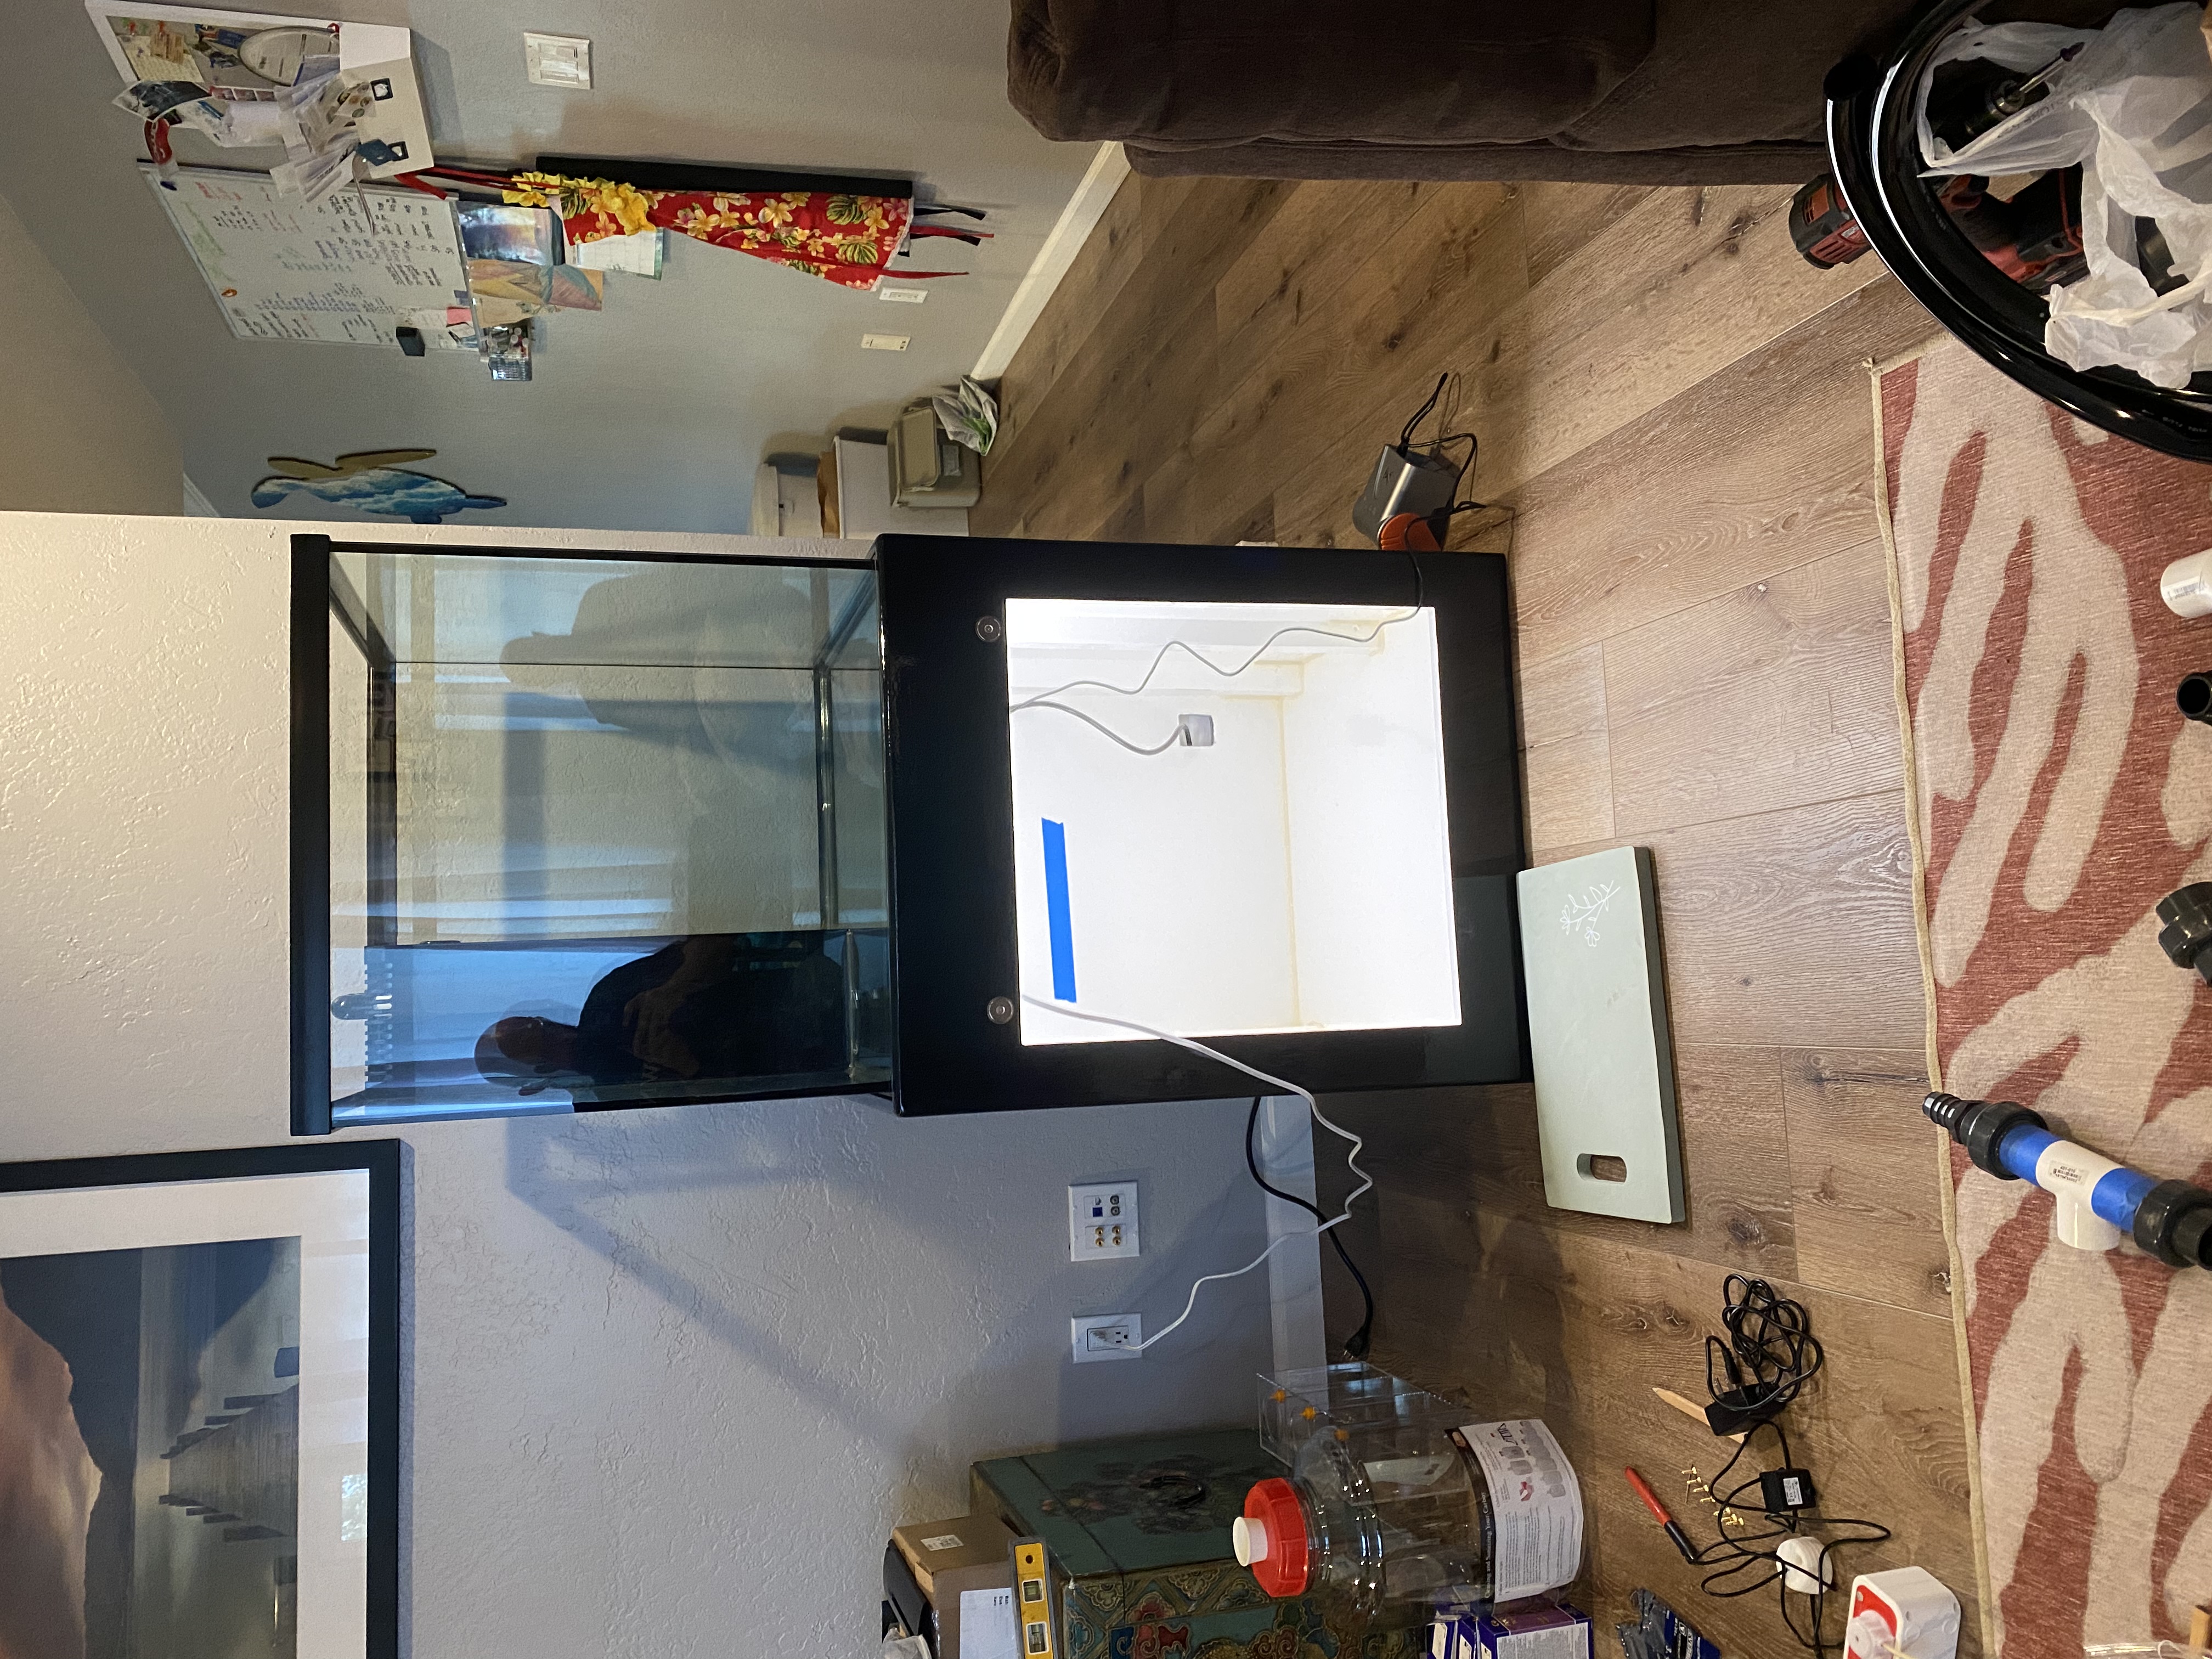
I spent the last month rebuilding the used stand that I picked up and am satisfied with that. This weekend I started in on the plumbing and right now I have everything set fit. My original plans didn’t work out once I started getting pieces in place mostly because of the size of the cabinet. I want to have everything inside for this build to include all the electronics so it’s gonna be tight! I have always enjoyed a good game of Tetris though so I have a decent plan I think.

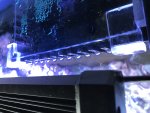
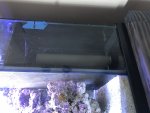
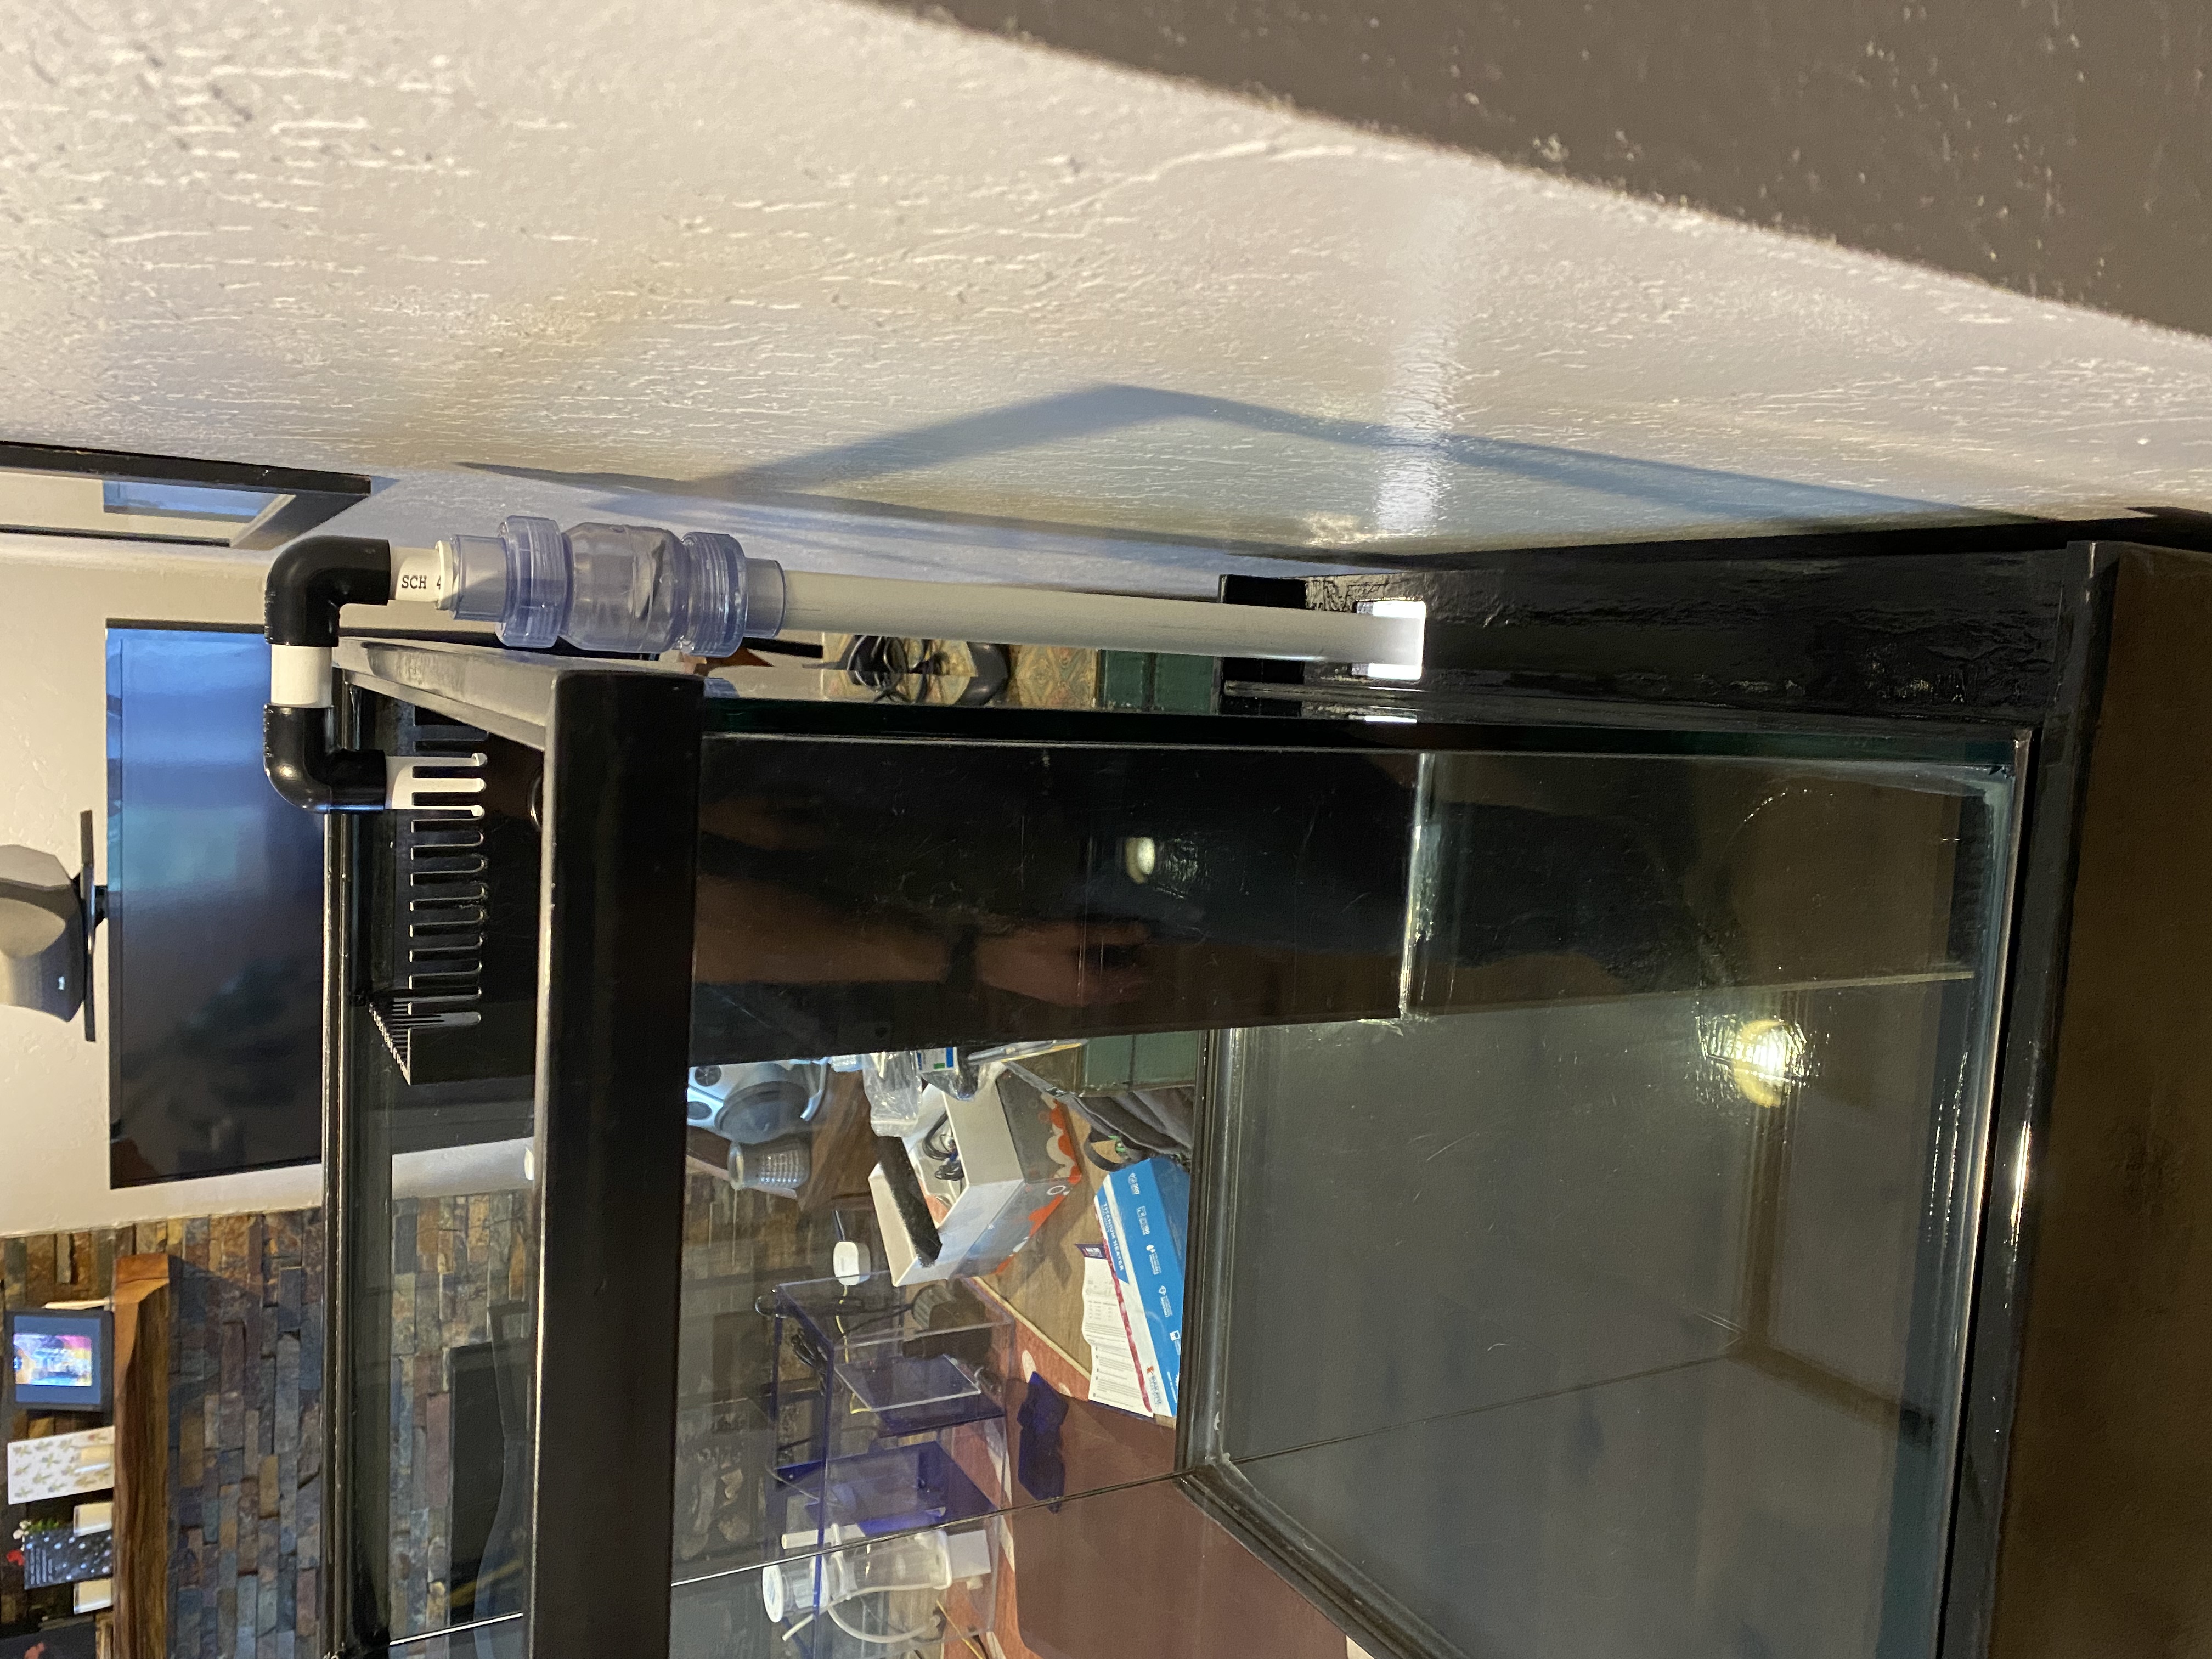
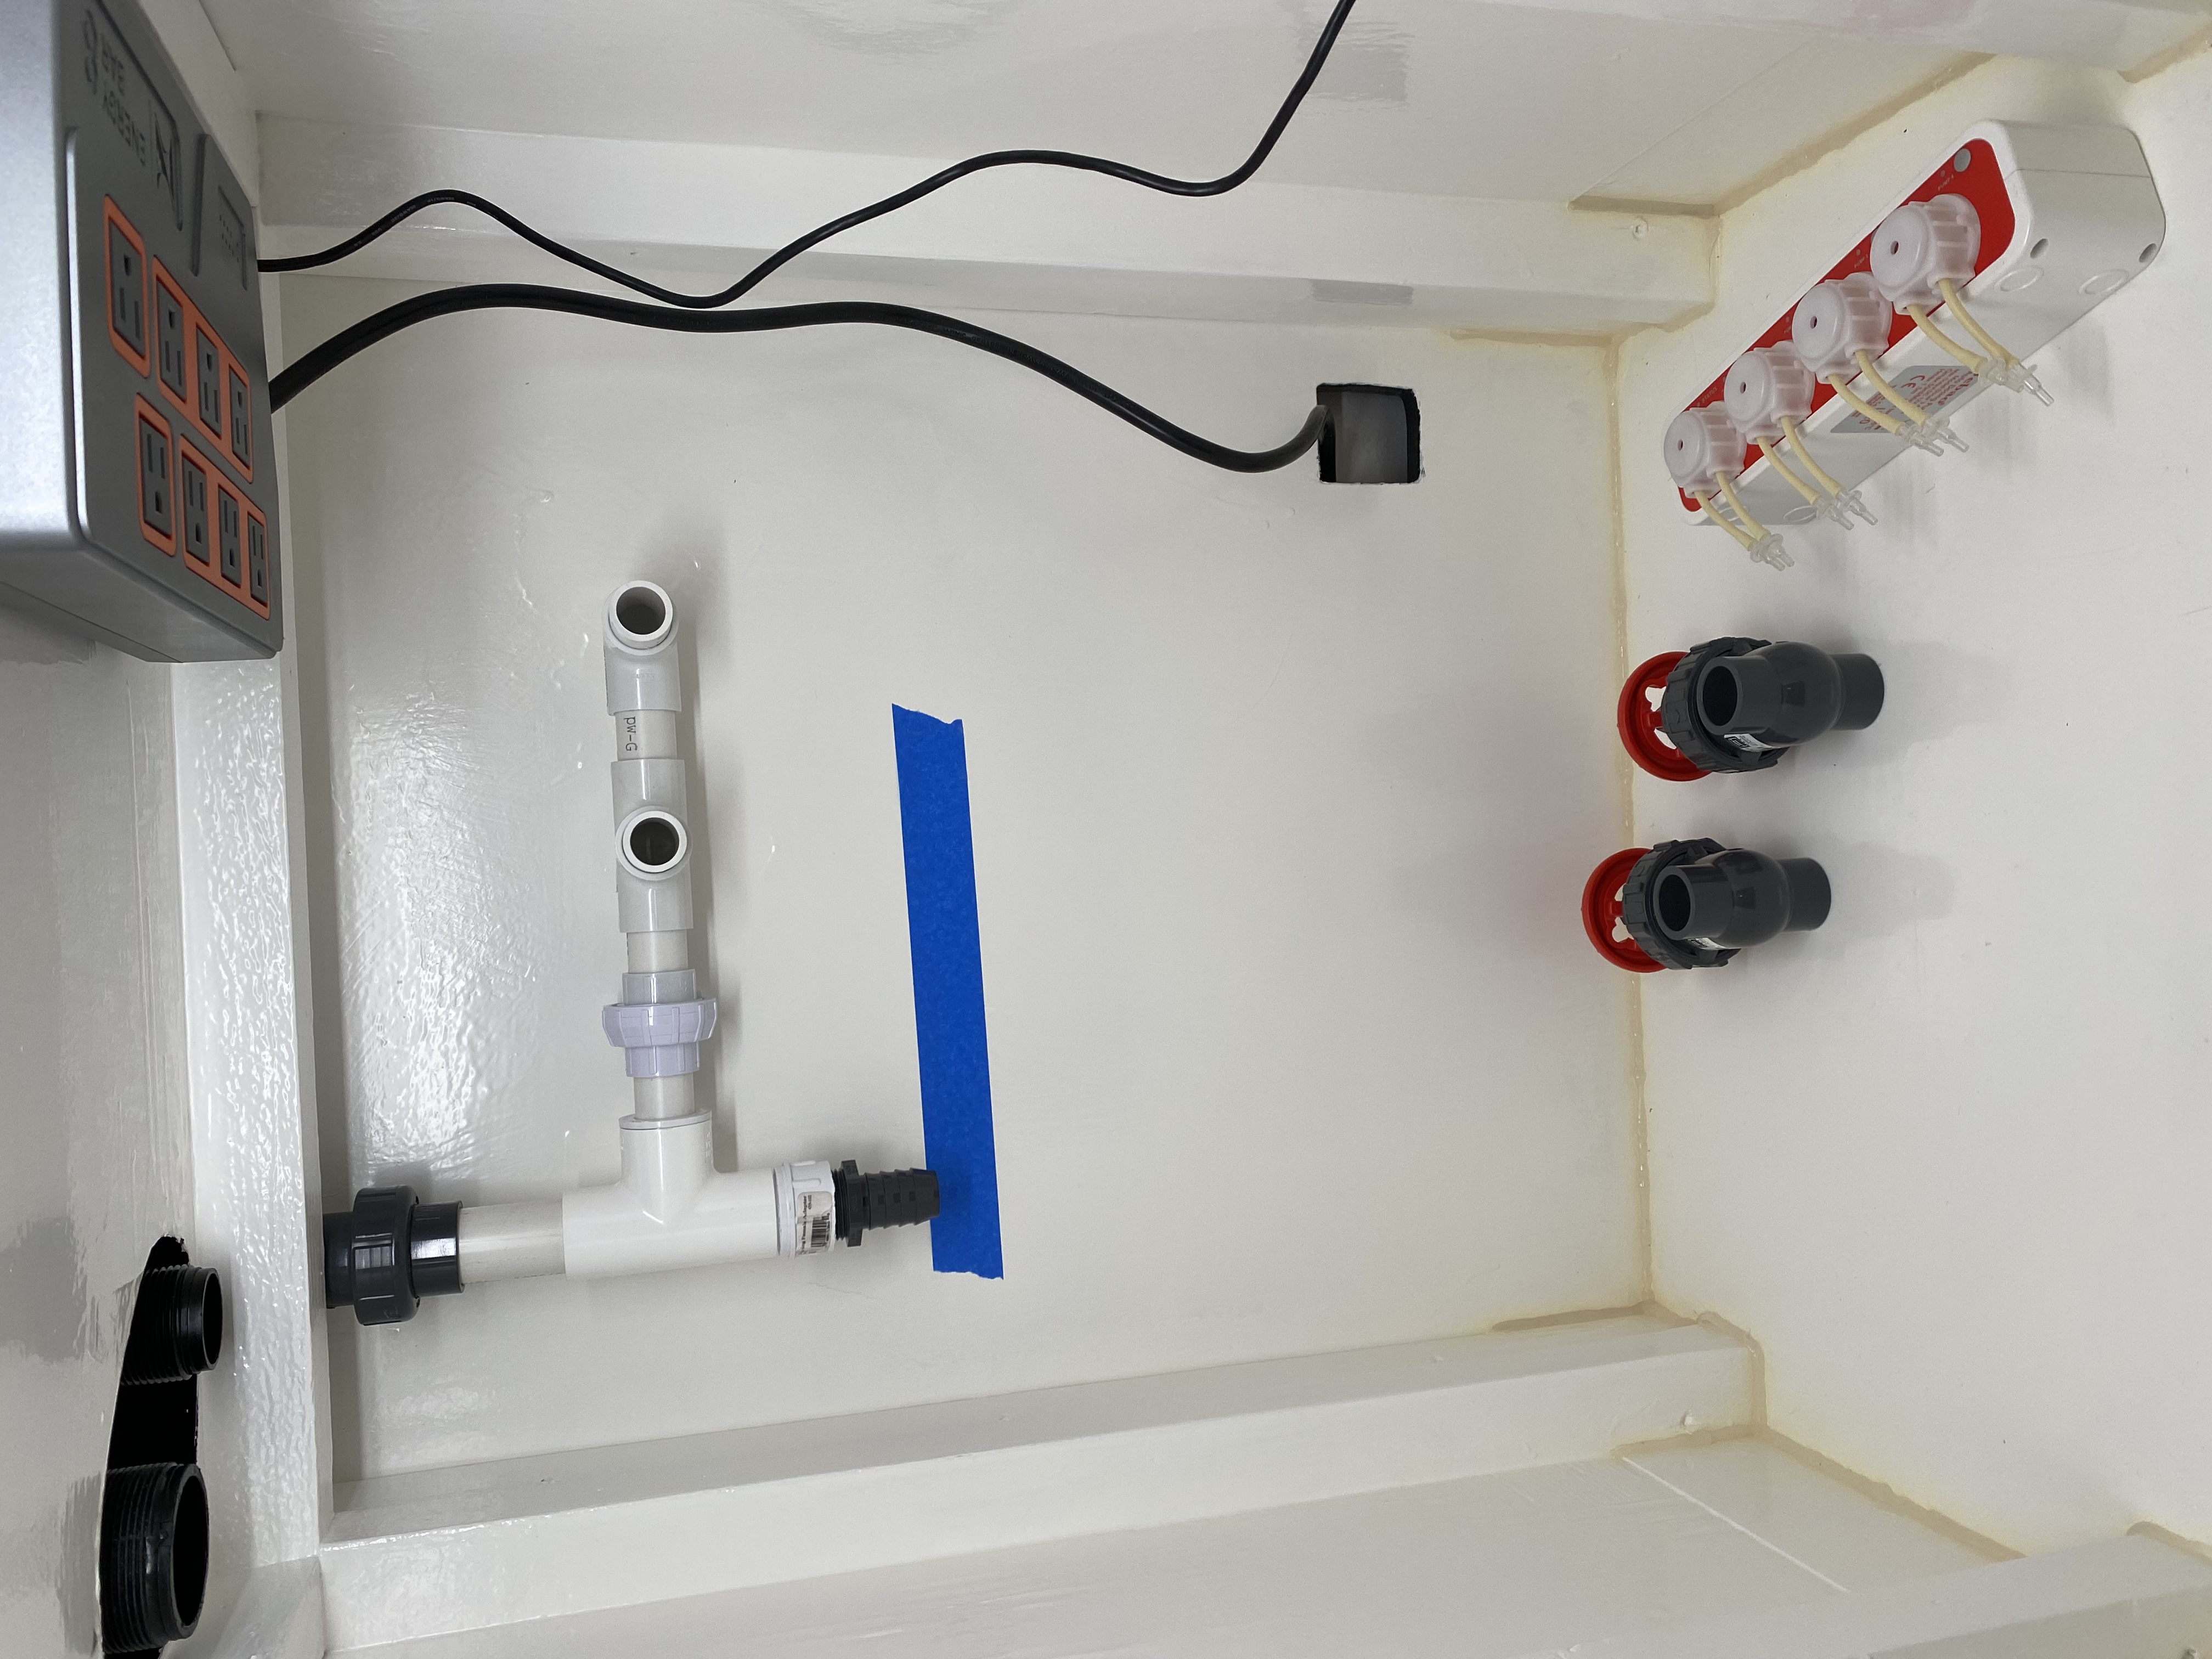
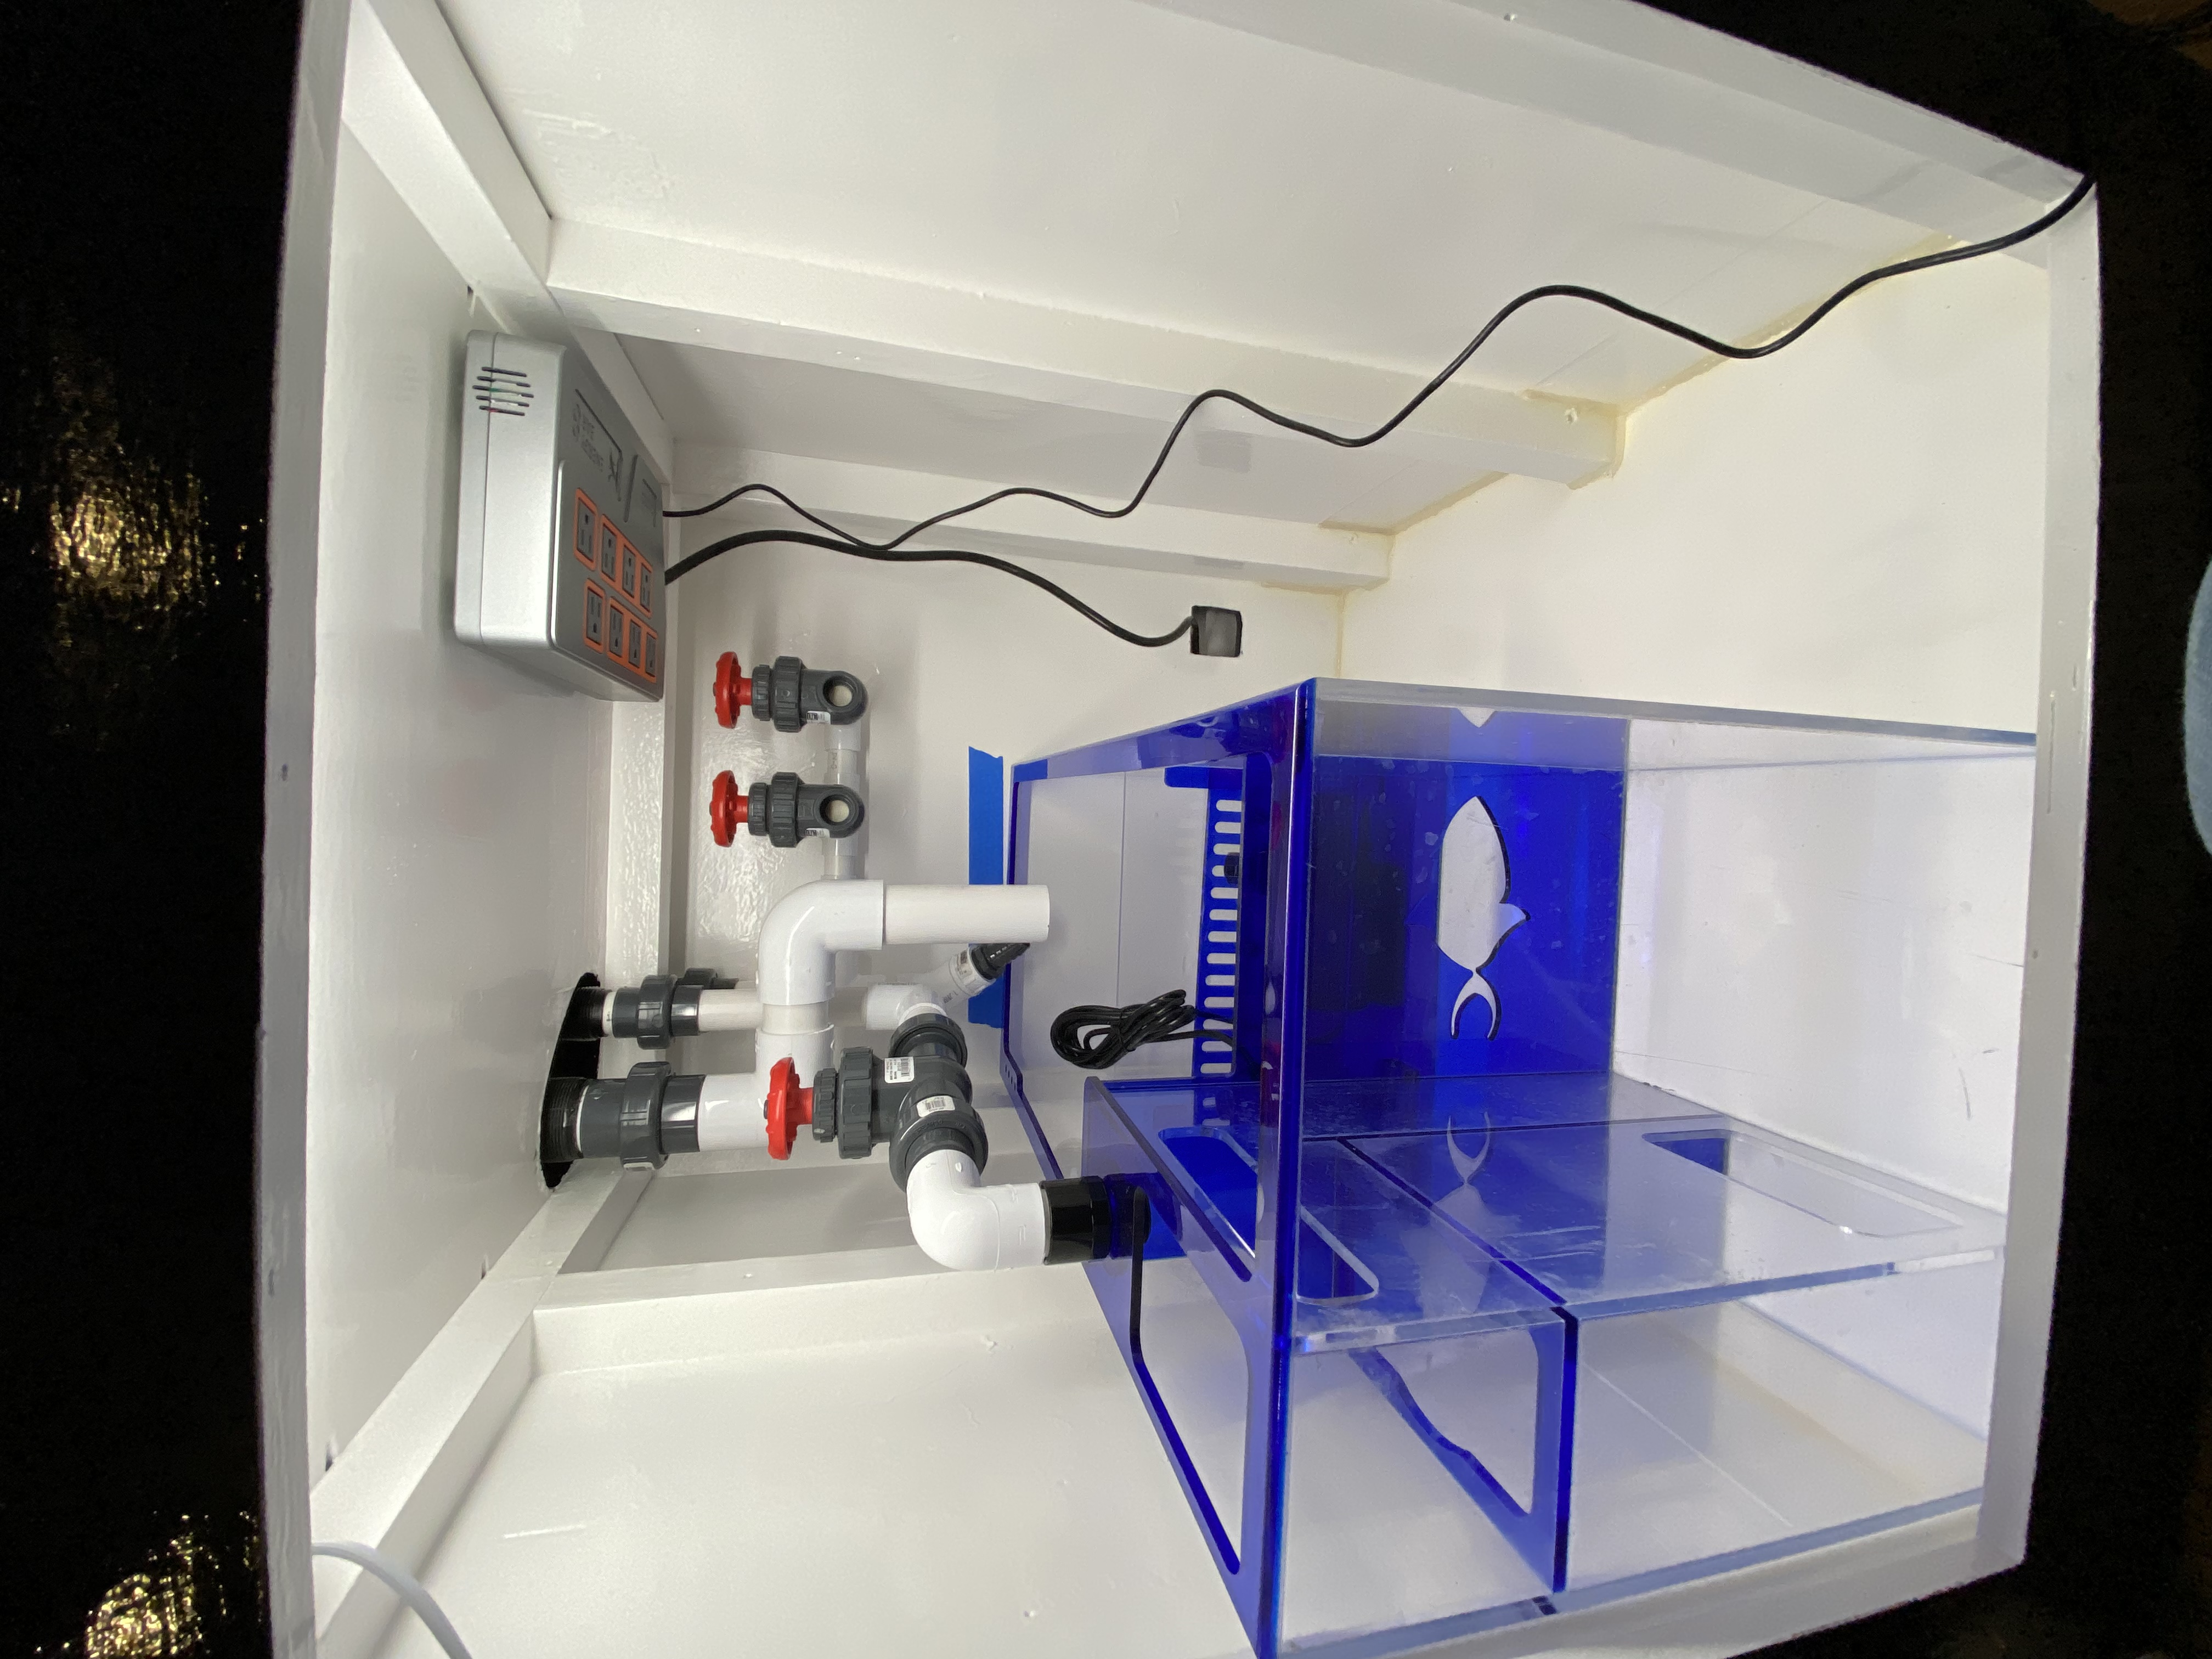
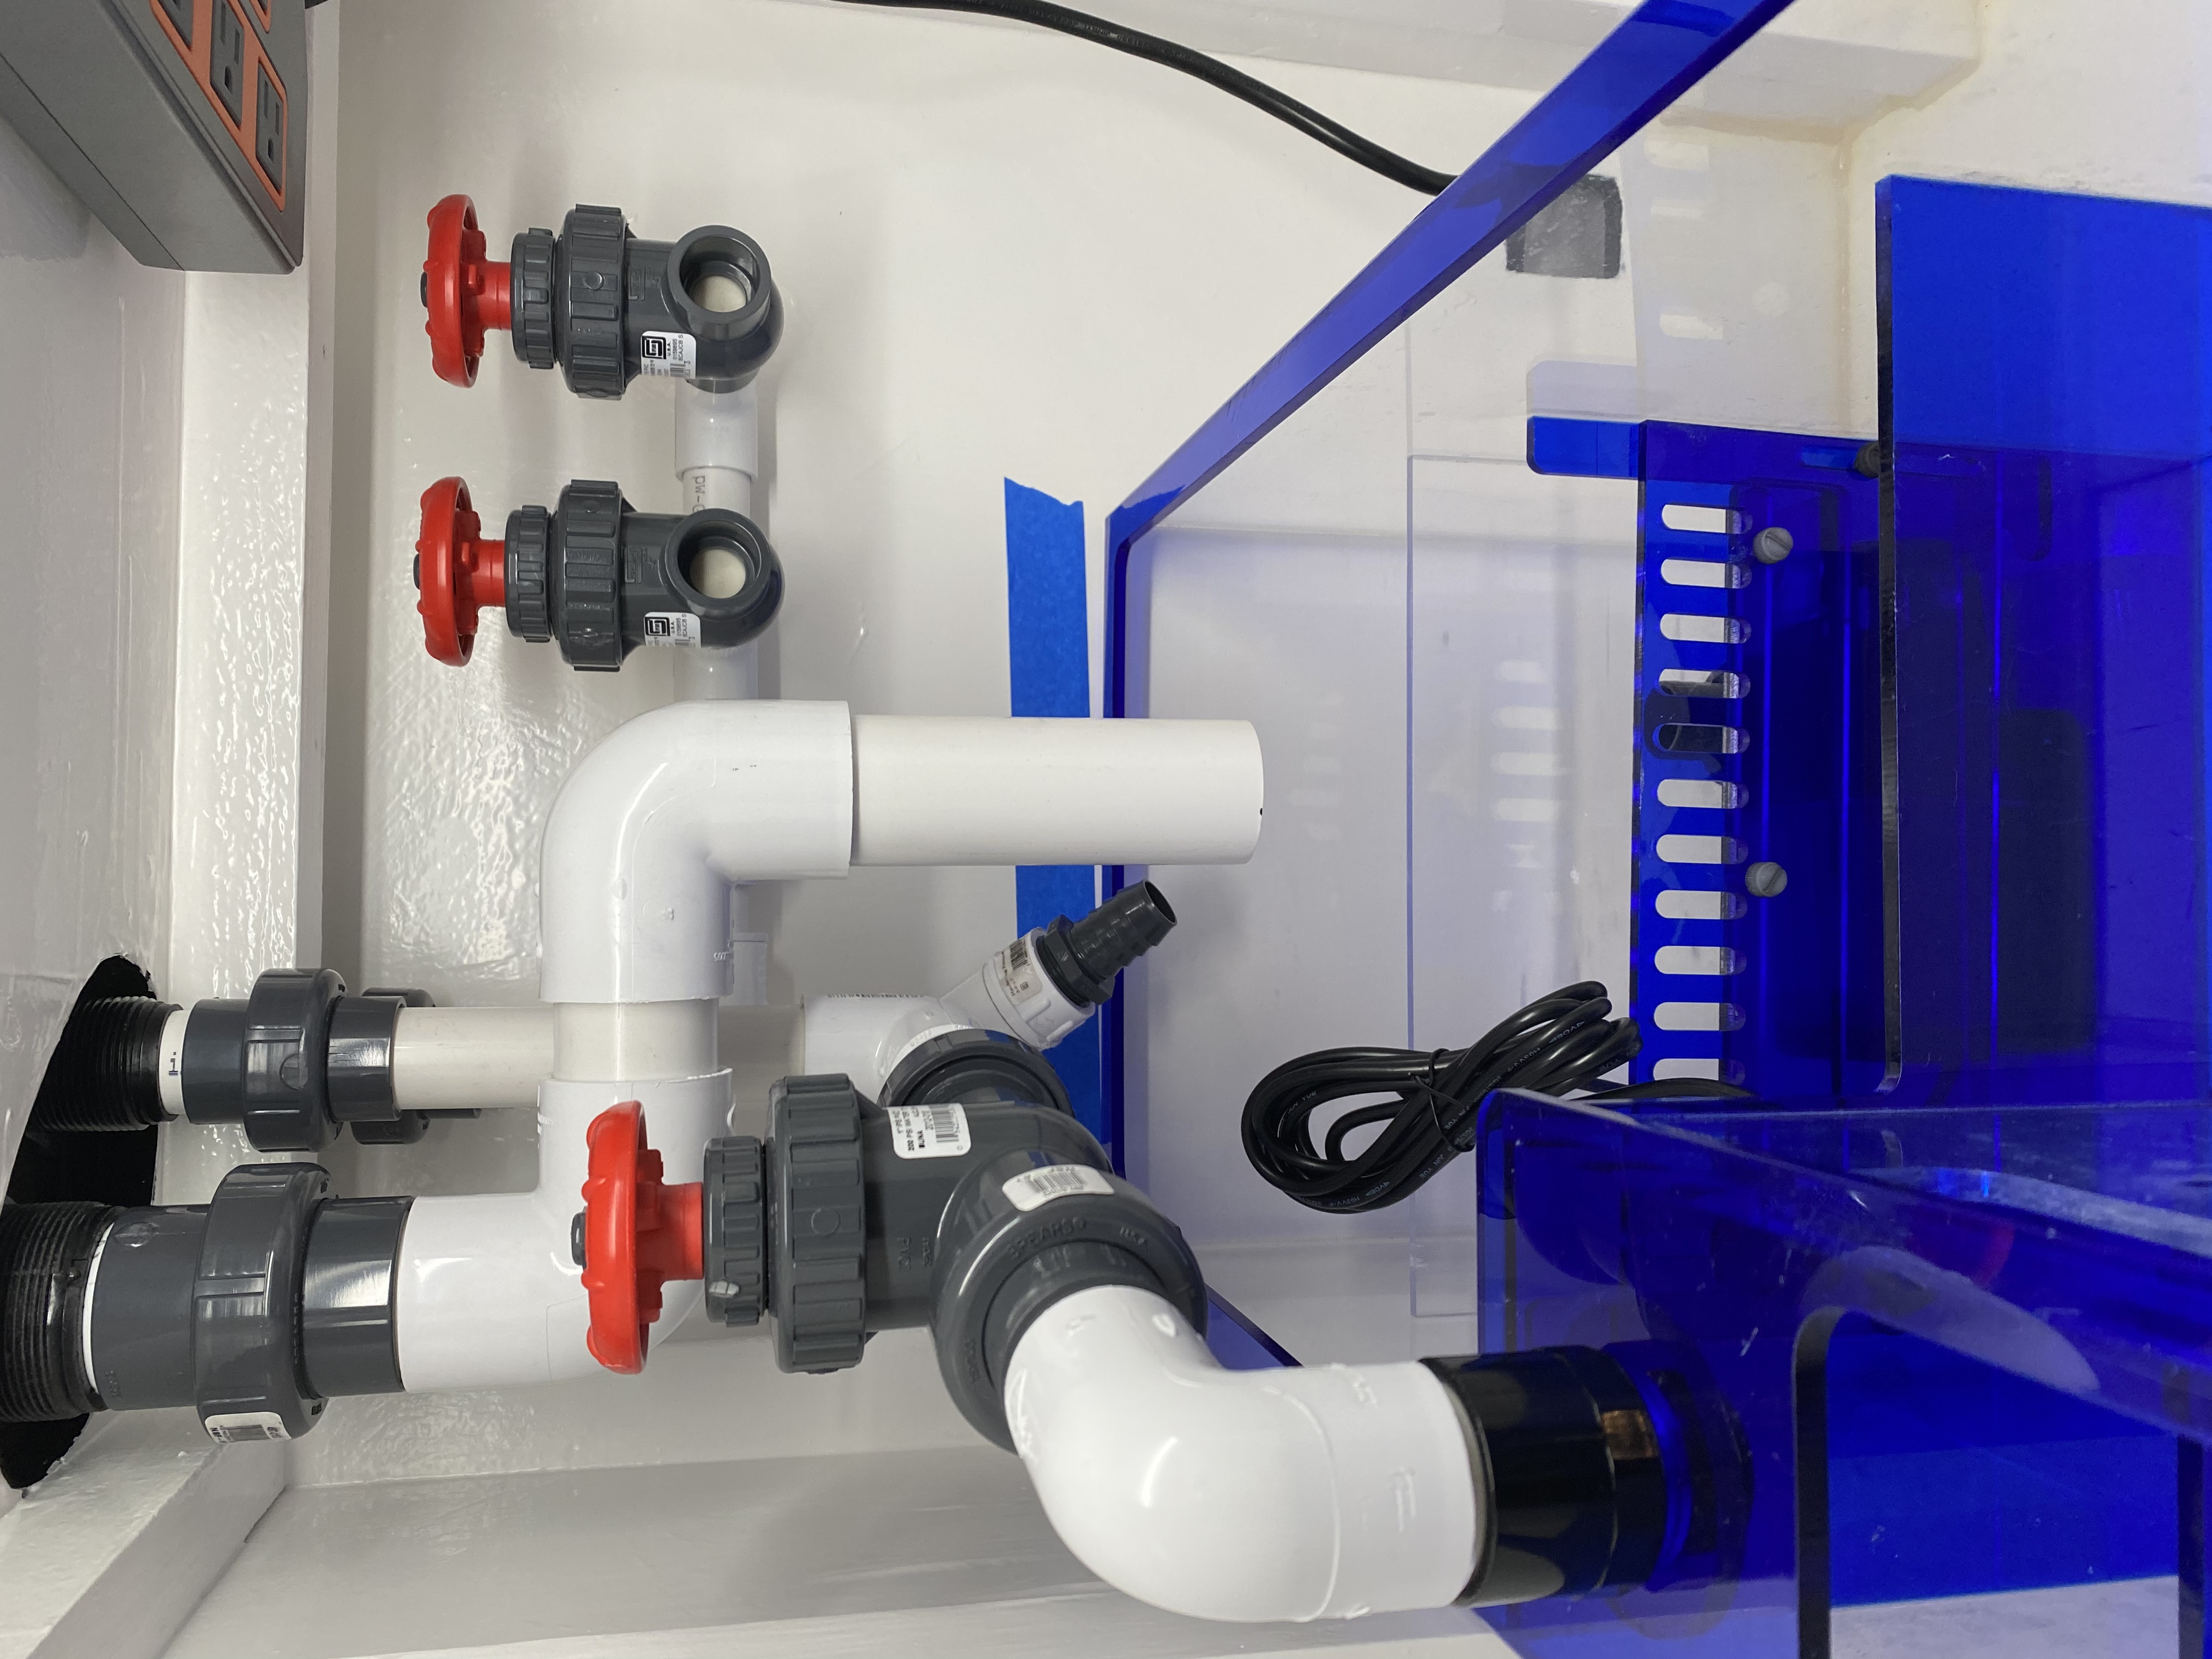
Onto the plumbing this tank was pre drilled for 1” return and 1.5” drain but I wanted a bit more peace of mind so I decided to go Herbie and run the return over the top and utilize the two holes for the drains. This cube has a corner overflow already setup so modifying it extensively is not something I was looking to do right out of the gate. Right now I have the 1” siphon drain and 1.5” emergency plumbed but I have some concerns with the emergency potentially splashing so I am considering extending it down into the sump a bit more. It dumps right over the bubble trap which is not ideal but given the space I am not sure I have a choice. I want to run a fuge light for future chaeto so I wanted to leave that area clear. The return is 1” hose to PVC and I added a 3/4” manifold with two spare gate valves incase I need to add anything in the future like reactor/UV or something. I have already thought about where these things could potentially go so as I progress this thread I think that will make more sense for the readers.

Right now I’m looking for feedback on my plumbing, good/bad/ugly what are your thoughts? I am of the mindset do it right so it once and there is much more experience around here than I have.

I also have some slight concerns about the closed cabinet and air circulation, there are some holes and I am going to mount a fan for circulation and cooling but this could be improved. I don’t want to cut more holes at this point.. but I would if needed haha.

You can see I have the start of the accessories with the Neptune EB mounted and I have the Apex, DOS, pump controller, 3 gal ATO, and a corner fan also going to be mounted up.

Onto the pics…

A4EDF53F-5B2A-4667-A151-A625C14E0578.jpeg


4D67DB99-D09B-431B-997E-357425934876.jpeg

49B88CFF-9C90-4E5C-8A7E-095BC532D8F3.jpeg

FAED2406-DDF8-402D-BA55-CCFCE2057EAA.jpeg

23370902-31D8-41DD-BB01-B29672622DB4.jpeg


hopefully the pics aren’t too huge!
 

EyeReef

Admin
admin
Supporter
Joined
May 25, 2007
Messages
5,553
Likes
233
Points
63
Location
San Diego
My Tank Build
#2
Quite the first tank! Looking good! Can’t wait to see the progress
 

Smite

Premium Member
Supporter
2020 POTM
Joined
Jun 11, 2013
Messages
6,361
Likes
3,779
Points
83
Location
Garden Grove
#3
Look great so far and welcome to SCR.

I'd bring the secondary drain close to the water whenever you fill it. To get the Herbie to run quite you're going to have to let water trickle over that secondary drain. At that height it'll be noisy and cause some splashing.

When I run a manifold off a return I like to do one of two things to create some back pressure to help make the manifold flow more consistent.
1) Step down the return nozzle size at the fitting. Ex: 1" return plumbing and manifold/ I'll step down to 3/4 nozzle/fitting right at the nozzle
2) Add a gate valve past the manifold "T". So I can restrict flow going to the tank and add more pressure to my manifold.

If you're running a controllable return that's oversized it might not be necessary. I just feel more pressure to the manifold helps maintain flow in things like GAC reactors ect that can start to become clogged over time.

What's your plan for layout of that sump?

Any idea on livestock type you plan to keep?
 
Joined
Oct 30, 2009
Messages
1,538
Likes
219
Points
63
#4
For a first tank you're going all in. And high end. Nice.
My thoughts. No need for an anti siphon/one way valve if you can manage the drain down when power is shut off to where your sump does not should not overflow. If you run your Locline up then back down into surface that will help alleviate the amount of water that does drain with no power.
My thoughts again. I have never run emergency drains on my set ups in almost 20 years. Emergency drains not needed if you can manage potential problems. Main one would be anything of size to impede enough or stop flow that the tank itself will overflow. This would mean snails most likely. Unless you’re running full siphon on a 1.5 inch pipe and your capable of returning that much water, It wont happen.
I have 1” drain and not quite full siphon, very close, some air is in the mix. Not much via my overflow spill which lets bubbles return to surface instead of drain. I also use larger plumbing under tank. 1” overflow meets 1.5” plumbing underneath to accommodate larger valve since they choke flow. I do the same with return. 3/4” return runs through 1” valves. Just me and my thinking. The valves you have are the good ones and may not have the same problem as the cheap ones I use.
I build lids for my overflows so anything that gets through will need to be 1/4” in size to fit between teeth. That does mean Cerriths get in but they flow down to sump without fear.
Maybe move the power source to a wall so gravity doesn’t want to help unplug anything with a bump or so. May be the one thing that leads to disaster real fast. Humidity rises as well and right into those holes over time won’t be good. Seems a little further back in stand than I‘d want too for access. Might just be perception of picture.
Depending on how nutty you are, you may want a bigger white board.
 

Attachments

joseserrano

Member
2020 Contributor
Joined
Nov 6, 2013
Messages
5,538
Likes
1,856
Points
83
Location
Santa Ana/Tustin
#5
Looks really good. Thanks for sharing the photos. Only think I would of do is redo the check valve. You want to do it as close as possible to the return to not loose power/head pressure.
 
Joined
Oct 30, 2009
Messages
1,538
Likes
219
Points
63
#6
Looks really good. Thanks for sharing the photos. Only think I would of do is redo the check valve. You want to do it as close as possible to the return to not loose power/head pressure.
Check valve. Couldn’t remember that name.
 
Joined
Mar 5, 2022
Messages
86
Likes
38
Points
0
Location
San Diego
My Tank Build
#7
For a first tank you're going all in. And high end. Nice.
My thoughts. No need for an anti siphon/one way valve if you can manage the drain down when power is shut off to where your sump does not should not overflow. If you run your Locline up then back down into surface that will help alleviate the amount of water that does drain with no power.
My thoughts again. I have never run emergency drains on my set ups in almost 20 years. Emergency drains not needed if you can manage potential problems. Main one would be anything of size to impede enough or stop flow that the tank itself will overflow. This would mean snails most likely. Unless you’re running full siphon on a 1.5 inch pipe and your capable of returning that much water, It wont happen.
I have 1” drain and not quite full siphon, very close, some air is in the mix. Not much via my overflow spill which lets bubbles return to surface instead of drain. I also use larger plumbing under tank. 1” overflow meets 1.5” plumbing underneath to accommodate larger valve since they choke flow. I do the same with return. 3/4” return runs through 1” valves. Just me and my thinking. The valves you have are the good ones and may not have the same problem as the cheap ones I use.
I build lids for my overflows so anything that gets through will need to be 1/4” in size to fit between teeth. That does mean Cerriths get in but they flow down to sump without fear.
Maybe move the power source to a wall so gravity doesn’t want to help unplug anything with a bump or so. May be the one thing that leads to disaster real fast. Humidity rises as well and right into those holes over time won’t be good. Seems a little further back in stand than I‘d want too for access. Might just be perception of picture.
Depending on how nutty you are, you may want a bigger white board.
noted on not needing the emergency, it’s really just a piece of mind at this point, plus switching to 1” return through the bottom and 1.5” drain makes the plumbing all change a I’d rather leave it at this point haha. Not to mention the stand has been modified to accommodate so I don’t see a reason to change but in the future if I end up with just two holes again I will keep that in mind. To be honest you aren’t the first to tell me I don’t need the emergency but I did it anyway! I was also hoping that I could keep the Herbie emergency flow to zero by tuning it appropriately. I have read this is how they are intended to function and the trickle through emergency is really just to not have to tune as much… I’m optimistic at this point I can make it work hah!

As for the check valve, I have see mixed opinions on that as well but I did it because it seemed reasonable enough. Now that I am looking at what I did I didn’t really take into consideration the valve itself being abs issue with head but I put it up top because it’s a 1” valve and the loc-line steps down to 3/4” so I was trying to minimize the 3/4” choke. I did oversize the return pump, I have a Simplicity DC2100 at the moment and can control the flow so maybe that won’t be an issue and I shouldn’t have to worry absout the manifold pressure as you have mentioned. I dont imagine I will be running the pump at 100% but these are cheap so upgrading to the next size isn’t too bad.

The apex EB is towards the back of the stand but the stand isn’t that large as is, and that was really the only place I could put it and be able to both plug it into the wall and get all of the plug in/out of it without dismounting. Originally I was going to put it on the side bu I would need a secondary shelf due to the “aqua bus” usbs abs the width of the 2x2 supports of the stand not playing nice. I think at this point if I can keep the air moving and clean regularly I should be able to mitigate any issues for a while but we shall see!
 
Joined
Mar 5, 2022
Messages
86
Likes
38
Points
0
Location
San Diego
My Tank Build
#8
Looks really good. Thanks for sharing the photos. Only think I would of do is redo the check valve. You want to do it as close as possible to the return to not loose power/head pressure.
As close as possible to the return pump is what you are saying? I could drop it down to the bottom of the tank but I am not going to be able to fit it inside the stand with the manifold in there haha! Would the ~18” really make that much of a difference here though? I have a 1” to 3/4” bushing at the output of the check valve which is why I put it up top to reduce the amount of 3/4” I ran into the loc-line. I could remove it all together but it seems like a good idea in general to run it but I have no experience with how it will affect the return pumps performance. I need to calculate what my head room for back flow volume is in the sump but I should be able to handle what comes back in the plumbing just not sure about what would drain from the loc-line off the top of my head. I will get back to you on that.
 
Joined
Mar 5, 2022
Messages
86
Likes
38
Points
0
Location
San Diego
My Tank Build
#9
Look great so far and welcome to SCR.

I'd bring the secondary drain close to the water whenever you fill it. To get the Herbie to run quite you're going to have to let water trickle over that secondary drain. At that height it'll be noisy and cause some splashing.

When I run a manifold off a return I like to do one of two things to create some back pressure to help make the manifold flow more consistent.
1) Step down the return nozzle size at the fitting. Ex: 1" return plumbing and manifold/ I'll step down to 3/4 nozzle/fitting right at the nozzle
2) Add a gate valve past the manifold "T". So I can restrict flow going to the tank and add more pressure to my manifold.

If you're running a controllable return that's oversized it might not be necessary. I just feel more pressure to the manifold helps maintain flow in things like GAC reactors ect that can start to become clogged over time.

What's your plan for layout of that sump?

Any idea on livestock type you plan to keep?
noted, I have an older bubble magnus at the moment that I was going to run at around 8” water level so I will bring the emergency lower. I was also hoping I could tune it not to trickle haha, we shall see about that! Mainly I don’t want splashing so closer is good I can rework it easily.

For the manifold I have a 1” to 3/4” bushing right at the tee so that should give me some more pressure and I do have a DC controllable pump, simplicity DC2100, so that should give me a little extra wiggle room for the time being. If/when I need to expand I will be willing to upsize the pump as needed sump allowing.

As for layout of the sump, after the filter sock I was going to go skimmer > refugium > bubble trap > return mostly because that seems the most logical and space allowing and then I have easy access to skimmer and filter sock up front.

As for livestock right now I just have some maintenance fish in mind, not all at once but:

2 clowns
Yellow eye kole tang
Lawnmower blenny
Six line wrasse
Blue tang

assuming I can get them of course, and then maybe a couple shrimp and maybe snails for cleanup

I am open to suggestions on livestock but seems reasonable for now.
 
Joined
Mar 5, 2022
Messages
86
Likes
38
Points
0
Location
San Diego
My Tank Build
#10
Quite the first tank! Looking good! Can’t wait to see the progress
haha thanks! I am all in kind of person so full send ahead and let’s have some fun. I attended CFM this weekend just to window shop so I am excited haha.

don’t tell anyone but I also have a 180 gallon waiting in my garage for later this year 😳 or whenever I have the chance haha
 

joseserrano

Member
2020 Contributor
Joined
Nov 6, 2013
Messages
5,538
Likes
1,856
Points
83
Location
Santa Ana/Tustin
#11
As close as possible to the return pump is what you are saying? I could drop it down to the bottom of the tank but I am not going to be able to fit it inside the stand with the manifold in there haha! Would the ~18” really make that much of a difference here though? I have a 1” to 3/4” bushing at the output of the check valve which is why I put it up top to reduce the amount of 3/4” I ran into the loc-line. I could remove it all together but it seems like a good idea in general to run it but I have no experience with how it will affect the return pumps performance. I need to calculate what my head room for back flow volume is in the sump but I should be able to handle what comes back in the plumbing just not sure about what would drain from the loc-line off the top of my head. I will get back to you on that.
It’s just a waste of energy to work against it.
 
Joined
Mar 5, 2022
Messages
86
Likes
38
Points
0
Location
San Diego
My Tank Build
#12
Well I was able to make some progress on the tank, I underestimated how tight this cabinet was going to be haha but I think it turned out pretty decent. Only things that are semi difficult to access are the return pump and heater being in the back of the sump but if/when those need servicing I can easily pull the plumbing and yank the pump out. I am hoping to setup my RO/DI system temporarily this weekend and get it wet.

I did also decide to add an intake fan to push fresh air into the stand, you can see the new hole on the top left above the sump bI need to modify the fan to interface with the Apex DC ports still and I can pop that in. For now I am going to just monitor the humidity and rock the door off until I can crimp the fan wires together on Monday. I don’t have the molex crimper but work does, should be easy enough to run the wire over to the EB832 now that everything else is pretty much buttoned up.

And some pics…

916C2904-B4BB-435F-BEC6-3D7308AA9E8A.jpeg

732DCEC1-EBFB-4DBC-860B-3D0E42E84BA0.jpeg

D50260CC-6404-4067-8C1E-84872B01575C.jpeg
 
Joined
Oct 30, 2009
Messages
1,538
Likes
219
Points
63
#14
Now that I see the plugs in to that power bank it doesn’t look like a problem. Mine always seem to have a bunch of weighty tension on them for some reason.
11 o’clock! Hour later than normal for me. Good night.
 
Joined
Mar 5, 2022
Messages
86
Likes
38
Points
0
Location
San Diego
My Tank Build
#15
Now that I see the plugs in to that power bank it doesn’t look like a problem. Mine always seem to have a bunch of weighty tension on them for some reason.
11 o’clock! Hour later than normal for me. Good night.
Same need to sleep haha, but yeah only the Jebao DOS pump plug seems to have any issue so I added an extra zip tie to it. I might add some additional support to it if I think it will be an issue but there shouldn’t be any reason for anything to fall and all the plugs are nice and snug.
 
Joined
Mar 5, 2022
Messages
86
Likes
38
Points
0
Location
San Diego
My Tank Build
#17
Well the tank is flowing water, has been since Sunday so just waiting on the cycle now. I finally got the ATO setup and running and got the cabinet fan installed but I am going to need to set some controls for the fan. With it on 100% it’s too much cooling right now haha, so I’ll have to figure that out. I have my sump level set at 8.5” right now for this bubble magnus based on some reviews I read so shall see how that works out once I turn it on.

I dropped a single WAV into the tank and im struggling to find the proper placement at the moment, might need to get a second to cover the whole tank a bit better the back seems to be not getting enough flow.

slight change of plans on the livestock I mentioned previously, can’t get the yellow and kole tang so not 100% sure what I am going to put in there but going to start with:

pair clowns

add later:
Cleaner shrimp
Tomini tang
Six line wrasse

Any other suggestions? I am think 6 fish max for this 60, and can’t wait to get some frags in there.

B281C0DF-E3AD-4B80-906B-133EC48C2460.jpeg
 

tripinpn01

Broke Reefer
Joined
Aug 3, 2007
Messages
248
Likes
107
Points
0
#18
Great start!

I recommend NOT getting Maroon Clowns. I have a pair that came with the tank and they are too territorial for a 24"x24" tank. They got even more territorial when I introduced an anemone.
 
Joined
Mar 5, 2022
Messages
86
Likes
38
Points
0
Location
San Diego
My Tank Build
#19
Great start!

I recommend NOT getting Maroon Clowns. I have a pair that came with the tank and they are too territorial for a 24"x24" tank. They got even more territorial when I introduced an anemone.
Thanks, so far so good but I wish I had a bigger ATO haha. Losing about 1/2 gal a day at the moment so the 3 gal won’t last too long.

Noted on the maroon clowns, my LFS didn’t have any that I saw so I was planning on going with occellaris most likely. I would like to introduce an anemone at some point though!

still playing with the WAV placement and thinking I might need two. One on the back wall and one on the left wall for proper coverage of the whole tank. I get tons of front sand movement seemingly no matter how I position it in the back but not as much back sand movement.

current position
BED37E8F-6746-437A-A476-4D6D78289278.jpeg

3A7ADEF1-47E7-4DDC-AFA1-3A002BEB33D4.jpeg
 
Joined
Jun 13, 2012
Messages
1,680
Likes
506
Points
28
Location
Murrieta
#20
What helps me figure out the flow thing is I have this a disc of gsp and a disc of xenia. That I move around to see how the flow is. Lol I keep these guys solely to see flow. But most of the time I toss them on the sand bed in the other system so they don’t go crazy spreading on my dt
 
Top