Matt's Cade Peninsula 1800 Mixed Reef

mchain275

New member
Joined
Aug 15, 2021
Messages
78
Likes
71
Points
0
#1
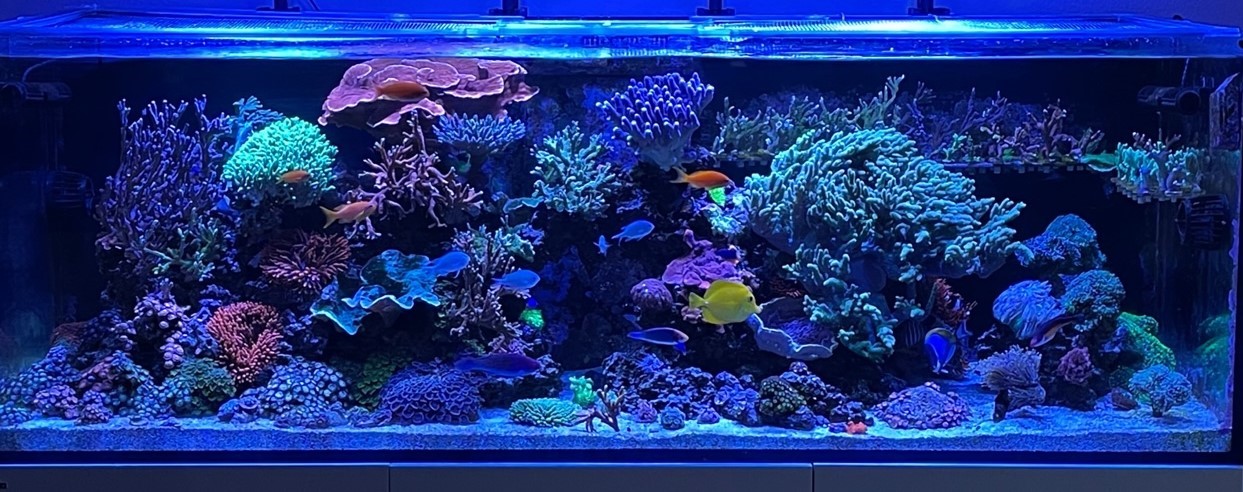
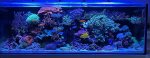
In early 2021, I got the itch to upgrade from a Red Sea Reefer 750. At the time, this tank was bursting with life but a bit of a dead end in terms of creativity. Plus, I made a number of mistakes with that build and stocking plan that I was determined to correct in a subsequent build. This is how the Red Sea tank looked at the time:

redseasummer2021.jpg


While I have had a good experience with the Red Sea tank, the long term stability of Red Sea's stand motivated me to choose a different tank builder for its successor. Given my lack of experience in designing and executing aquarium plumbing, I gravitated towards plug and play setups such as Waterbox and Cade. I ended up choosing Cade because (a) I felt confident in the long term stability of their pre-assembled aluminum stands, (b) I really liked the layout of the Cade sump and (c) Algae Barn offered great deals in 2021, including complimentary Marco rock, sand, salt, etc.

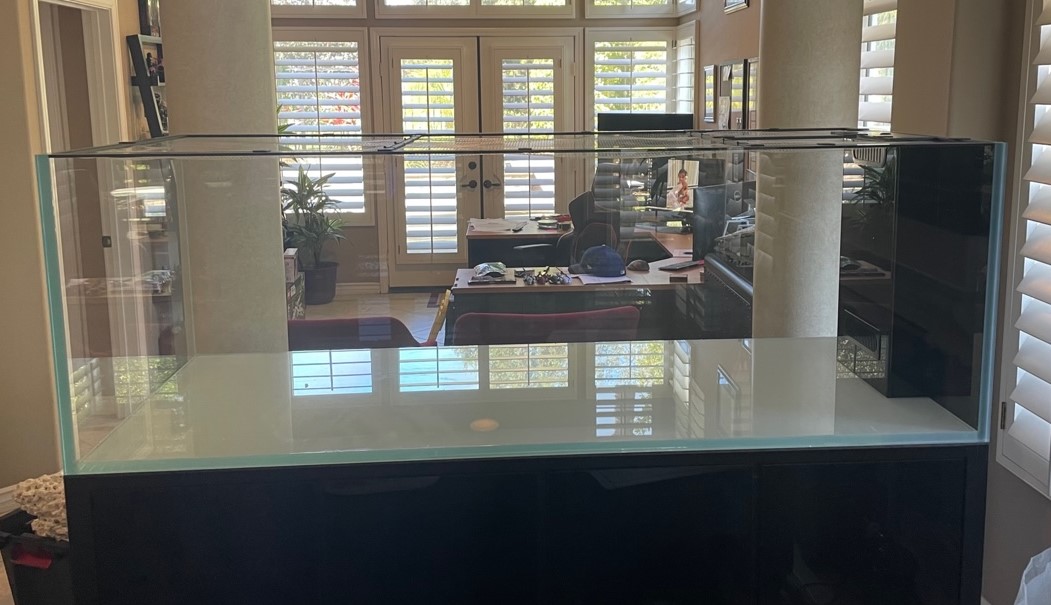
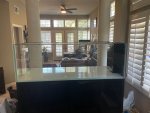
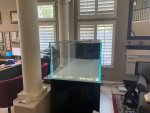
Having usurped my dining room for an office during the height of the pandemic, I thought it would be a good idea to utilize a peninsula style tank to serve as a room divider between the office and our entryway. This would also provide me with a lovely vantage point to observe the tank from my desk during the day. As an added kicker, the tank is situated between a couple of early 90s era decorative columns that, to me, gives the tank a bit of an Atlantis aesthetic.

empty1.jpg

empty2.jpg


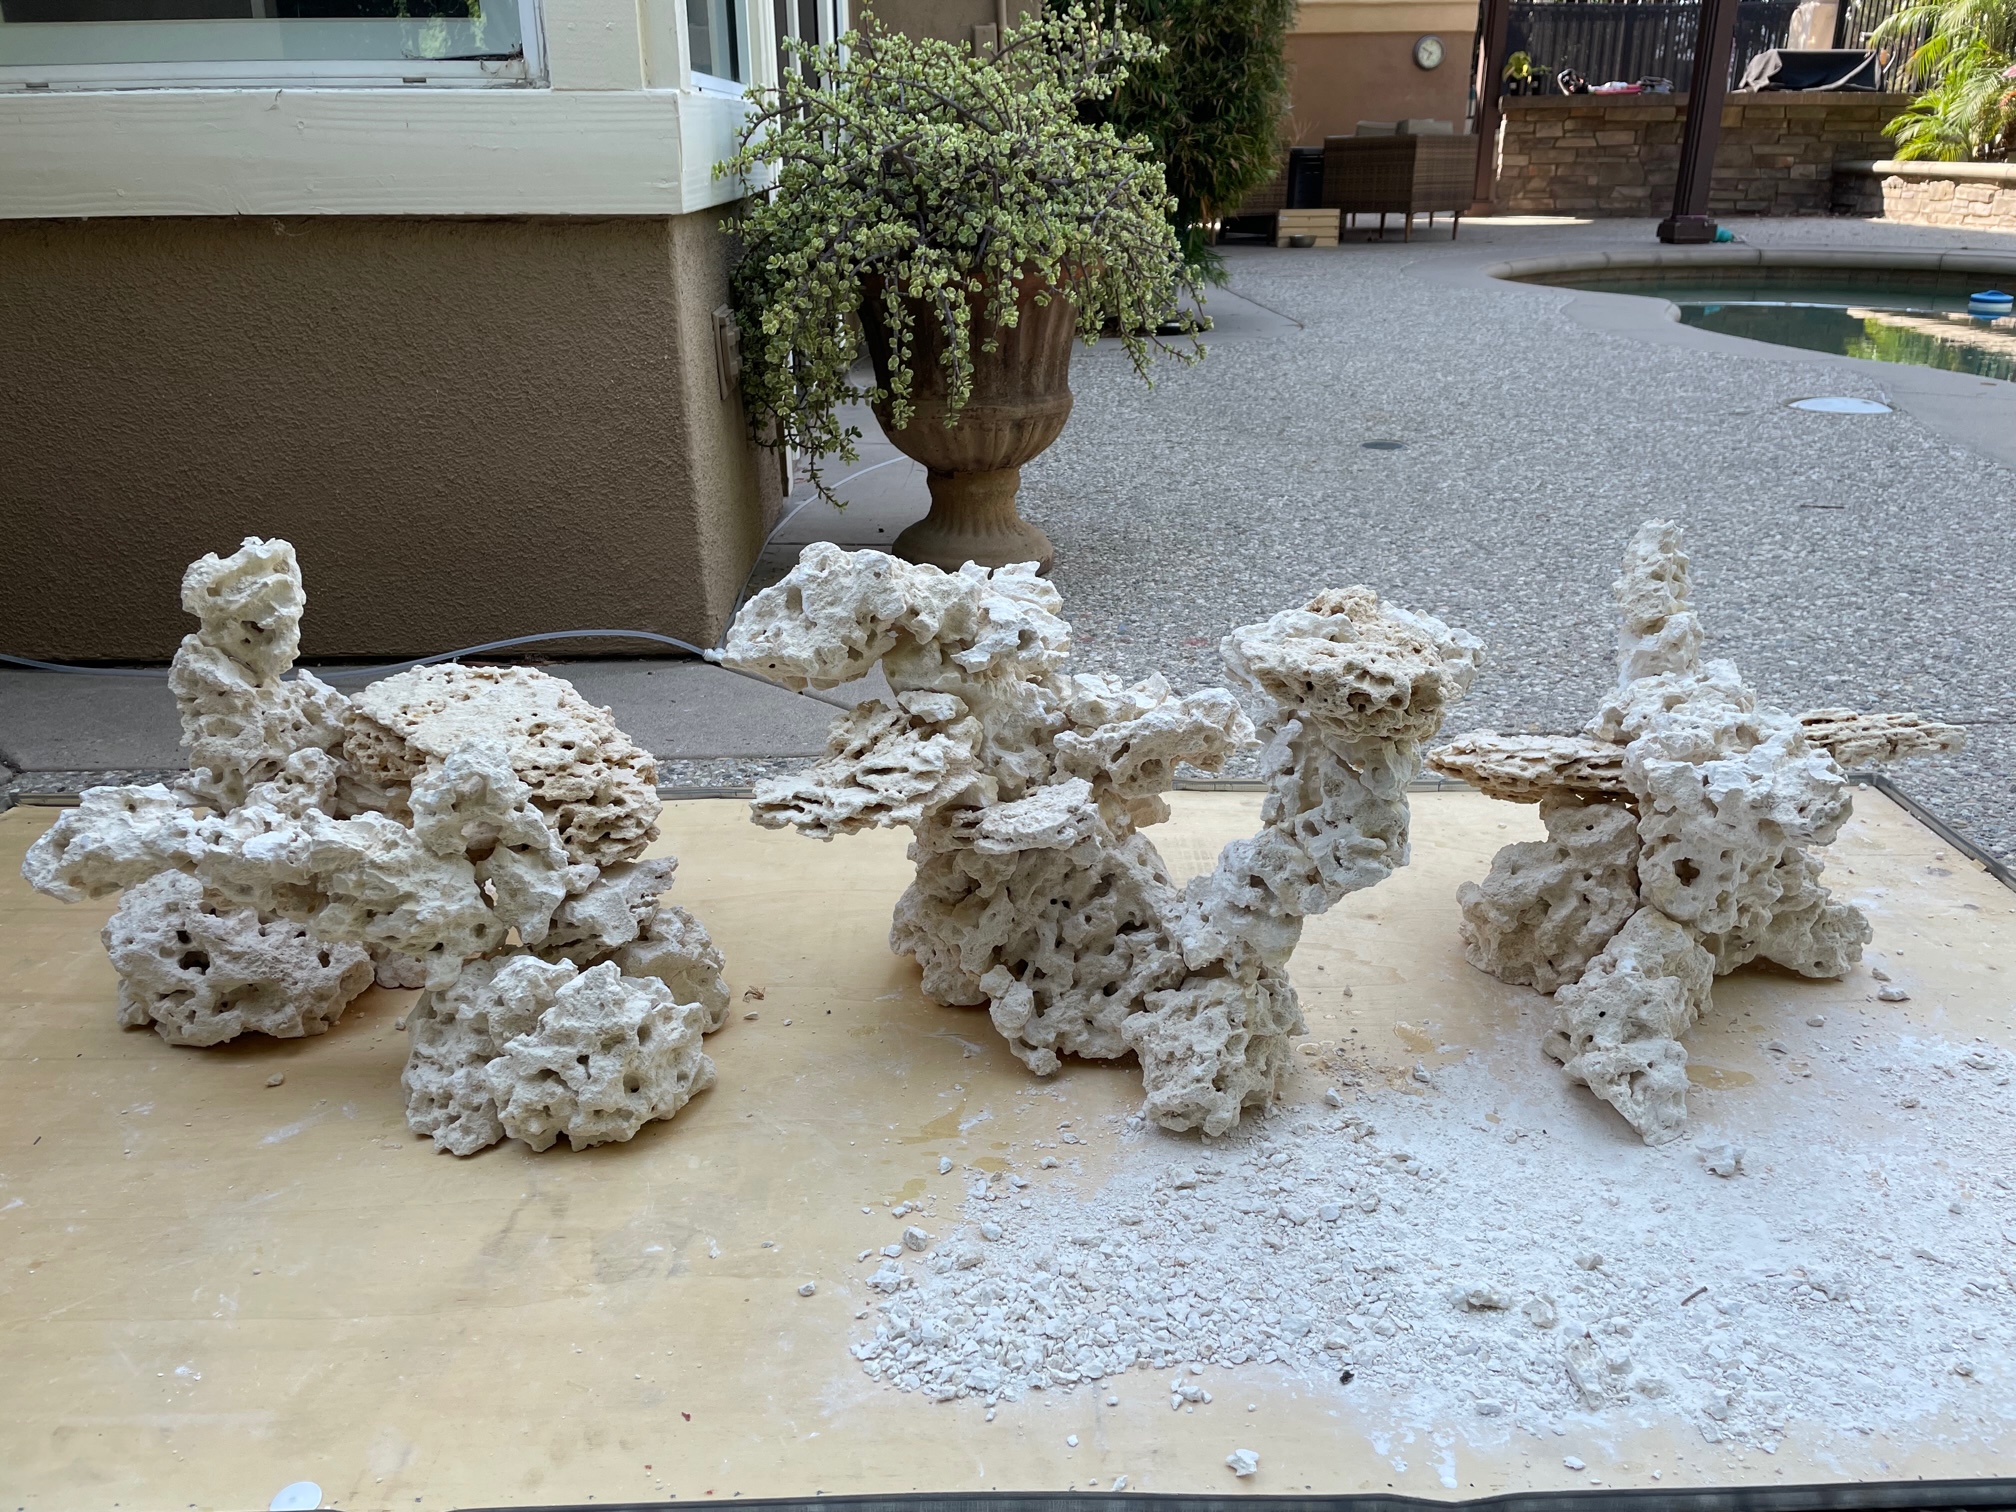
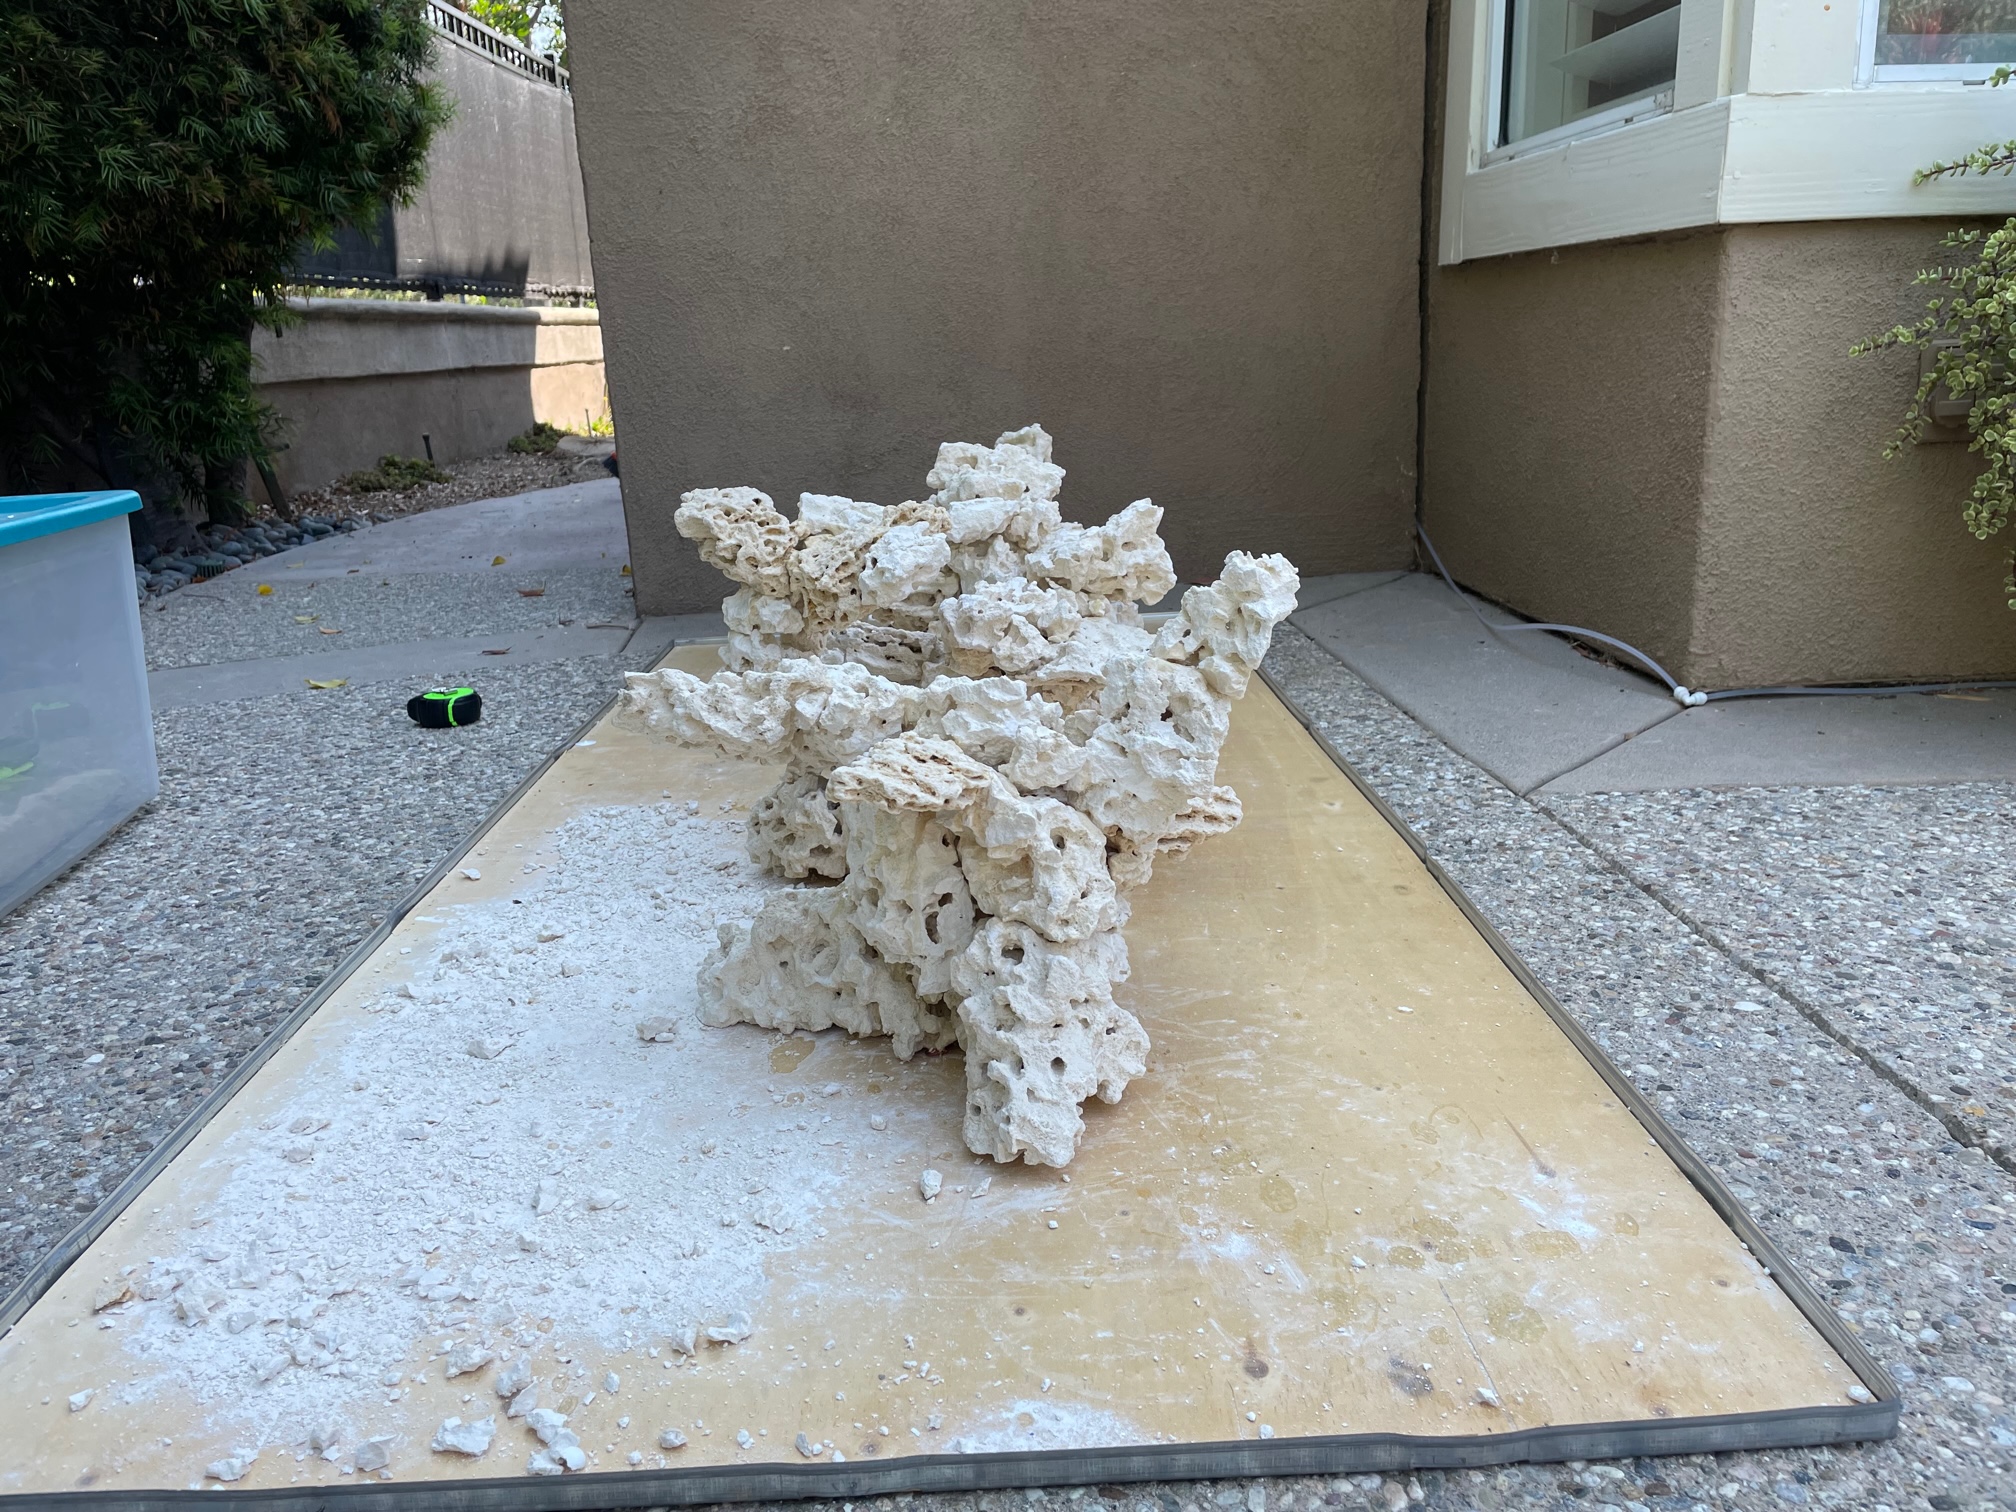
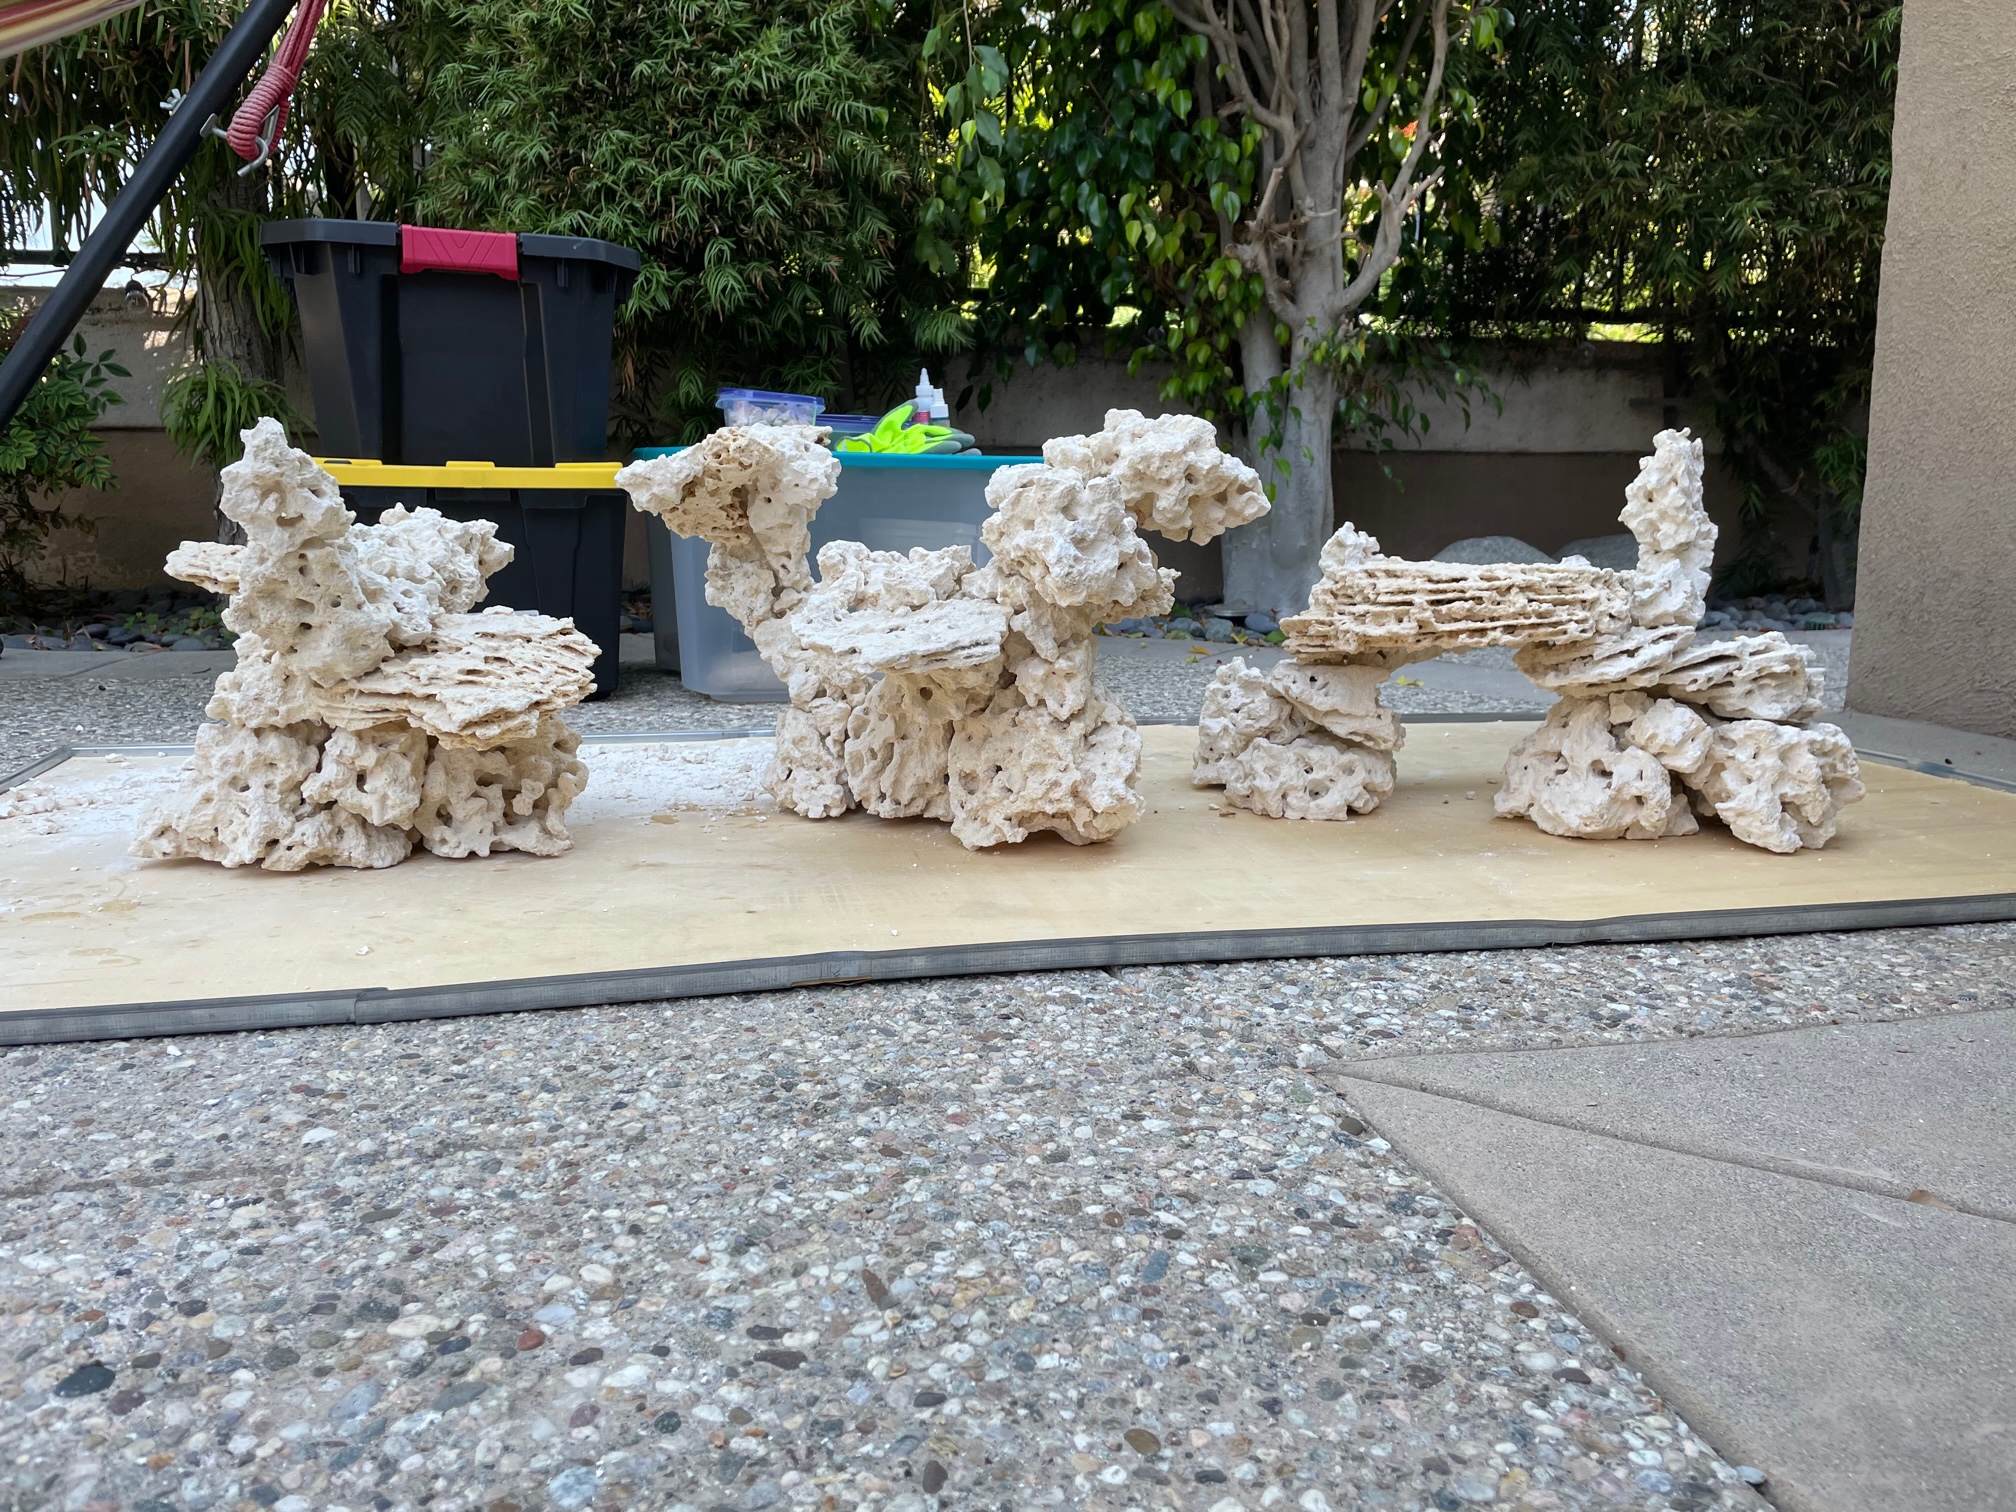
At the time, negative space aquascaping was very popular, and I was enamored with the idea of sculpting something unique to suit the peninsula layout of the tank. I knew I wanted three distinct islands of rock, with an eye towards eventually connecting the islands with some zoanthid-covered Tonga branch rock that I had in the old system. Over the course of several weekends messing around with fast-curing superglue and mortar, and after a few iterations, I felt reasonably happy with the results. I made three stand-alone islands with flat rocks on the bottom (for the sake of stability when placed directly on the glass) that I would pick up and place in the aquarium.

IMG_0335 (1).jpg


IMG_0334 (1).jpg


IMG_0333 (1).jpg
 

Attachments

Last edited:

mchain275

New member
Joined
Aug 15, 2021
Messages
78
Likes
71
Points
0
#3
Before getting into the details of the hardware, etc., a few preliminary notes regarding my goals for this tank. With this build, I was determined not to repeat a few mistakes, so I set out with the following goals:

1. No anemones. The predecessor tank is inundated with rose anemones that stung a good amount of coral as they moved about. I have strictly adhered to this rule, and I'm glad I did.​
2. Avoid iffy reef safe fish. The predecessor tank is home to a Regal Angel that developed a taste for Acans, Scolys, Candy Canes and Zoanthids (no appetite for the common species, but apparently the expensive ones are particularly delicious). Because I'm a schmuck, I violated this rule almost immediately by adding a Pyramid Butterfly. Some people like to say that 99 out of 100 of these are perfectly reef safe, but this particular one eats Acans, Scolys and Elegance Corals. For this reason, I have to avoid those species altogether and I wouldn't dare invest in something like a meat coral. Perfectly fine with SPS, clams, Euphyllia and Zoanthids. For now.​
3. Only quarantined fish. Fortunately, I haven't had any material issues when it comes to fish health, but I did have to extract and medicate a powder blue tang in the predecessor tank a couple times. I've stuck to this one for the most part - the notable exception being a trio of captive bred yellow tangs from Biota, which worked out perfectly fine. Tip of the cap to Ocean Devotion and Dr Reef for some great fish.​
4. Select the right equipment from the start. For this build, I was willing to spend a bit more than the predecessor tank so I wouldn't feel an itch to upgrade things. Radions instead of Hydras, calcium reactor instead of two-part, reactors instead of media bags, etc. I've adhered to this one and haven't felt the need to upgrade anything, though I did add a couple pieces of hardware over the course of two years.​
5. Take it slow and stay patient. Pretty much every problem I had with the predecessor tank could ultimately be attributed to rushing something. With this system, I originally planned to go fish only with the lights off for approximately three months to let the biome mature and hopefully avoid the ugly phase. Unfortunately, I let temptation get the best of me and window-shopping at online shops turned into a sizeable order of LPS corals well ahead of schedule. Not surprisingly, this proved to be a big mistake. More on this later.​
I planned to migrate many pieces of coral from the predecessor tank at the right time. At the outset, my plan was to transition the predecessor tank to a softy / anemone tank for a few reasons. First, I wanted to lighten the maintenance load on the predecessor tank by drastically reducing calcium and alkalinity demands and removing more delicate species. Second, I wanted the tanks to look and feel significantly different. This worked out in some cases and was disastrous in others. I ended up losing a couple well established colonies for a variety of reasons, which was truly heartbreaking.
 

mchain275

New member
Joined
Aug 15, 2021
Messages
78
Likes
71
Points
0
#5
Equipment List

Lighting: 3x Radion XR30's, gen 5, mounted on the RMS. While these provided a good amount of light, I found that I needed greater coverage and ended up supplementing with 4x 60" ReefBrite strips, which are conveniently attached to the RMS.​
Circulation Pumps: 2x MP60's, mounted adjacent to the overflow so they are reasonably well concealed. While they push a lot of water, I found that the opposite end of the peninsula was lacking in surface agitation, which tended to result in the accumulation of an unsightly biofilm. Accordingly, I cannibalized an MP40 from the predecessor tank and mounted it near the surface at the opposite end of the tank, largely for the purpose of agitating the surface. While it's a bit intrusive on the otherwise clean aesthetic that I like, I was able to snake the power cable along the RMS rail.​
Return Pump: Vectra M2. While I like it a lot, and I like that it's coupled with a battery backup (knock on wood, no power failures since the tank has been up, though tropical storm Hilary is coming this weekend, so we'll see), experience tells me that this pump will fail well ahead of its anticipated life. I have Jebao pumps at the ready when the time comes.​
Skimmer: Reef Octopus Regal 250 INT. No complaints - it produces a decent amount of skimmate and has been very reliable. At around the one year mark, I added a CO2 scrubber to compensate for the calcium reactor depressing the pH of the system.​
Calcium Reactor: Reef Octopus Various CR200. This is coupled with a Kamoer pump (which is awesome) and a CarbonDoser Electronic CO2 regulator (which is also great). This is my first go round with a calcium reactor, and I'm generally pleased with its performance. I'm presently using BRS ARM media and while it does melt effectively, I find that I have to run the reactor at a pH of around 6.2 to do the job. When the time comes to replenish the media, I intend to try Reborn, which I understand has a higher pH melting point, which would be very helpful. In addition to the reactor, I dose 2 gallons of saturated kalkwasser a day, along with 70 mL of All-for-Reef. Keeps the system very stable.​
Media Reactors: AquaMaxx media reactors plumbed off the stock Cade manifold. I think these are great and reasonably priced. While I originally ran both carbon and GFO, I'm only running carbon presently, as my phosphates are manageable without chemical intervention.​
UV Sterilizer: Coralife Turbo-Twist 6x 18 watts. This is where I cheaped out. This thing is admittedly undersized, but it did solve a water clarity issue I had early on, so I'm convinced it's doing something productive despite being undersized.​
Mechanical Filtration: While I would absolutely love to integrate a fleece rollover, I don't have the confidence to irrevocably cut up my sump to accommodate one and install it. Instead, I'm utilizing 4x filter socks in the stock Cade sump. However, I am utilizing a product called Reef Diapers, which are disposable filter socks akin to coffee filters. I feel a bit guilty, as they're not the most environmentally friendly choice, and their cost does add up, but it spares me wife aggro that would otherwise accrue if I put dirty filter socks through the laundry machine. I hate admitting this, but I like the product.​
Controller: Neptune A2 Apex. I use it to monitor temperature, salinity, pH and calcium reactor pH. I have it connected via ethernet, yet it loses connectivity at least twice a month necessitating a reset. This might be user error, and I haven't tried in earnest to iron out the problem, so I can't complain too much. It's a solid controller.​
Dosing Pump: While I still utilize a Jebao dosing pump on the predecessor tank, I use a Neptune DOS on this one and I love having the ability to program it via the Apex app. I'm using one unit to dose Kalkwasser and All-for-Reef. I have a second unit that I intend to set up soon to dose Acropower and NeoNitro.​
Monitoring: Neptune Trident. I bought it, I buy reagents for it, I sent it in for an annual maintenance. I don't love it. I find that the numbers it spits out are seldom, if ever, correct when compared to Hanna checkers, but I do find it valuable for purposes of monitoring consistency. Any given reading is probably wrong (or very wrong, as the case may be), but it is very effective at alerting me to an issue when a reading is out of the normal range for that particular batch of reagents. If I could do this again, I would go with an Alkatronic.​
Refugium: I started with an Apex GRO. I know some people like it and find success with it, but it was a total dud for me. I moved on to a Kessile H80. It was OK, but I ended up needing it on my predecessor tank, so I have now settled on a pair of Tunze Eco Chic Waterproof 8831's. These are awesome - chaeto took off with these.​
Lid: For two years, I relied on the stock mesh lid from Cade, which worked fine but was of limited durability. I have since upgraded to a custom two-piece lid from Top Lids. While it was not cheap, I'm very satisfied with it. It feels very durable, the custom-placed feeding doors and equipment cut outs are great and it fits like a glove. Highly recommend.​
 

mchain275

New member
Joined
Aug 15, 2021
Messages
78
Likes
71
Points
0
#6
In goes the rock! I played around with the orientation of each piece more than I care to admit. I liked this layout because it provided ample space for the fish and a good amount of exposed sand (which I like for aesthetics).


IMG_0381.jpg


IMG_0386.jpg


I installed three Gen 5 Radeon Pro's, mounted on the RMS rail. I would have preferred to mount these with some supplementary T5's or LED strips in a 60-72" fixture, but the height of the ceiling in this room prevented that, and I didn't want to go to the trouble of doing a cantilever setup.

IMG_0479.jpg


In goes the sand, most of which was courtesy of the Algae Barn Cade package, though I supplemented with some additional crushed coral. Also installed a pair of MP60's to provide the bulk of the circulation. I have since moved them up a few inches, because at that height they tend to blow around the substrate.

IMG_0549.jpg
 

mchain275

New member
Joined
Aug 15, 2021
Messages
78
Likes
71
Points
0
#7
I went with the stock Cade plumbing with no modifications. If I could do it again, I would strongly consider cutting out the filter sock chamber in favor of a fleece roller, mostly for the sake of convenience. I don't mind changing filter socks, but there are times when I forget to do so after they're saturated. I'm making use of a product called Reef Diapers, which are disposable filter socks. While not as eco-friendly as reusable filter socks, I suppose they're not much different than using disposable fleece rolls.

IMG_0438.jpg


I plumbed a couple media reactors of various sizes to the stock manifold using soft tubing. I favored soft tubing over PVC because (a) acquiring metric sized PVC pipe locally was a pain and (b) I wanted maximum flexibility when it comes to placement of the reactors (which have shifted a number of times).

IMG_0466.jpg


The Cade sump also features a bevy of media chambers in the back, adjacent to the return pump chamber. I opted to fill these chambers with bio cubes and other porous bio media. I figured additional surface area for nitrifying bacteria couldn't hurt, though this might have been overkill since I've found that I have to dose nitrate to maintain a measurable level.
 
Last edited:

mchain275

New member
Joined
Aug 15, 2021
Messages
78
Likes
71
Points
0
#8
One of the features of the pre-built Cade stand that I really like is the built-in control board and switch-enabled outlets. It makes it very easy to manage cables and manually toggle selected items off and on. I have my lights plugged in to the stock outlets since (a) at the time, my Apex controller was of limited use in controlling the lights and (b) I wanted to put the light fixtures on a different circuit than everything else. Collectively, the lights, pumps and heaters (when on) would be taxing on a single circuit.

IMG_0581.jpg
 

mchain275

New member
Joined
Aug 15, 2021
Messages
78
Likes
71
Points
0
#9
In goes the water on a Saturday afternoon. For this build, I opted to go with Red Sea blue bucket salt, which has served me well.

IMG_0553.jpg


This level of water clarity would never again be achieved, but it was nice for a couple days.

IMG_0582.jpg


I opted for a fish-free cycle fed with bottled ammonia and kickstarted with bottled bacteria. If I could re-do this step, I would (a) use a more diverse set of bottled bacteria (mixing brands, etc.) and (b) seed the dry Marco rock with a few pieces of high quality established live rock. I was hesitant to pull rock from the predecessor tank because I was concerned with importing potential fish pathogens and pests like aiptasia and vermetid snails. I'm nonetheless convinced that a lack of diversity in the biome in the first few months was the cause of a multitude of problems, including a months-long battle with dinoflagellates.

IMG_0556.jpg


Forgive me for the boneheaded picture of the freshwater side of the API color card... I dosed to 2ppm of ammonia a few times until ammonia zeroed out overnight.

IMG_0603.jpg
 

mchain275

New member
Joined
Aug 15, 2021
Messages
78
Likes
71
Points
0
#10
After completing the cycle, around the four week mark, I dropped in the first three fish. For this build, I wanted to take a cautious approach when it came to fish. I was not diligent about quarantine practices in my predecessor build, which caused a good amount of stress when a powder blue tang exhibited signs of ich a few times. While I have some experiencing medicating fish prophylactically, I found that my success rate (or failure rate, as the case may be) justified paying a premium for a professional to take care of it. I placed several fish orders with Adam at Ocean Devotion in LA, which worked out great. I opted to introduce fish in batches, a few at a time.

From the start, I knew I wanted a group of fairy wrasses, a group of tangs, multiples of a few different species and some hawkfish (as this would be a shrimp-free tank). For the first batch, I selected a Helfrichi Firefish, a Rosy Scale Wrasse and a Scott's Fairy Wrasse. Given their generally timid nature, I figured these three should go in first.

Forgive me for the grainy photo, but this is the best shot I could get of all three. Two of these fish are still with me today, but the Firefish would only emerge from his hiding hole to feed and eventually stopped emerging altogether (and presumably succumbed to stress / starvation).

IMG_0708.jpg


I let them get adjusted to the tank for about two weeks before adding a second batch of four fish. This round consisted of a female Bellus Angel, a Pintail Wrasse, a Flame Hawk and a Longnose Hawkfish. All of these fish are still with me today.

IMG_0880.jpg


IMG_0877.jpg


IMG_0875.jpg


IMG_0879.jpg
 
Top