I mentioned in my Welcome post that I would start a build thread. Please bare with me as this is my first official build thread. Between purchasing a house and landscape/hardscape construction, I havent had time for a reef tank. The dust has finally settled (literally) and I'm ready! First off, I was forced back into the hobby because LeeMar decided to shut down their aquarium production line. After missing the deadline to place an order by a day, I scrambled on the forums for a LeeMar starphire eurobraced tank. Thanks to @StrictySalties I found a brand new Leemar 280 gallon (72"x30"x30") Starphire, Eurobraced, black back, black silicon, diamond edge, and center overflow with 1x1.5" hole and 1x1"hole. The tank was supposed to be 60" instead of 72" so Matt at Coral Collection had it sitting in his shop. I didnt like the 30" height (prefer 24") and the single overflow with only 1x1" hole for a return, but beggers can't chosers and I'm grateful for the tank. My goal for this setup is to be patient and buy the best possible equipment that I can afford without having to upgrade later. I also plan on keeping mainly SPS with a medium-high bio load of fish.
Here's the equipment list:
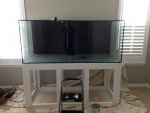
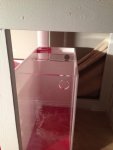
Tank - Leemar 280 Gallon (72"x30"x30") Starphire Eurobraced, center overflow with 1x1.5" and 1x1" holes
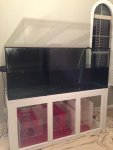
Stand - Big thanks to Tony (unbearable) on Sdreefs for building my frame. Solid construction, perfectly level, and ready for skin.
Protein skimmer - Havent finalized my decision but I'm leaning on an ATB 10.5 deluxe
Lighting - ATI LED powermodule 8x80 watt with 4x75 watt LED
Sump - 100 gallon custom Advance Acrylics
Calcium Reactor - GEO 618 (I kept from my previous setup)
Return pump - havent finalized but i'm leaning on the Fluval SP6 or wavelince DC
Flow - 2xMP60's
Controller - Apex (I kept from my previous setup)
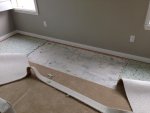
Part of the hardscape contruction included building a concrete platform outside the house behind the wall where the tank is located. I included a drain that taps into my sidewalk drain and a 15 AMP circuit breaker as well. I plan on keeping my equipment outside to minimize noise and having to haul water inside the house during water changes.
Again, please bare with me and I will be posting pictures as I make progress.
Looking forward to everyone's input!
Here's the equipment list:
Tank - Leemar 280 Gallon (72"x30"x30") Starphire Eurobraced, center overflow with 1x1.5" and 1x1" holes
Stand - Big thanks to Tony (unbearable) on Sdreefs for building my frame. Solid construction, perfectly level, and ready for skin.
Protein skimmer - Havent finalized my decision but I'm leaning on an ATB 10.5 deluxe
Lighting - ATI LED powermodule 8x80 watt with 4x75 watt LED
Sump - 100 gallon custom Advance Acrylics
Calcium Reactor - GEO 618 (I kept from my previous setup)
Return pump - havent finalized but i'm leaning on the Fluval SP6 or wavelince DC
Flow - 2xMP60's
Controller - Apex (I kept from my previous setup)
Part of the hardscape contruction included building a concrete platform outside the house behind the wall where the tank is located. I included a drain that taps into my sidewalk drain and a 15 AMP circuit breaker as well. I plan on keeping my equipment outside to minimize noise and having to haul water inside the house during water changes.
Again, please bare with me and I will be posting pictures as I make progress.
Looking forward to everyone's input!